Old plaster walls often look fine from across the room until you get close to the bottom edge. Near the baseboard, moisture can collect, leaving dark spots, greenish mildew, and loose plaster that flakes off when you touch it. If that is the problem you are dealing with, this wall restoration method gives you a clean, durable surface to work from, so the repair actually lasts.
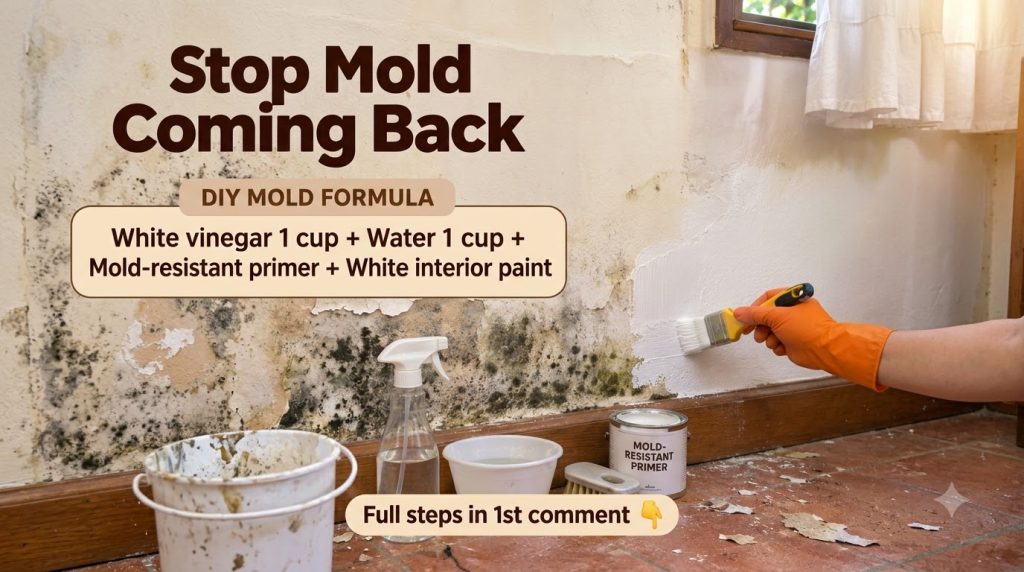
What You’ll Need
Tools and supplies:
- Rubber gloves and safety glasses
- A stiff wire brush or plastic scraper
- A bucket of warm water and a few drops of mild dish soap
- Clean sponges or rags
- Painter’s tape and a drop cloth
- A stain-blocking or mold-resistant primer
- A paintbrush sized for trim work and a small roller
- A putty knife and fine-grit sanding sponge
- A vacuum or stiff brush for dust and debris
Materials:
- Fresh interior paint in a finish suited to your room, such as matte or eggshell
Why This Method Works
Mold and peeling plaster are signs that the surface has lost its bond and has been holding moisture. Removing loose material and cleaning the area first gives the new coating a stable base. A primer designed to block stains and resist mildew helps seal the surface so discoloration does not bleed through the new paint. Skipping these steps is the most common reason a fresh coat starts to bubble or spot within a few months.
How to Prepare the Wall
- Open a window or run a fan, then put on gloves and eye protection.
- Protect the baseboard and floor with painter’s tape and a drop cloth. Old tile can be stained by drips, and loose plaster dust gets everywhere.
- Scrape away all loose, flaking plaster and paint with the putty knife or scraper. Keep working until you reach firm material. Do not leave loose edges behind.
- Brush the area with a stiff brush to remove dust and debris, then vacuum the floor.
- Wipe the moldy area with a sponge dipped in warm soapy water. Scrub gently and rinse with clean water using a fresh rag.
- Let the wall dry completely. Plaster that still feels damp will trap moisture under the new coating. Allow at least 24 hours in a dry room, longer if the air is humid.
- Lightly sand the edges of the repaired area so the transition between old and new surfaces feels smooth.
How to Apply the Coating
- Brush the primer over the cleaned, dry patches first. Extend it slightly beyond the repaired area so the new coat blends in.
- Let the primer dry according to the label directions. Most primers need a few hours before recoating.
- Apply the topcoat with a brush for edges and corners, then use a small roller for larger areas. Work in thin, even coats rather than one heavy layer.
- Allow the first coat to dry fully, then check for thin spots and apply a second coat if needed.
What to Expect
A well-prepared wall should look clean, even, and ready for normal use. You may still see slight texture differences where the plaster was repaired, especially on an older surface. Mold can return if the root cause, such as leaking water or poor ventilation, is not fixed. Treat this as a surface restoration, not a permanent cure for moisture problems.
Helpful Tips
- Check the wall for a source of moisture before you paint, including leaks, condensation, or a bathroom exhaust fan that is not working.
- Mold-resistant paint helps in humid rooms, but it does not replace proper cleaning and drying.
- If the mold covers a large area, or it keeps coming back, consider a professional assessment.
- Keep a small amount of matching paint for future touch-ups.
Important Notes and Safety
- Do not mix cleaning products together. Use only mild soap and water for the cleaning step, and never combine bleach with ammonia or other cleaners.
- Wear gloves and eye protection while scraping and cleaning, since mold spores and dust can irritate skin and airways.
- Test your primer and paint on a small hidden spot first to confirm the finish and color.
- Store leftover paint and primer tightly sealed, away from heat and children.
With careful preparation, this restoration can turn a neglected corner into a clean, well-maintained surface that looks much better and holds up far longer.