Easy Pan Banana Bread (No Oven Needed)
Ripe bananas, a simple batter, and a lidded skillet are all you need for this easy pan banana bread. It bakes gently on the stovetop, so you can enjoy a warm, moist, naturally sweet treat without turning on the oven. It is a good choice for small kitchens, hot summer days, or any time you have a few overripe bananas on the counter.
Why You’ll Love This Recipe
- No oven required. A covered skillet on the stovetop does the job.
- Uses ripe bananas. Spotty, soft bananas add natural sweetness and moisture.
- Simple pantry ingredients. Most people already have flour, sugar, butter, and eggs on hand.
- Quick cleanup. One bowl and one skillet are all you need.
- Great for a small batch. You get a warm treat without baking a full loaf.
Ingredients
- 2 ripe bananas, mashed (about 1 cup or 240 g)
- 1/3 cup (75 g) unsalted butter, melted and slightly cooled
- 1/2 cup (100 g) granulated sugar
- 1 large egg, at room temperature
- 1 tsp (5 ml) vanilla extract
- 1 cup (125 g) all-purpose flour
- 1 tsp (4 g) baking soda
- 1/4 tsp (1.5 g) fine salt
- 1/2 tsp (1 g) ground cinnamon, optional
- 1/3 cup (40 g) chopped walnuts or pecans, optional
- 2 tbsp (30 ml) milk, if the batter seems too stiff
- Butter or nonstick cooking spray for greasing the pan
Ingredient Notes
Very ripe bananas with brown spots give the best flavor and moisture. Mash them well so the batter is smooth. Melted butter keeps the bread tender, while the egg helps bind everything together. Baking soda gives the bread its lift, so measure it carefully. If the batter is too thick to spread, add the milk one teaspoon at a time.
Equipment You’ll Need
- An 8-inch (20 cm) nonstick skillet or small saucepan with a tight-fitting lid
- A medium mixing bowl
- A fork or potato masher
- A whisk or rubber spatula
- A toothpick or thin skewer for testing
- Parchment paper, optional, for lining the bottom
How to Make Easy Pan Banana Bread
-
Grease your 8-inch skillet with butter or nonstick spray. Cut a small round of parchment to fit the bottom if you want easier release. Set the pan aside.
-
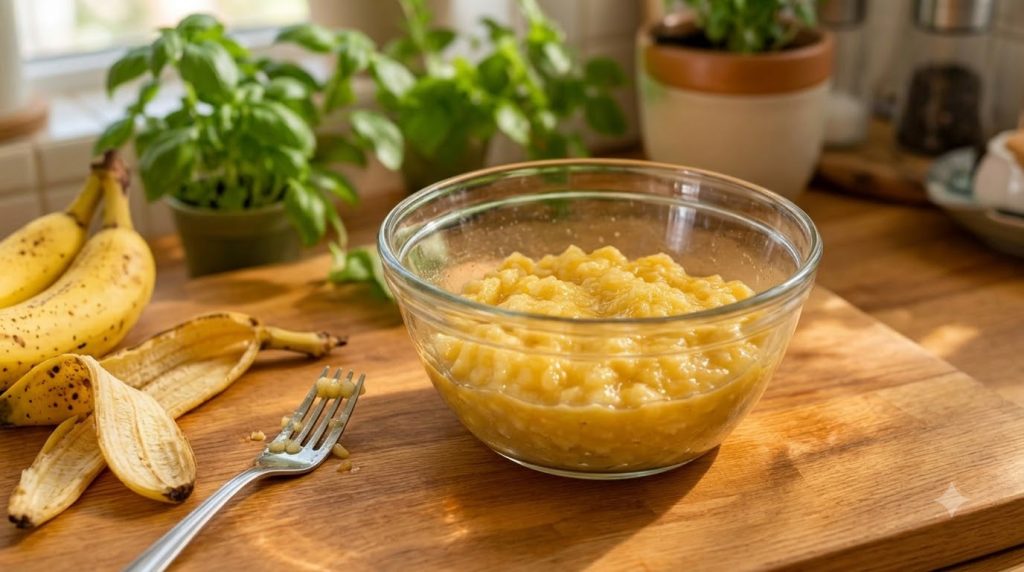
In a medium bowl, mash the bananas with a fork until mostly smooth. A few small lumps are fine. You should have about 1 cup.
-
Stir the melted butter, sugar, egg, and vanilla into the bananas. Whisk until the mixture looks smooth and slightly glossy, about 1 minute.
-
In a separate small bowl, whisk together the flour, baking soda, salt, and cinnamon, if using. Whisking evenly distributes the baking soda so you do not get bitter pockets.
-
Add the dry ingredients to the wet ingredients. Stir gently with a spatula just until no dry flour streaks remain. Do not overmix, or the bread can turn tough. The batter should be thick but spreadable, like soft cake batter.
-
If the batter is very stiff, stir in milk one teaspoon at a time. Fold in the nuts, if using.
-
Spoon the batter into the prepared skillet and smooth the top with the back of a spoon. Tap the pan gently on the counter to release large air bubbles.
-
Cover the skillet with its lid and set it over low heat. Cook for about 25 to 35 minutes. Keep the heat low so the bottom does not scorch before the center sets. Cooking times vary by pan and stove, so start checking around the 25-minute mark.
-
Check doneness by inserting a toothpick into the center. It should come out clean or with a few moist crumbs. The top should look set and not wet or glossy. If the top is still very wet, cover and cook for 3 to 5 more minutes.
-
Turn off the heat and let the bread rest in the covered pan for 5 minutes. Then loosen the edges with a knife and transfer it to a cooling rack. Let it cool for at least 10 minutes before slicing so the crumb can firm up.
Pro Tips for the Best Results
- Use bananas that are heavily speckled or mostly brown for the sweetest, most moist bread.
- Keep the heat low. A heat diffuser under the pan can help prevent the bottom from browning too fast.
- Let the melted butter cool slightly before adding the egg so the egg does not scramble.
- Measure flour by spooning it into the cup and leveling it off. Packing it in can make the bread dry.
- Check the bread a few minutes early. Skillet cooking can vary quite a bit from stove to stove.
- Cut the bread into wedges while it is still slightly warm for easy serving, or wait until fully cool for cleaner slices.
Common Mistakes to Avoid
The bottom is burnt but the middle is raw. The heat was likely too high. Use low heat and keep the lid on so the center cooks through.
The bread is gummy. It may need a few more minutes covered, or the bananas may have been very wet. Test again with a toothpick before removing it.
The bread is tough. The batter was probably overmixed after adding the flour. Stir only until the flour disappears.
The bread sticks to the pan. Grease the pan well and use parchment on the bottom for easier removal.
Variations and Substitutions
- Chocolate chip banana bread: Fold in 1/3 cup (60 g) mini chocolate chips.
- Brown sugar version: Replace the granulated sugar with packed brown sugar for a deeper, caramel-like flavor.
- Oil instead of butter: Use 1/3 cup (80 ml) neutral oil in place of melted butter for a slightly softer crumb.
- Spiced version: Add a pinch of nutmeg along with the cinnamon.
Serving Suggestions
Serve the banana bread warm or at room temperature. A pat of butter, a drizzle of honey, or a dollop of plain Greek yogurt makes a simple topping. It also pairs well with a cup of coffee, tea, or cold milk for breakfast or an afternoon snack.
Storage and Reheating
Store cooled banana bread in an airtight container at room temperature for up to 2 days. For longer storage, wrap slices tightly in plastic wrap and freeze them for up to 2 months. Thaw at room temperature or warm a slice in a covered skillet over low heat for a few minutes. Refrigeration can dry out the crumb, so it is best to keep it at room temperature if you plan to eat it within a day or two.
Frequently Asked Questions
Can I make this without a lid?
A lid helps trap heat and steam, which cooks the center evenly. If you do not have one, you can cover the skillet loosely with a baking sheet, but check the bread more often.
Can I use a different pan?
A small nonstick skillet or saucepan with a tight lid works best. A larger pan will make the bread thinner and cook faster, so start checking early.
Why did my pan banana bread turn out dry?
It may have been overbaked, or the flour may have been packed into the measuring cup. Use ripe bananas and check doneness early.
Can I make this ahead of time?
Yes. Make the bread a day ahead and store it at room temperature in an airtight container. The flavor often improves after it rests.
Can I use bananas that are not very ripe?
You can, but the bread will be less sweet and less moist. Ripening bananas on the counter until the peels are heavily spotted gives much better results.
Recipe Card
Recipe Name: Easy Pan Banana Bread (No Oven Needed)
Short Description: A moist, naturally sweet banana bread cooked in a covered skillet on the stovetop.
Prep Time: 15 minutes
Cook Time: About 25 to 35 minutes
Total Time: About 1 hour including cooling
Servings: 6 to 8 slices
Course: Breakfast, Snack, Dessert
Cuisine: American
Cooking Method: Stovetop, covered skillet
Ingredients:
- 2 ripe bananas, mashed (about 1 cup or 240 g)
- 1/3 cup (75 g) unsalted butter, melted
- 1/2 cup (100 g) granulated sugar
- 1 large egg
- 1 tsp (5 ml) vanilla extract
- 1 cup (125 g) all-purpose flour
- 1 tsp (4 g) baking soda
- 1/4 tsp (1.5 g) fine salt
- 1/2 tsp (1 g) ground cinnamon, optional
- 1/3 cup (40 g) chopped walnuts or pecans, optional
- 2 tbsp (30 ml) milk, if needed
Instructions:
- Grease an 8-inch (20 cm) lidded skillet and set aside.
- Mash the bananas, then whisk in the melted butter, sugar, egg, and vanilla.
- Whisk the flour, baking soda, salt, and cinnamon in a separate bowl.
- Combine the wet and dry ingredients until just blended. Fold in nuts and milk if needed.
- Spread the batter in the skillet and cover.
- Cook over low heat for about 25 to 35 minutes, until a toothpick comes out clean or with a few moist crumbs.
- Rest 5 minutes, then cool on a rack for at least 10 minutes before slicing.
Notes: Cooking times vary by pan and stove. Check early and keep the heat low to prevent the bottom from burning.
Storage: Keep at room temperature in an airtight container for up to 2 days, or freeze slices for up to 2 months.
Nutrition: Nutrition information is an estimate and may vary depending on the ingredients and brands used.