Unlock Radiant Skin: Discover the Magic of DIY Hydrating Face Gels for a Natural Glow
Hey beauty besties! Are you dreaming of that radiant, healthy glow, but feel overwhelmed by endless products and confusing routines? What if we told you that some of the most amazing skin-loving ingredients might already be in your kitchen? At Beauty Tips Daily, we’re all about embracing natural, affordable, and effective ways to care for your skin, and today, we’re diving into the wonderful world of homemade hydrating face gels!
Forget the idea that you need expensive serums to achieve beautiful skin. Nature has provided us with incredible ingredients that can help nourish, soothe, and hydrate your complexion, giving you that lovely, healthy look you’ve been craving. We’re talking about ingredients like flaxseed, rice, okra, and cloves – humble heroes that, when prepared carefully, can transform into luxurious, skin-quenching gels.
These homemade gels are packed with natural goodness, designed to help your skin feel softer, look smoother, and maintain its natural barrier. While they won’t magically erase wrinkles overnight or produce collagen, they are fantastic for boosting hydration, offering soothing relief, and contributing to an overall healthy, glowing appearance. Consistency is key, and just like with any skincare routine, gentle care and patience yield the best results.
Ready to get started on your journey to naturally radiant skin? Let’s explore the magic of these simple, DIY face gels!
Table of Contents
- What Makes Homemade Face Gels Popular?
- Flaxseed Gel Recipe: The Hydration Hero
- Rice Gel Recipe: For a Smoother, Brighter Look
- Okra Gel Recipe: Nature’s Soothing Elixir
- Clove Gel Recipe: The Antioxidant Boost (Use with caution)
- Key Ingredient Benefits: Understanding the Power of Nature
- Which Skin Types Can Benefit from These Gels?
- How to Store Your Homemade Gels Safely
- Understanding Shelf Life for Natural Products
- The Importance of Patch Testing
- Essential Safety Tips for DIY Skincare
- Frequently Asked Questions About Homemade Face Gels
- Final Thoughts: Embrace Your Natural Glow
- Disclaimer
What Makes Homemade Face Gels Popular?
In a world full of complex skincare solutions, why are so many people turning back to basics with homemade face gels? The answer lies in their simplicity, affordability, and the sheer joy of connecting with nature’s bounty. Here’s why these DIY wonders are winning hearts:
- Embracing Natural Ingredients: Many of us are becoming more conscious about what we put on our bodies. Homemade gels allow you to use fresh, whole ingredients, free from synthetic fragrances, harsh chemicals, and artificial preservatives often found in commercial products. You know exactly what’s going into your skin.
- Cost-Effective Beauty: Quality skincare can be expensive! These DIY gels utilize common kitchen staples, making them incredibly budget-friendly. You can achieve fantastic hydration and nourishment without breaking the bank.
- Customization at Your Fingertips: One of the biggest perks of DIY skincare is the ability to tailor recipes to your specific skin needs. While we’ll provide foundational recipes, you can adapt them (within safe limits, of course!) once you understand your skin’s response.
- A Sense of Self-Care and Empowerment: There’s something incredibly satisfying about creating your own beauty products. It’s a mindful act of self-care, a moment to slow down and nurture yourself with ingredients chosen and prepared by you. It’s empowering to take control of your beauty routine.
- Gentle and Soothing: Many natural ingredients are known for their gentle, soothing properties, making them ideal for sensitive or reactive skin types (though patch testing is always recommended!). They provide hydration and comfort without feeling heavy or greasy.
These gels offer a refreshing alternative for anyone looking to simplify their routine, reduce exposure to chemicals, and enjoy the process of natural beauty. They’re not about quick fixes but about consistent, loving care for your skin using ingredients from Mother Nature.
Flaxseed Gel Recipe: The Hydration Hero
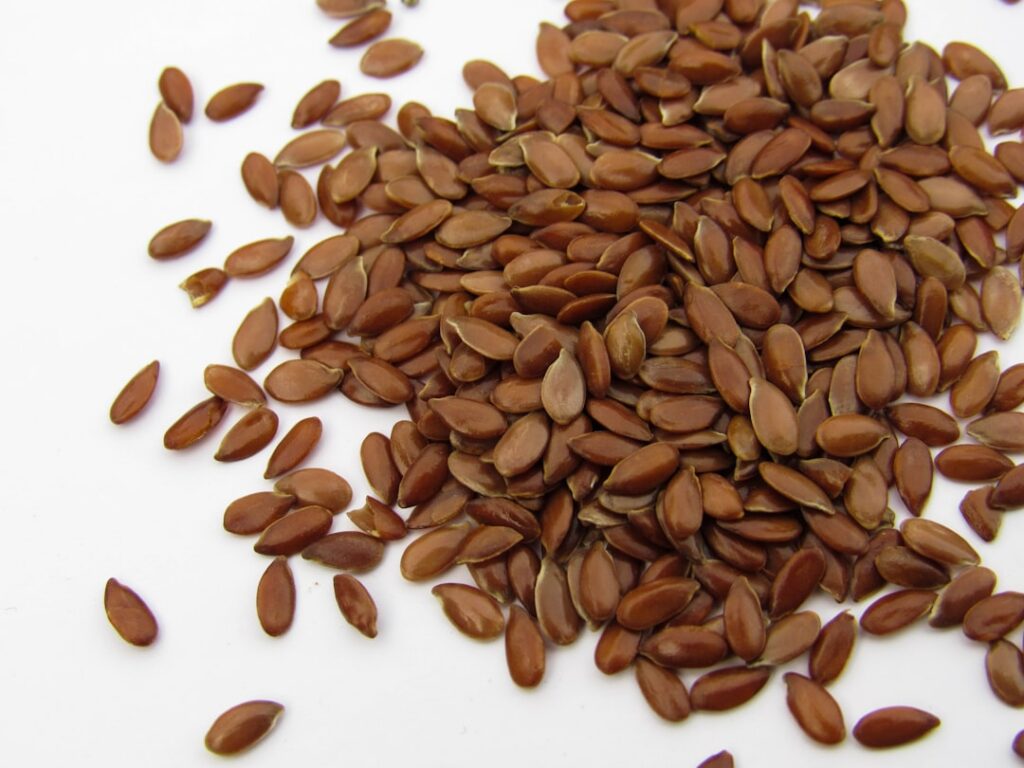
Flaxseed, often lauded for its dietary benefits, is a true superstar for skin hydration. When boiled, flaxseeds release a mucilage that forms a gel-like consistency, rich in omega-3 fatty acids, antioxidants, and lignans. This gel is incredibly moisturizing, soothing, and can leave your skin feeling wonderfully soft and supple. It’s like a big drink of water for your face!
Ingredients:
- 1/4 cup whole flaxseeds (golden or brown)
- 2 cups filtered water
- Optional: 1-2 drops of a skin-safe essential oil (e.g., lavender for soothing, tea tree for blemish-prone skin – *use with extreme caution and dilute properly*)
Instructions:
- Combine Ingredients: In a small saucepan, combine the flaxseeds and filtered water.
- Bring to a Boil: Place the saucepan over medium-high heat and bring the mixture to a rolling boil.
- Simmer: Reduce the heat to low and let it simmer for about 7-10 minutes, stirring occasionally. You’ll notice the mixture starting to thicken and form a gel-like consistency. Be careful not to overcook, or it will become too thick to strain.
- Strain the Gel: Once it reaches your desired gel consistency (it should be thick enough but still liquid), immediately remove it from the heat. Carefully strain the gel using a fine-mesh sieve, cheesecloth, or a clean nylon stocking into a clean glass jar or bowl. It’s easier to strain while hot.
- Cool and Store: Allow the gel to cool completely before covering and storing it in the refrigerator.
- Add Essential Oils (Optional): Once the gel has cooled, you can stir in 1-2 drops of your chosen essential oil, if using. Mix thoroughly.
How to Use:
Apply a thin layer to clean skin (face and neck) morning and/or night. You can use it as a standalone moisturizer, a hydrating serum under your regular cream, or even as a soothing mask. Allow it to absorb fully. It creates a subtle, firming film that feels lovely.
Rice Gel Recipe: For a Smoother, Brighter Look
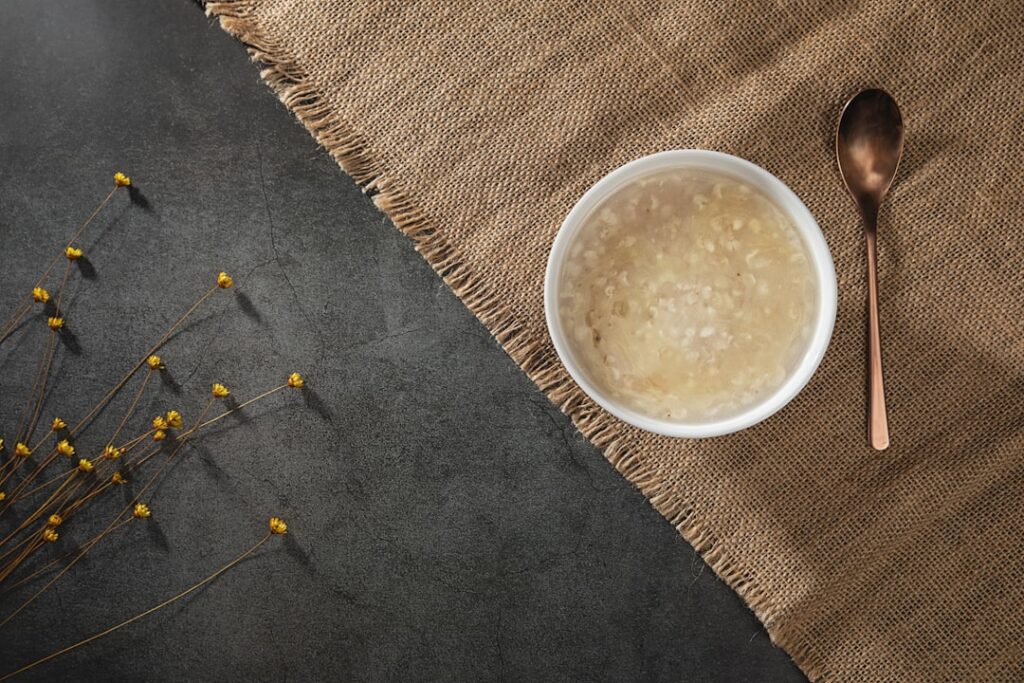
Rice water has been a cherished beauty secret in Asian cultures for centuries, known for its ability to promote a smoother, more even-toned complexion. This gel takes the benefits of rice a step further, offering hydration, mild exfoliation, and a soothing effect. It’s perfect for achieving that coveted healthy-looking skin with a natural radiance.
Ingredients:
- 1/2 cup organic white rice (e.g., jasmine, basmati)
- 2 cups filtered water
- Optional: A few drops of rose water for fragrance and added soothing properties.
Instructions:
- Rinse the Rice: Rinse the rice thoroughly under cold running water to remove any excess starch or impurities.
- Cook the Rice: In a saucepan, combine the rinsed rice and filtered water. Bring to a boil, then reduce heat to low, cover, and simmer until the rice is very soft and slightly overcooked (about 20-30 minutes). You want it to be mushy.
- Blend the Mixture: Remove from heat and let it cool slightly. Transfer the rice and water mixture to a blender. Blend until a smooth, thick, gel-like consistency is achieved. Add a tiny bit more water if needed to reach desired texture.
- Strain (Optional): For an ultra-smooth gel, you can strain the mixture through a fine-mesh sieve or cheesecloth, pressing down to extract all the liquid. However, for a thicker, more paste-like gel, you can skip this step.
- Cool and Store: Allow the gel to cool completely before transferring it to an airtight container and storing it in the refrigerator.
- Add Rose Water (Optional): Stir in rose water once cooled, if desired.
How to Use:
Apply a generous layer to clean skin as a mask for 15-20 minutes, then rinse off with lukewarm water for a brighter feel. Alternatively, apply a thin layer as a hydrating serum before your moisturizer, especially if you opted for a very smooth, strained version.
Okra Gel Recipe: Nature’s Soothing Elixir
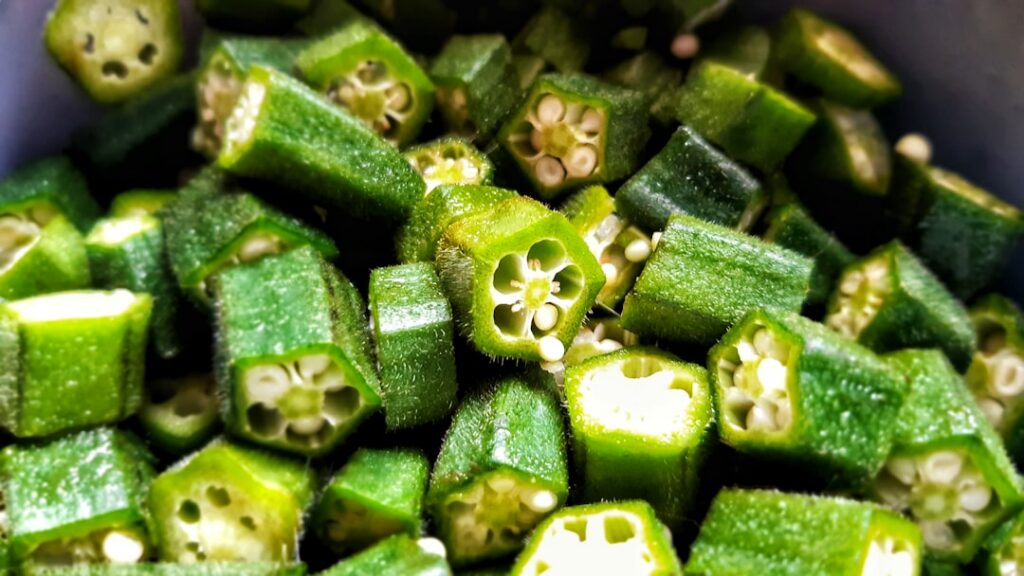
Okra, often known as “lady’s fingers,” is not just for cooking! This unique vegetable is packed with vitamins (C, K), folate, and most importantly, mucilage. This natural “slime” creates a wonderfully soothing and hydrating gel that can help calm irritated skin, improve its texture, and lock in moisture. It’s surprisingly gentle and effective.
Ingredients:
- 5-6 fresh okra pods
- 1 cup filtered water
Instructions:
- Prepare Okra: Wash the okra pods thoroughly. Slice them into small rounds.
- Boil Okra: Place the sliced okra and filtered water in a small saucepan. Bring to a boil, then reduce heat and simmer for 10-15 minutes, or until the okra is very soft and releases its natural mucilage, creating a thick, slimy liquid.
- Cool and Blend: Remove from heat and let the mixture cool completely. Once cool, transfer the okra and its liquid to a blender. Blend until smooth.
- Strain the Gel: Pour the blended mixture through a fine-mesh sieve or cheesecloth into a clean glass jar or bowl. Press firmly to extract all the gel, discarding the solid okra pulp. This step is crucial for a smooth gel.
- Store: Cover and store the okra gel in the refrigerator.
How to Use:
Apply a thin layer to clean skin, focusing on areas that need soothing or extra hydration. It works wonderfully as a calming serum, especially after sun exposure or for irritated skin. Leave on for 15-20 minutes as a mask, or apply a very thin layer as a leave-on treatment.
Clove Gel Recipe: The Antioxidant Boost (Use with caution)
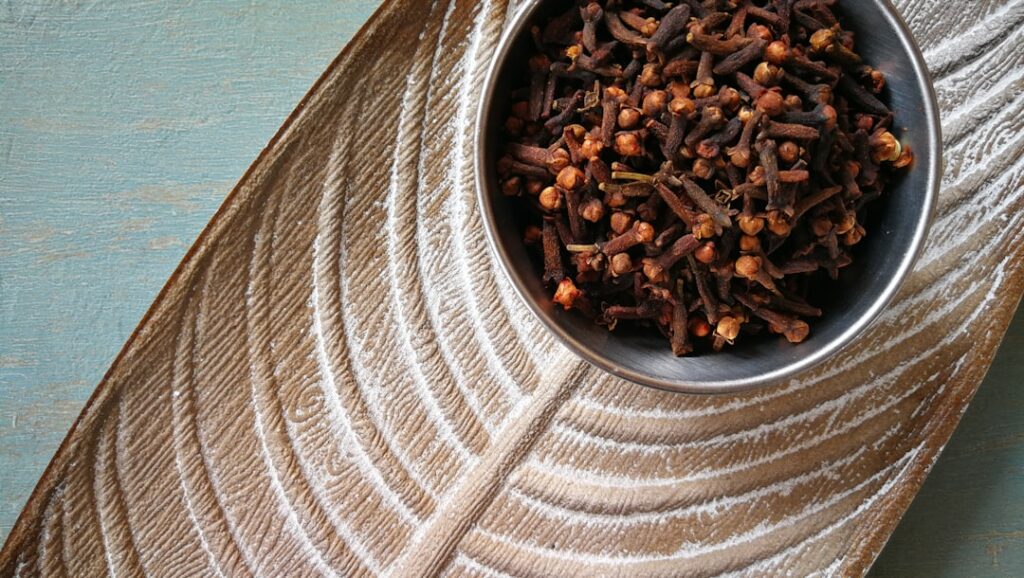
Cloves are potent spices known for their powerful antioxidant properties. Eugenol, the primary compound in cloves, is a strong antioxidant and has anti-inflammatory benefits. When used correctly and diluted, a clove-infused gel can offer protective benefits and contribute to healthier-looking skin. However, cloves are very potent and can be irritating if not properly diluted. Always proceed with extreme caution and prioritize patch testing. This gel is more about a subtle infusion rather than direct application of strong clove concentrations.
Ingredients:
- 1/4 cup whole cloves (not ground powder)
- 1 cup filtered water
- 1 tablespoon pure aloe vera gel (store-bought, 100% pure, or freshly extracted from a leaf if you have one)
Instructions:
- Infuse Water: In a small saucepan, combine whole cloves and filtered water. Bring to a gentle simmer on low heat for 10-15 minutes. You want to infuse the water with the clove’s properties, not create a strong, concentrated extract.
- Cool and Strain: Remove from heat and let the clove-infused water cool completely. Strain the liquid through a fine-mesh sieve to remove all cloves.
- Combine with Aloe Vera: In a clean bowl, mix the strained clove-infused water with the pure aloe vera gel. Start with a small amount of clove water and add more gradually until you achieve a gel-like consistency and a very mild clove scent. The aloe vera gel helps to dilute the clove’s potency and provides additional hydration.
- Store: Transfer the mixture to an airtight container and store it in the refrigerator.
How to Use:
This gel must be used with extreme caution. Always perform a patch test first. Apply a tiny amount to a small, inconspicuous area of your skin (like behind the ear or on your inner arm) and wait 24 hours for any reaction. If no irritation occurs, you can apply a very thin layer to clean skin, focusing on areas where you want antioxidant benefits. Due to its potency, this gel is best used sparingly, perhaps 2-3 times a week, and always diluted further if you experience any sensitivity. Consider it more of an occasional treatment than a daily staple.
Key Ingredient Benefits: Understanding the Power of Nature
Let’s take a closer look at the wonderful properties of the ingredients we’re using in these homemade gels, focusing on their general benefits for skin health and appearance, always with realistic expectations.
Flaxseeds (Linum usitatissimum):
- Hydration & Moisture Lock: The mucilage (gel-like substance) formed when flaxseeds are boiled is an excellent humectant. It attracts and retains moisture, creating a protective barrier on the skin that helps prevent water loss, leading to plumper, more hydrated skin.
- Omega-3 Fatty Acids: Flaxseeds are a rich source of alpha-linolenic acid (ALA), an omega-3 fatty acid. While topical application benefits are still being researched, omega-3s are generally known to support skin barrier function and reduce discomfort associated with dryness.
- Antioxidants: They contain lignans, which are powerful antioxidants that help protect the skin from environmental stressors.
- Soothing Properties: The natural emollients in flaxseed gel can help calm and soothe irritated skin, making it feel more comfortable.
Rice (Oryza sativa):
- Skin Softening: The starch and proteins in rice can help to soften and smooth the skin’s texture, contributing to a more refined appearance.
- Hydration: Rice water and gel provide a gentle dose of hydration, helping to keep the skin moisturized and supple.
- Antioxidant Presence: Rice contains compounds like ferulic acid and allantonin, which have antioxidant and anti-inflammatory properties that can protect the skin from daily environmental aggressors.
- Mild Brightening Effect: Regular use of rice-based products is anecdotally associated with a brighter, more even-toned complexion due to its gentle exfoliation and soothing action.
Okra (Abelmoschus esculentus):
- Deep Hydration: The high mucilage content in okra is a fantastic natural humectant, drawing moisture into the skin and helping to keep it intensely hydrated.
- Soothing & Calming: Okra gel is incredibly gentle and can provide relief to dry, irritated, or sensitive skin, reducing feelings of discomfort.
- Vitamins and Minerals: Okra is rich in vitamins C and K, and various minerals, all of which contribute to overall skin health and vitality.
- Improves Skin Texture: The hydrating and emollient properties can help to smooth the skin’s surface, making it feel softer to the touch.
Cloves (Syzygium aromaticum):
- Potent Antioxidant: Cloves are exceptionally high in antioxidants, particularly eugenol. These compounds help combat free radical damage caused by environmental factors, which can lead to dullness and signs of aging.
- Mild Anti-inflammatory: The anti-inflammatory properties can help soothe certain types of skin discomfort, though again, caution with concentration is paramount.
- Aromatic Benefits: Beyond topical effects, the warm, spicy aroma of cloves can have an uplifting effect on mood, enhancing the self-care experience.
Aloe Vera (Aloe barbadensis miller):
While not a primary ingredient in all recipes, fresh aloe vera gel is an excellent addition or base for many DIY skincare concoctions due to its renowned benefits:
- Intense Hydration: Aloe vera is mostly water, making it a powerful hydrator. It helps to deliver moisture directly to the skin, making it feel plump and dewy.
- Soothing & Healing: It’s famous for its ability to soothe sunburns, irritation, and minor cuts. Its anti-inflammatory compounds can help reduce redness and discomfort.
- Vitamins & Enzymes: Aloe vera contains a wealth of vitamins (A, C, E, B12), enzymes, and amino acids that nourish the skin and support its natural healing processes.
- Lightweight & Non-Greasy: It absorbs quickly into the skin without leaving a heavy or greasy residue, making it suitable for many skin types.
Which Skin Types Can Benefit from These Gels?
One of the beauties of natural, hydrating ingredients is their versatility! Generally, these homemade gels can be beneficial for a wide range of skin types, but here’s a breakdown:
- Dry Skin: Absolutely! Flaxseed, rice, and okra gels are packed with hydrating mucilage and emollients that will help replenish moisture, soothe dryness, and improve the skin’s barrier function. They provide a lovely drink for thirsty skin.
- Oily Skin: Yes, even oily skin needs hydration! Dehydrated oily skin can sometimes overproduce oil to compensate. These gels are lightweight, non-comedogenic (unlikely to clog pores), and provide moisture without adding excess oil, helping to balance the skin.
- Combination Skin: Perfect for balancing different areas. You can apply more generously to dry patches and lightly to oilier zones.
- Sensitive Skin: Flaxseed, rice, and okra gels are generally very gentle and soothing, making them good candidates for sensitive skin. However, patch testing is crucial for everyone, especially those with sensitivities. The Clove Gel should be approached with extra caution by sensitive skin types due to its potency.
- Acne-Prone Skin: While these gels won’t cure acne, the hydration and soothing properties can be beneficial. Well-hydrated skin is healthier and can heal better. Flaxseed and okra gels can help calm inflammation. Rice gel’s mild exfoliating properties might also be helpful. Always ensure your hands and tools are clean to avoid introducing bacteria.
- Mature Skin: Hydration is key for mature skin to maintain elasticity and a plump appearance. These gels help to moisturize deeply, making fine lines appear less prominent by plumping the skin with water.
Remember, every individual’s skin is unique. What works wonders for one person might not be ideal for another. Always listen to your skin and adjust your routine as needed.
How to Store Your Homemade Gels Safely
Because these gels are made with fresh, natural ingredients and contain no artificial preservatives, proper storage is absolutely vital to maintain their efficacy and prevent bacterial growth. Think of them like fresh food – they need to be treated with care!
- Refrigeration is Key: Always store your homemade face gels in the refrigerator immediately after they have cooled down. The cool temperature slows down bacterial growth and keeps the ingredients fresh.
- Airtight Containers: Use clean, airtight glass jars or containers. This prevents exposure to air, which can cause oxidation and introduce contaminants. Small glass jars with tight-fitting lids are ideal.
- Label and Date: Always label your containers with the name of the gel and the date you made it. This helps you keep track of its freshness and prevents accidental use past its shelf life.
- Avoid Contamination: When using the gel, avoid dipping your fingers directly into the main container. Instead, use a clean spatula or spoon to scoop out the desired amount. This minimizes the introduction of bacteria from your hands into the product.
- Small Batches: It’s always best to make small batches that you can use up within their recommended shelf life. This ensures you’re always using the freshest possible product.
Understanding Shelf Life for Natural Products
Unlike commercial products that often contain a cocktail of preservatives, homemade gels have a very limited shelf life. This is a crucial aspect of DIY skincare safety and effectiveness.
- General Rule: Most homemade water-based gels, even when refrigerated and stored properly, will last for about 3 to 7 days. Some might last a little longer (up to 10 days) if you’re extremely meticulous with hygiene, but it’s safer to err on the side of caution.
- Signs of Spoilage: Always check your gel before each use. Discard it immediately if you notice any changes in:
- Smell: An unusual or sour odor.
- Color: Discoloration or changes from its original hue.
- Texture: Separation, unusual lumps, or changes in consistency.
- Appearance: Any visible mold growth.
- When in Doubt, Throw it Out: If you’re unsure about the freshness of your gel, it’s always best to discard it and make a fresh batch. Using spoiled products can introduce bacteria to your skin, leading to irritation, breakouts, or infection.
Adhering to these guidelines will ensure you get the most benefit from your fresh, homemade gels while keeping your skin happy and healthy.
The Importance of Patch Testing
Before you enthusiastically slather your wonderful homemade gel all over your face, there’s one absolutely non-negotiable step: patch testing! Even though these ingredients are natural, your skin might still have a unique reaction to them. This step helps you identify potential allergies or sensitivities before they affect a larger area.
How to Perform a Patch Test:
- Choose an Inconspicuous Area: Select a small, discreet patch of skin. Common areas include behind your ear, along your jawline, or on the inside of your forearm.
- Apply a Small Amount: Apply a tiny dab of the prepared gel to the chosen area.
- Observe for 24-48 Hours: Leave the gel on and monitor the area for any signs of reaction. This means looking out for:
- Redness
- Itching
- Burning
- Stinging
- Swelling
- Rash or Hives
- Rinse if Irritated: If you experience any discomfort or adverse reaction during the test period, rinse the area immediately with cool water and discontinue use of that product.
- Proceed with Caution: If no reaction occurs after 24-48 hours, it’s generally safe to proceed with using the gel on your face. However, always pay attention to your skin’s response during initial full applications.
Patch testing is a simple step that can save you a lot of discomfort and potential skin issues. It’s especially important if you have sensitive skin, known allergies, or are trying a new ingredient.
Essential Safety Tips for DIY Skincare
Creating your own beauty products is a rewarding journey, but safety should always be your top priority. Here are some essential tips to ensure your DIY skincare adventure is both enjoyable and skin-friendly:
- Hygiene is Paramount:
- Always start with clean hands. Wash them thoroughly before handling any ingredients or equipment.
- Use sterilized or very clean tools, bowls, and containers. You can sanitize glass jars by boiling them for 10 minutes or running them through a hot dishwasher cycle.
- Keep your workspace clean and tidy.
- Use High-Quality Ingredients:
- Opt for organic, food-grade ingredients whenever possible, especially for items like flaxseeds and rice.
- Ensure your water is filtered to avoid chlorine and other impurities.
- If using fresh aloe vera, ensure it’s from a healthy plant and properly extracted.
- Respect Potent Ingredients:
- Some natural ingredients, like cloves, are very potent. Always dilute them properly and use sparingly. More is not always better in skincare, especially with active botanicals.
- Never apply concentrated essential oils directly to the skin. If using, ensure they are skin-safe and properly diluted in a carrier gel or oil.
- Avoid Contaminants:
- As mentioned, use a clean spatula or spoon to dispense product from the main container to avoid introducing bacteria from your fingers.
- Keep containers tightly sealed when not in use.
- Listen to Your Skin:
- Your skin is your best indicator. If something feels off (stinging, itching, burning), rinse it off immediately and discontinue use.
- Don’t force a product if your skin isn’t happy.
- Don’t Expect Miracles:
- Homemade gels are fantastic for hydration, soothing, and general skin health. They are not medical treatments, and they won’t dramatically alter skin conditions or reverse significant signs of aging. Manage your expectations realistically.
- Consult a Professional:
- If you have specific skin conditions (e.g., severe acne, rosacea, eczema) or are unsure about using certain ingredients, it’s always best to consult with a dermatologist or a qualified skincare professional before incorporating new DIY remedies into your routine.
Frequently Asked Questions About Homemade Face Gels
Q1: Can these homemade gels replace my regular moisturizer?
A: It depends on your skin type and needs. For some with oily or combination skin, these lightweight gels might provide sufficient hydration. For those with dry or very dry skin, they can serve as an excellent hydrating serum layer underneath a richer cream or moisturizer to lock in extra moisture.
Q2: How often can I use these DIY face gels?
A: Most of these hydrating gels (flaxseed, rice, okra) can be used daily, both morning and night, after cleansing and toning. The Clove Gel, due to its potency, is best used sparingly, perhaps 2-3 times a week, and always with prior patch testing.
Q3: Are homemade gels safe for all skin types, including sensitive skin?
A: While natural ingredients are generally well-tolerated, individual reactions vary. Flaxseed, rice, and okra gels are typically gentle. However, always perform a patch test before applying any new product to your entire face, especially if you have sensitive or reactive skin. The Clove Gel requires extra caution for sensitive skin.
Q4: Do these homemade gels truly produce collagen or erase wrinkles?
A: It’s important to set realistic expectations. While these gels provide excellent hydration and support overall skin health, which can make the skin appear plumper and reduce the *appearance* of fine lines due to improved moisture, they do not directly produce collagen or erase established wrinkles. Collagen production is a complex biological process, and while ingredients with antioxidants can support healthy skin function, topical application of these homemade gels will not significantly boost collagen synthesis in the way medical treatments or certain scientifically proven peptides might.
Q5: Can I add essential oils to my homemade gels?
A: You can, but with extreme caution and proper knowledge. Use only skin-safe essential oils (e.g., lavender, tea tree, frankincense, rose — always diluted!) and in very small concentrations (1-2 drops per batch). Some essential oils can be highly irritating or allergenic. Always research the oil, ensure it’s high quality, and perform an additional patch test with the final product. If you’re unsure, it’s best to skip essential oils altogether.
Q6: What if my skin reacts negatively to a homemade gel?
A: Immediately rinse the product off with cool water. If the irritation persists, consider applying a soothing, plain moisturizer. Discontinue use of that specific gel. If the reaction is severe or doesn’t improve, consult a dermatologist.
Q7: Can I use these homemade gels on my body or hair?
A: Absolutely! Many of these gels are wonderful for the body, especially for dry patches on elbows, knees, or shins. Flaxseed gel, in particular, is a popular natural hair gel for defining curls and adding shine. Rice water is also a traditional hair rinse. Just be mindful of their limited shelf life.
Q8: What exactly is “glass skin” and how do these gels contribute to it?
A: “Glass skin” refers to a complexion that appears incredibly smooth, luminous, and poreless, almost like polished glass. It’s a look of extreme hydration and health, not literally glass-like. These homemade gels contribute to glass skin by deeply hydrating the skin, plumping it up, improving its texture, and enhancing its natural radiance, making it look smoother and healthier. Consistent hydration is a cornerstone of achieving that coveted healthy glow.
Q9: Are these gels effective for managing acne or blemishes?
A: While not direct acne treatments, the hydrating and soothing properties can be beneficial for acne-prone skin. Well-hydrated skin has a stronger barrier, which can help it manage breakouts. Some ingredients like flaxseed (anti-inflammatory) and rice (mild exfoliation) can indirectly support healthier skin. However, for active or severe acne, always consult a dermatologist for targeted treatment.
Q10: Why choose homemade gels over store-bought ones?
A: Choosing homemade allows you to control the ingredients, avoiding synthetic chemicals, fragrances, and preservatives. It’s often more affordable and offers a wonderful sense of self-care. It also connects you more directly with natural remedies. However, store-bought products often have extensive research, stable formulations, and specific active ingredients that might offer different benefits.
Q11: Can I combine these gels or add other ingredients?
A: You can mix small amounts of different gels, for example, a bit of flaxseed with rice gel. When adding other ingredients, stick to simple, known skin-safe additions like pure aloe vera gel (the non-clove version), a tiny bit of vegetable glycerin for extra humectant power, or pure rose water. Always introduce new ingredients one at a time and patch test.
Q12: Do these gels provide sun protection?
A: No. Homemade gels do not offer any significant sun protection (SPF). Always follow up your morning routine with a broad-spectrum sunscreen of SPF 30 or higher, regardless of what other skincare products you use.
Final Thoughts: Embrace Your Natural Glow
Stepping into the world of homemade skincare is a beautiful way to connect with nature, practice self-care, and discover what truly makes your skin happy. These DIY hydrating face gels – crafted from simple, everyday ingredients like flaxseed, rice, okra, and even a hint of clove – offer a gentle yet effective path to a more radiant, soothed, and healthy-looking complexion.
Remember, true beauty comes from consistent, loving care. It’s about nurturing your skin with kindness, understanding its needs, and providing it with the hydration and nourishment it deserves. While these gels won’t work miracles overnight or replace medical treatments, they are a fantastic, affordable addition to any routine, supporting your skin’s natural vitality and helping you achieve that desirable soft, dewy glow.
So, gather your ingredients, enjoy the process of creating your own beauty elixirs, and watch as your skin thanks you with a renewed radiance. Your journey to naturally glowing skin starts right in your kitchen!
Disclaimer
The information provided in this article about homemade face gels is for general informational purposes only and is not intended as medical advice, nor should it be used to diagnose, treat, cure, or prevent any disease. While natural ingredients can be beneficial, individual results may vary, and reactions can occur. Always perform a patch test before applying any new product to your entire face, especially if you have sensitive skin, allergies, or existing skin conditions. Consult with a qualified dermatologist or healthcare professional if you have any concerns about your skin health or before making significant changes to your skincare routine, particularly if you have underlying medical conditions or are pregnant or breastfeeding. Beauty Tips Daily is not responsible for any adverse reactions or outcomes resulting from the use of the recipes or information presented herein. These homemade gels are intended for hydration and general skin well-being, not as substitutes for professional medical advice or prescribed treatments. Discontinue use if irritation occurs.