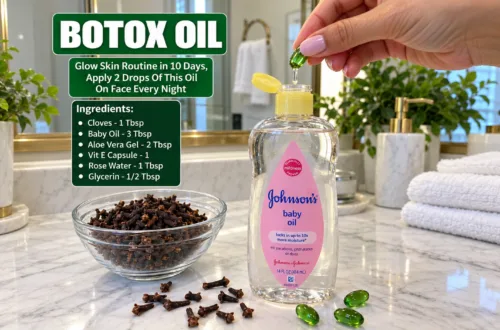
Hey beautiful souls! We all dream of that coveted radiant, clear skin, right? Sometimes, navigating the world of skincare products can feel overwhelming, not to mention expensive. But what if we told you that some of the most potent ingredients for a glowing complexion are already sitting in your kitchen cabinet? Today, we’re diving deep into the magic of homemade toners, and we’re going to shine a spotlight on a particularly powerful one: the DIY Clove Toner!
Toners are often overlooked, but they play a crucial role in balancing your skin’s pH, minimizing pores, and preparing your skin to absorb serums and moisturizers more effectively. While store-bought options are plentiful, crafting your own natural toners allows you to control the ingredients and avoid harsh chemicals, making them perfect for sensitive skin or those who prefer a more organic approach.
Why Go DIY with Your Toner?
- Natural Ingredients: You know exactly what you’re putting on your skin, free from artificial fragrances, dyes, and preservatives.
- Cost-Effective: Many DIY ingredients are kitchen staples, saving you money in the long run.
- Customizable: Tailor your toner to your specific skin concerns.
- Eco-Friendly: Reduce plastic waste by reusing your own bottles and sourcing ingredients responsibly.

The Secret Ingredient: Cloves for Clear & Radiant Skin
Yes, those aromatic little spice buds you use in cooking are skincare superheroes! Cloves are packed with compounds that offer incredible benefits for your skin:
- Antimicrobial Properties: Cloves contain eugenol, a powerful compound known for its antimicrobial and antiseptic qualities. This makes clove toner excellent for fighting acne-causing bacteria and preventing breakouts.
- Anti-inflammatory Benefits: If you struggle with redness or inflamed skin, cloves can help soothe and calm irritation, promoting a more even skin tone.
- Antioxidant Power: Rich in antioxidants, cloves help protect your skin from free radical damage, which can contribute to premature aging. This means a more youthful, radiant glow!
- Exfoliating & Brightening: Regular use can gently help shed dead skin cells, revealing brighter, clearer skin underneath.
Your DIY Clove Toner Recipe for Radiant Skin!
Ready to whip up your own batch of skin-loving goodness? Here’s a simple recipe for a powerful Clove Toner:
What You’ll Need:
- 1 tablespoon whole cloves
- 1 cup distilled water (or filtered water)
- A small saucepan
- A fine mesh strainer or cheesecloth
- A clean, airtight glass bottle or spray bottle
Step-by-Step Instructions:
- Boil the Water: Pour 1 cup of distilled or filtered water into a small saucepan and bring it to a boil.
- Add Cloves: Once the water is boiling, add the 1 tablespoon of whole cloves.
- Simmer: Reduce the heat to low, cover the saucepan, and let it simmer for about 10-15 minutes. This allows the beneficial compounds from the cloves to infuse into the water.
- Cool Down: Remove the saucepan from the heat and let the mixture cool completely. It’s important to let it cool fully before straining to ensure maximum infusion.
- Strain: Once cooled, strain the liquid through a fine mesh strainer or cheesecloth into a clean bowl. Discard the used cloves.
- Transfer: Pour the strained clove toner into your clean, airtight glass bottle or spray bottle.
- Store: Keep your homemade clove toner in the refrigerator to maintain its freshness and potency.
How to Use Your DIY Clove Toner
Integrating this toner into your routine is super easy:
- Cleanse: Start with a freshly cleansed face, as you normally would.
- Apply: Dampen a cotton pad with the clove toner and gently swipe it across your face and neck, avoiding the eye area. Alternatively, you can spritz it directly onto your face (if using a spray bottle) and pat it in.
- Follow Up: Once the toner has absorbed, follow with your favorite serum, moisturizer, and SPF (during the day).
Use this toner once or twice daily, depending on your skin’s needs. Remember, consistency is key!
Important Tips:
- Patch Test: Always perform a patch test on a small area of your skin (like behind your ear or on your inner arm) before applying any new product to your entire face. Wait 24 hours to check for any adverse reactions.
- Shelf Life: Since this toner contains no preservatives, it’s best to use it within 7-10 days. The refrigerator helps extend its life. If you notice any changes in smell or appearance, discard it.
- Adjust Concentration: If you have very sensitive skin, you can start with fewer cloves or dilute the toner with a bit more distilled water.
Embracing natural, homemade skincare doesn’t have to be complicated. With just a few simple ingredients, you can create powerful potions that truly benefit your skin. Give this DIY Clove Toner a try and let us know how your skin transforms!
Have you tried making your own toners before? Share your favorite natural beauty hacks in the comments below! We’d love to hear from our beauty besties!