Garlic Growing & Anatomy: The Marc Théberge Method
Welcome, fellow garden enthusiasts! Few things are as satisfying as harvesting your own fresh garlic, pungent and flavorful, straight from your backyard. If you’ve ever dreamed of growing your own abundant garlic crop but felt a bit intimidated, you’re in the right place. Today, we’re diving deep into the art of planting garlic, guided by the straightforward and highly effective Marc Théberge method. This approach simplifies the process, ensuring even novice gardeners can achieve a bountiful harvest.
Before we get our hands dirty, let’s understand the humble garlic bulb a little better. Knowing its structure is key to planting it correctly and giving it the best start.
Understanding Your Garlic Bulb: Anatomy 101
To successfully plant garlic, it helps to understand its basic garlic bulb anatomy. A garlic bulb isn’t just one solid piece; it’s a complex structure designed for growth and storage.
- Hard Central Stem: This is the core of the bulb, especially prominent in hardneck varieties. It’s tough and remains rigid even after harvest.
- Protective Outer Wrappers: The papery layers that enclose the entire bulb and individual cloves. These help protect the cloves from drying out and damage.
- Root Plate: Located at the very bottom of the bulb, this is where the roots will emerge. It’s crucial for anchoring the plant and absorbing nutrients.
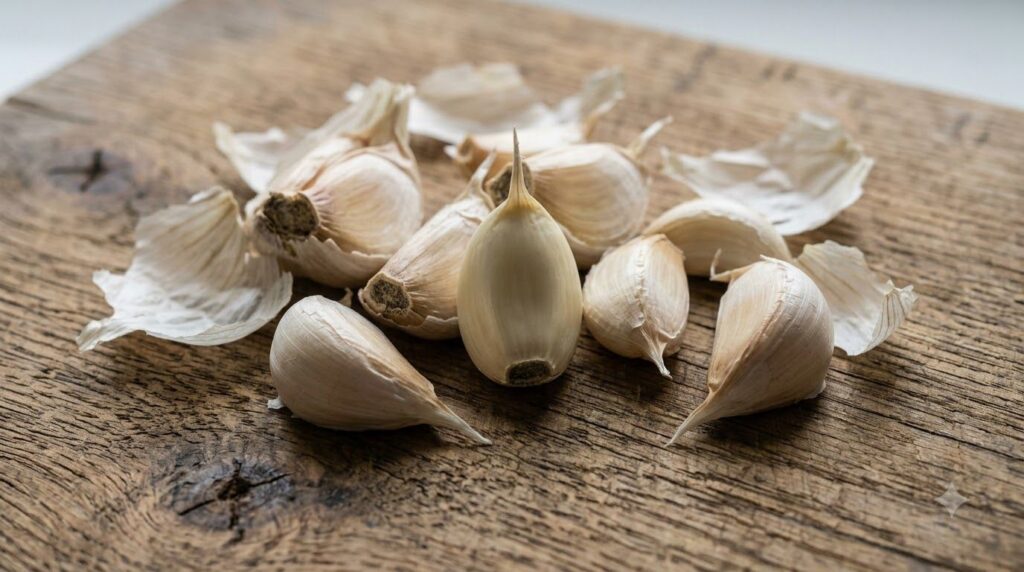
- Cloves: These are the individual segments arranged around the central stem. Each clove is a potential new garlic plant! They typically have a flat, blunt end (the root plate attachment) and a pointy end (where the shoot will emerge).
Clove vs. Bulbil: What to Plant for the Best Harvest
When you’re considering what to plant, you might encounter two main terms: cloves and bulbils. It’s important to know the difference for the best outcome.
- Clove: This is the culinary part of the garlic bulb – the individual segments you eat and cook with. For planting, cloves are almost always the preferred choice. They are genetically mature and will grow into full-sized, high-yield garlic bulbs in a single growing season. This is the most common and recommended approach for clove vs bulbil planting for gardeners aiming for substantial harvests.
- Bulbil: These are tiny, miniature garlic bulbs produced in an aerial seed head at the top of the garlic scape (the flower stalk) on hardneck varieties. While you can plant bulbils, they typically take two or even three seasons to grow into a full-sized bulb. They are often used for developing new garlic varieties or for smaller, long-term projects. For quick and robust results, stick with cloves!
The Marc Théberge Method: Step-by-Step Planting Guide
Now that we’re clear on our planting material, let’s get into the specifics of the Marc Theberge garlic method. This straightforward technique focuses on proper preparation and placement, ensuring your garlic has everything it needs to thrive.
Step 1: Preparing Your Cloves (Break Apart Just Before Planting)
Timing is everything when preparing your garlic cloves. You want them to be as fresh as possible and ready to spring into action.
- Select Your Bulbs: Start with healthy, firm, and ideally organic garlic bulbs. The larger the cloves you plant, generally, the larger the resulting bulb will be.
- Separate Right Before Planting: Do not break apart your garlic bulb into individual cloves too far in advance. Separating them too early can reduce their vigor and make them more susceptible to disease. Aim to do this just a day or two before you plan to plant. Gently separate the cloves, being careful not to damage the protective skin.
- Choose the Best Cloves: For optimal results, select the largest, healthiest-looking outer cloves from your bulb. These contain more stored energy and will produce the biggest new bulbs. Discard any small, soft, or damaged cloves.
Step 2: Planting with Precision (Pointy End Up!)
This step is crucial for successful germination and growth. The orientation of the clove dictates how easily the shoot can emerge and the roots can establish.
- Always Plant Pointy End UP: Examine your garlic clove. One end will be noticeably pointier (this is where the green shoot will emerge), and the other will be a flatter, sometimes rougher end (this is the root plate). When you how to plant garlic cloves, ensure the pointy end faces upwards, towards the sky.
- Root Plate Down: The flat root plate should be oriented downwards, making direct contact with the soil. This allows the roots to quickly anchor themselves and begin drawing up water and nutrients. Incorrect orientation can lead to stunted growth or even failure to sprout.
Step 3: The Perfect Home: Depth & Spacing
Proper depth and spacing are essential for good air circulation, nutrient uptake, and allowing the bulbs enough room to expand.
- Depth: Plant your garlic cloves 2–3 inches (5–8 cm) deep. This depth protects the cloves from harsh winter freezes and ensures the developing roots have enough soil to hold onto. In very cold climates, you might go slightly deeper, up to 4 inches.
- Spacing: Give your garlic plants room to breathe and grow. Space individual cloves 4–6 inches (10–15 cm) apart within the row. If you’re planting multiple rows, leave about 12 inches (30 cm) between rows to allow for good air circulation and ease of weeding. This depth and spacing for garlic planting will prevent overcrowding and promote larger bulbs.
Beyond Planting: Care for a Bountiful Harvest
Once your garlic is planted, a little ongoing care will go a long way. Keep the area free of weeds, as garlic doesn’t compete well. Ensure consistent moisture, especially during bulb development in spring. In colder climates, a layer of mulch (like straw) can protect your newly planted cloves through winter.
Ready to Grow Your Own Garlic?
Growing garlic is incredibly rewarding, adding fresh flavor to your kitchen and beauty to your garden. By following the Marc Théberge method – understanding your bulb, selecting the right planting material, and paying attention to orientation, depth, and spacing – you’re well on your way to a successful harvest. Give it a try this season and taste the difference!