Are you looking for a simple, eco-friendly way to boost your garden’s health while reducing household waste? Look no further than your kitchen scraps! What many see as trash, savvy gardeners see as ‘garden gold’ – the raw material for rich, nutrient-dense compost. Transforming your kitchen waste into garden soil is not only incredibly rewarding but also a fantastic step towards sustainable living.
What is Composting and Why Should You Do It?
Composting is nature’s recycling process. It’s the controlled decomposition of organic materials like food scraps and yard waste into a dark, crumbly, nutrient-rich soil amendment called compost. This ‘black gold’ significantly improves soil structure, water retention, and nutrient availability, creating an optimal environment for your plants to thrive.
The Benefits of Composting:
- Enriches Soil: Compost adds essential nutrients and beneficial microbes to your soil, reducing the need for chemical fertilizers.
- Improves Soil Structure: It helps sandy soils retain water and nutrients, and loosens heavy clay soils for better drainage and root growth.
- Reduces Waste: Diverts organic waste from landfills, where it would otherwise produce harmful methane gas.
- Saves Money: Less need to buy potting mix or soil amendments.
- Suppresses Plant Diseases: Healthy soil leads to healthier plants that are more resistant to pests and diseases.
What You Can (and Can’t) Compost from Your Kitchen
Knowing what to toss into your compost bin is key to a healthy, odorless pile. Generally, ‘green’ materials (nitrogen-rich) and ‘brown’ materials (carbon-rich) are needed in balance.
Kitchen Scraps That Make Great Compost:
- Fruit and vegetable peels and cores
- Coffee grounds and filters
- Tea bags (ensure they are plastic-free)
- Eggshells (crushed)
- Stale bread and grains
- Nut shells (avoid black walnut)
- Used paper towels (unbleached, if possible)
What to AVOID in Your Compost:
- Meat, bones, and fish scraps (attract pests, create odors)
- Dairy products (attract pests, create odors)
- Oils and greasy foods (attract pests, create odors)
- Pet waste (may contain pathogens)
- Diseased plants (can spread disease)
- Weeds with seeds (seeds can germinate in your garden)
- Treated wood or sawdust (may contain harmful chemicals)
Simple Composting Methods for Home Gardeners
There are several ways to compost, even if you have limited space:
1. Traditional Compost Pile or Bin
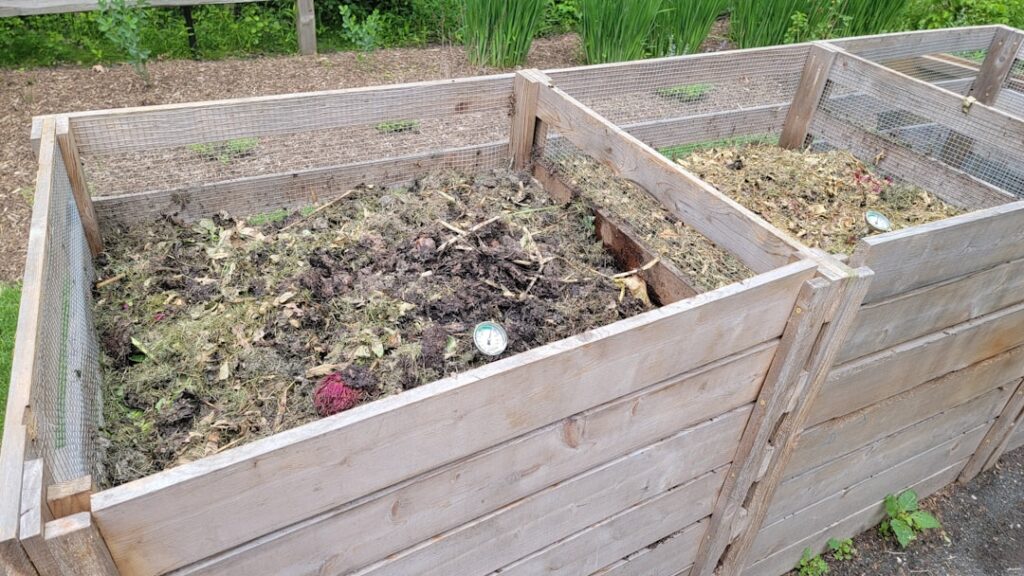
This is the most common method. You can build a simple pile in your yard or purchase a ready-made compost bin. The key is to layer your ‘greens’ and ‘browns’, keep it moist like a wrung-out sponge, and turn it regularly for aeration. A good ratio is typically two parts brown to one part green.
2. Vermicomposting (Worm Composting)
Perfect for smaller spaces or even indoors! Red wiggler worms do all the work, consuming your kitchen scraps and producing nutrient-rich ‘worm castings’ and ‘worm tea’. A small worm bin can be easily managed.
3. Bokashi Composting
A Japanese method that ferments food waste (even meat and dairy!) using a special bran inoculated with beneficial microbes. It’s an anaerobic process, meaning no oxygen is needed. Once fermented, the material is buried in the garden or added to a traditional compost pile for final breakdown.
Getting Started: Your Step-by-Step Guide
Ready to turn your kitchen scraps into garden gold? Here’s how to begin:
-
Choose a Location:
Select a shady, well-drained spot for your compost bin or pile. It should be easily accessible but not too close to your home, just in case.
-
Collect Your Scraps:
Keep a small container with a lid in your kitchen for daily scraps. When it’s full, empty it into your main compost system.
-
Layer Your Materials:
Start with a layer of coarse brown material (twigs, straw) for aeration. Then, alternate layers of ‘greens’ (kitchen scraps, grass clippings) and ‘browns’ (leaves, shredded paper, cardboard).
-
Keep it Moist:
The compost pile should be consistently moist, like a damp sponge. Water it occasionally if it seems dry, especially during hot weather.
-
Turn Regularly:
Aeration is crucial for decomposition. Turn your compost pile with a fork or aerator every week or two to mix materials and introduce oxygen. This speeds up the process and prevents odors.
-
Be Patient:
Compost can be ready in a few weeks to several months, depending on the method and conditions. You’ll know it’s ready when it’s dark brown, crumbly, and has an earthy smell.
Troubleshooting Common Composting Problems
- Smelly Compost: Usually due to too many ‘greens’ or lack of aeration. Add more ‘browns’ and turn the pile.
- Slow Decomposition: Might be too dry, too many ‘browns’, or not enough aeration. Moisten, add ‘greens’, and turn.
- Pests: Often caused by adding prohibited items like meat or dairy. Remove offending items and ensure your bin is sealed or properly managed.
Using Your Finished Compost
Once your compost is ready, it’s time to enjoy the fruits (and vegetables!) of your labor. You can:
- Mix it into garden beds before planting.
- Top-dress existing plants, trees, and shrubs.
- Use it in potting mixes for containers.
- Spread it on your lawn as a natural fertilizer.
Embracing composting is a powerful step towards a more sustainable lifestyle and a healthier, more vibrant garden. It transforms what would be waste into a valuable resource, proving that sometimes, the greatest treasures are found right in our own kitchens.
Happy composting!