Craving warm, fluffy homemade bread but don’t have an oven? You’re in luck! Baking delicious loaves, rolls, and flatbreads is entirely possible right on your stovetop. This clever method opens up a world of possibilities for fresh bread anytime, anywhere. We’ll start with a classic: Stovetop Raisin Bread, inspired by a popular no-oven technique, then explore seven more fantastic bread recipes you can master without a conventional oven.
Whether you’re looking for a sweet breakfast treat, a savory side for dinner, or quick flatbreads, these recipes are designed to be practical, clear, and utterly delicious. Get ready to transform your kitchen into a bakery with just a stovetop and a few simple ingredients!
Quick Overview
- Main topic: No-Oven Bread Baking
- Best for: Home bakers, small kitchens, camping, anyone without an oven
- Number of recipes: 8
- Prep style: Mix, rise (for yeast breads), shape, stovetop bake
- Reader benefit: Enjoy fresh homemade bread with minimal equipment
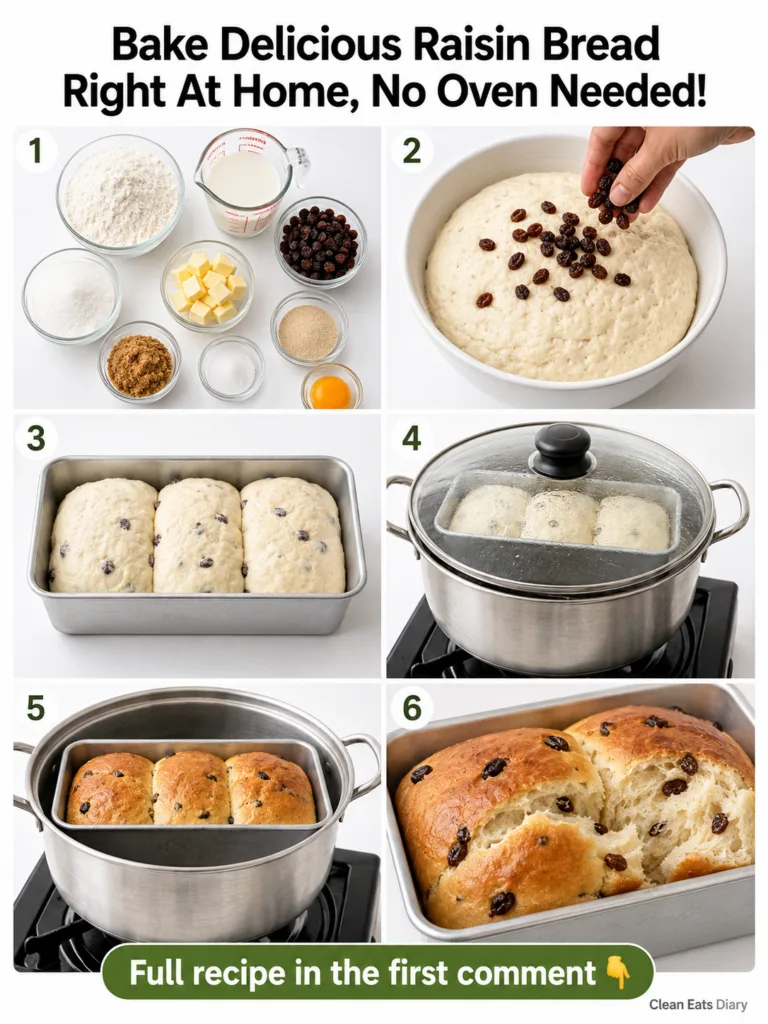
Recipe 1: Classic Stovetop Raisin Bread
Our anchor recipe, this Stovetop Raisin Bread, brings a taste of traditional baking to your countertop. It’s wonderfully soft, subtly sweet, and packed with juicy raisins, proving that you don’t need a fancy oven for fantastic results.
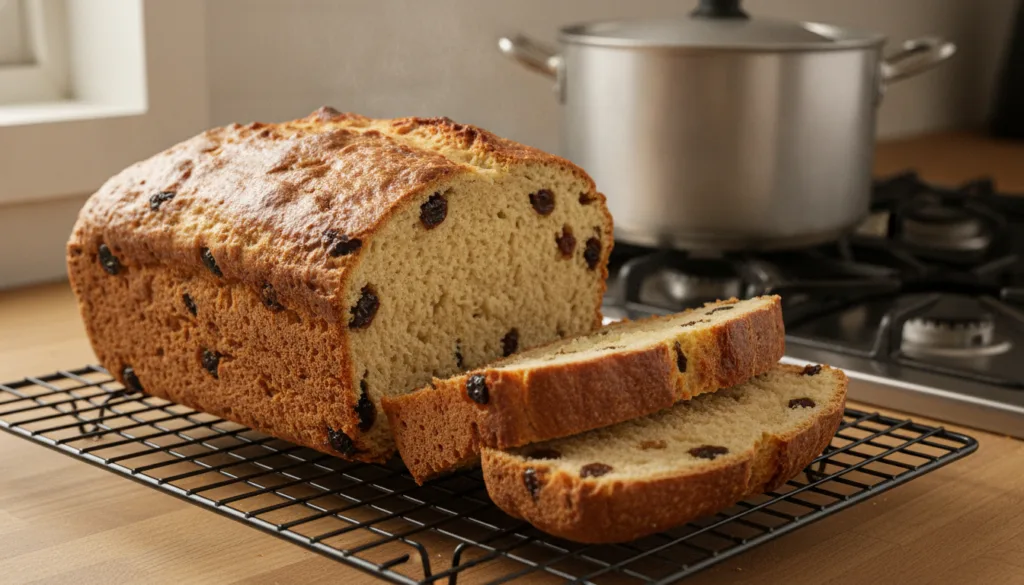
Servings: 8-10 slices
Prep time: 25 minutes + 2-3 hours rise time
Cook / chill / rest time: 45-60 minutes
Ingredients:
- 3 cups all-purpose flour
- 1 cup warm milk (105-115°F / 40-46°C)
- 1/2 cup raisins
- 1/4 cup granulated sugar
- 1/4 cup unsalted butter, melted
- 2 1/4 teaspoons active dry yeast (1 packet)
- 2 tablespoons light brown sugar
- 1 teaspoon salt
- 1 large egg yolk
Instructions:
- In a large bowl, whisk together the flour, granulated sugar, brown sugar, salt, and active dry yeast. Make a well in the center.
- In a separate bowl, whisk the warm milk, melted butter, and egg yolk until combined.
- Gradually pour the wet mixture into the dry ingredients, mixing with a wooden spoon or spatula until a shaggy dough forms.
- Turn the dough out onto a lightly floured surface and knead for 8-10 minutes, or until smooth and elastic.
- Lightly grease a clean bowl with oil, place the dough in it, turning once to coat. Cover the bowl with plastic wrap or a clean kitchen towel and let it rise in a warm spot for 1-1.5 hours, or until doubled in size.
- Gently punch down the dough, then add the raisins and lightly knead for 1-2 minutes to distribute them evenly.
- Shape the dough into a loaf and place it into a lightly greased standard loaf pan (approximately 8×4 inches). Cover and let it proof again for 45-60 minutes, or until nearly doubled.
- To ‘bake,’ place a small metal trivet or a few crumpled balls of aluminum foil at the bottom of a large, heavy-bottomed pot (large enough to fit the loaf pan with some space around it). Place the loaf pan on top of the trivet/foil.
- Cover the large pot tightly with its lid (you can wrap the lid with a kitchen towel inside to absorb moisture and prevent condensation from dripping onto the bread).
- Cook over the lowest possible heat setting on your stovetop for 45-60 minutes, or until the top is golden brown and a skewer inserted into the center comes out clean. Rotate the pot halfway through for even cooking.
- Carefully remove the loaf pan from the pot. Let the bread cool in the pan for 10 minutes before transferring it to a wire rack to cool completely before slicing.
Storage / Serving / Usage Note:
Enjoy warm slices with butter or jam. Store leftover raisin bread in an airtight container at room temperature for up to 3 days, or freeze for longer storage.
Recipe 2: Stovetop Garlic Herb Bread
This savory stovetop bread is fragrant with garlic and herbs, making it a perfect accompaniment to soups, salads, or pasta dishes. Its soft interior and subtle crust are incredibly satisfying.
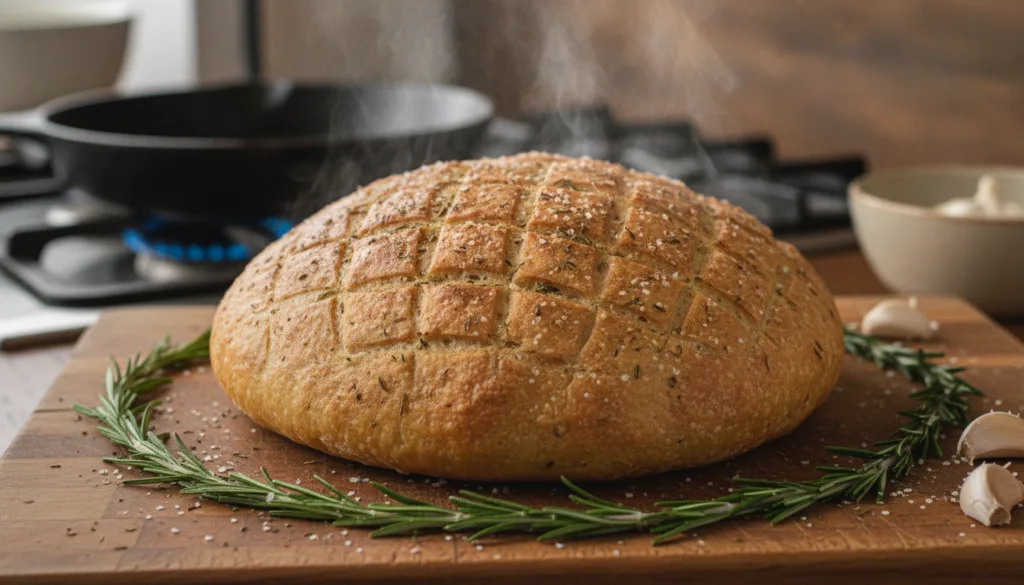
Servings: 8-10 slices
Prep time: 20 minutes + 2 hours rise time
Cook / chill / rest time: 30-40 minutes
Ingredients:
- 3 cups all-purpose flour
- 1 cup warm water (105-115°F / 40-46°C)
- 2 1/4 teaspoons active dry yeast
- 1 tablespoon granulated sugar
- 1 teaspoon salt
- 2 tablespoons olive oil, plus more for greasing
- 1 tablespoon garlic powder
- 1 tablespoon dried Italian herbs (oregano, basil, thyme, rosemary blend)
Instructions:
- In a large bowl, dissolve yeast and sugar in warm water. Let sit for 5 minutes until foamy.
- Stir in olive oil, salt, garlic powder, and dried Italian herbs.
- Gradually add flour, mixing until a shaggy dough forms.
- Knead on a lightly floured surface for 5-7 minutes until smooth and elastic.
- Place dough in a greased bowl, cover, and let rise in a warm place for 1-1.5 hours, or until doubled.
- Gently punch down the dough and shape it into a round loaf.
- Grease a heatproof round pan (e.g., a pie plate or cake pan that fits inside your large stovetop pot). Place the loaf in the pan, cover, and let proof for another 30-45 minutes.
- Set up your large stovetop pot with a trivet. Place the pan with the dough inside the pot.
- Cover the large pot and bake over the lowest heat for 30-40 minutes, rotating the pot occasionally, until golden brown and cooked through.
Storage / Serving / Usage Note:
Serve warm with butter or dipping oil. Stores well for 2-3 days in an airtight container.
Recipe 3: Easy No-Knead Frying Pan Bread
This incredibly simple no-knead bread requires minimal effort and delivers a rustic, chewy loaf. The long fermentation develops deep flavors, and it cooks beautifully in a frying pan.
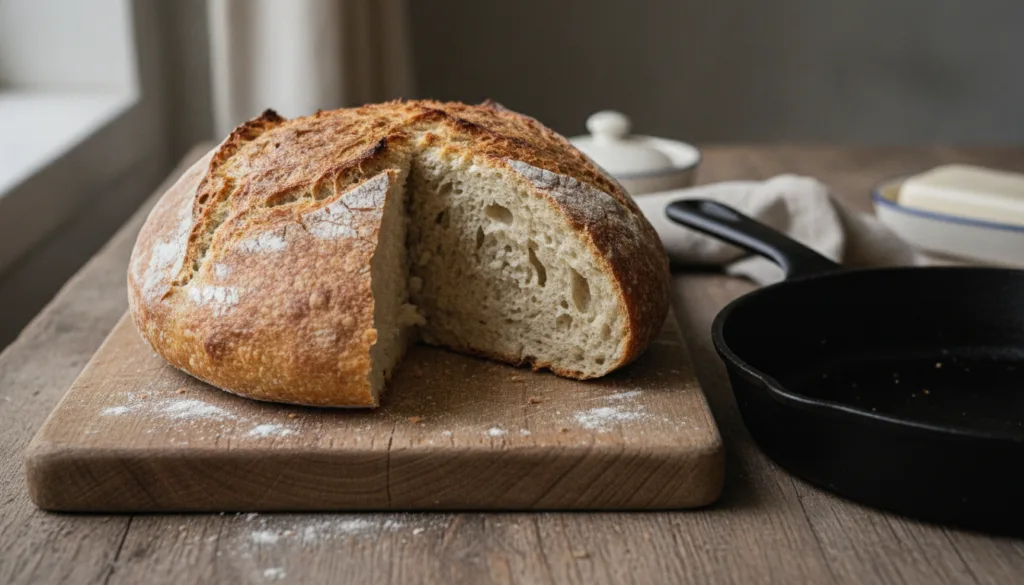
Servings: 6-8 slices
Prep time: 10 minutes + 12-18 hours rise time
Cook / chill / rest time: 20-25 minutes
Ingredients:
- 3 cups all-purpose flour
- 1 1/2 cups warm water
- 1/4 teaspoon active dry yeast
- 1 1/2 teaspoons salt
Instructions:
- In a large bowl, combine flour, yeast, and salt. Add warm water and mix with a wooden spoon until just combined. The dough will be shaggy and sticky.
- Cover the bowl tightly with plastic wrap and let it sit at room temperature for 12-18 hours.
- Lightly flour your work surface and gently scrape the dough out of the bowl. Fold the edges of the dough towards the center a few times to create a round shape.
- Place the dough on a piece of parchment paper. Cover and let rest for 30 minutes.
- Heat a heavy-bottomed frying pan (cast iron works best) over medium-low heat for 5 minutes.
- Carefully transfer the dough (with the parchment paper) into the hot frying pan.
- Cover the pan with a tight-fitting lid and cook for 15-20 minutes on one side until the bottom is golden brown.
- Flip the bread, cover, and cook for another 5-10 minutes until the second side is golden and the bread is cooked through.
Storage / Serving / Usage Note:
Excellent with olive oil, cheese, or as a sandwich bread. Best eaten fresh, but leftovers can be toasted.
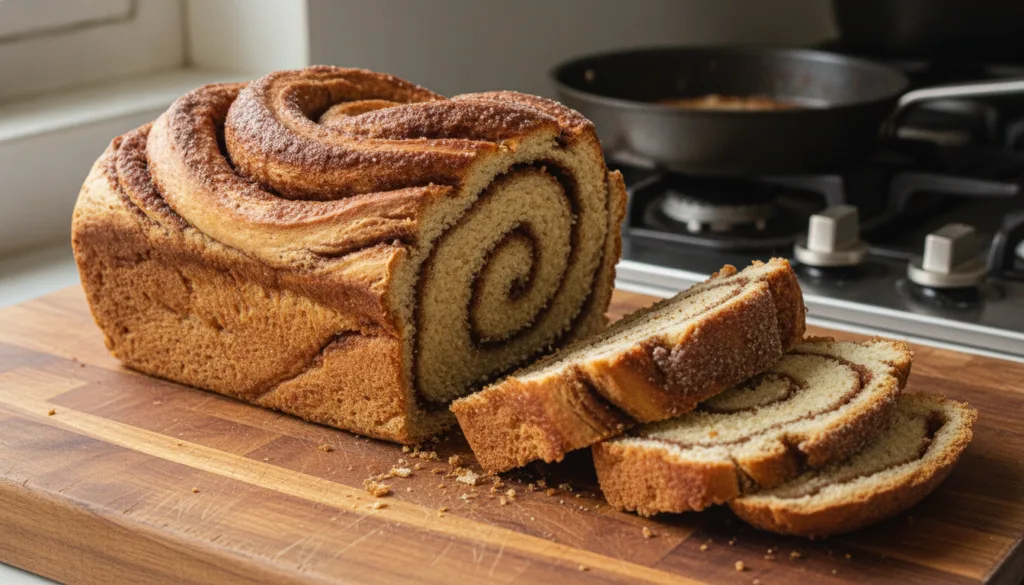
Recipe 4: Sweet Stovetop Cinnamon Swirl Bread
Indulge in a sweet treat with this delightful cinnamon swirl bread, baked right on your stovetop. Each slice boasts ribbons of warm cinnamon and brown sugar, perfect for breakfast or dessert.
Servings: 8-10 slices
Prep time: 30 minutes + 2-3 hours rise time
Cook / chill / rest time: 50-60 minutes
Ingredients:
- For the Dough:
- 3 cups all-purpose flour
- 1 cup warm milk (105-115°F / 40-46°C)
- 2 1/4 teaspoons active dry yeast
- 1/4 cup granulated sugar
- 1/4 cup unsalted butter, melted
- 1 large egg
- 1 teaspoon salt
- For the Cinnamon Swirl:
- 1/4 cup brown sugar
- 1 tablespoon ground cinnamon
- 2 tablespoons melted butter
Instructions:
- In a large bowl, combine warm milk, yeast, and 1 tablespoon of the granulated sugar. Let sit for 5-10 minutes until foamy.
- Stir in the remaining granulated sugar, melted butter, egg, and salt.
- Gradually add the flour, mixing until a soft dough forms. Knead on a lightly floured surface for 5-7 minutes until smooth and elastic.
- Place dough in a greased bowl, cover, and let rise in a warm place for 1-1.5 hours, or until doubled.
- While the dough rises, prepare the swirl: In a small bowl, mix brown sugar and cinnamon.
- Punch down the risen dough and roll it into a 12×18-inch rectangle on a lightly floured surface.
- Brush the dough evenly with 2 tablespoons of melted butter, then sprinkle with the cinnamon-sugar mixture.
- Starting from a long side, tightly roll up the dough into a log. Pinch the seam to seal.
- Place the log into a lightly greased 8×4-inch loaf pan. Cover and let proof again for 45-60 minutes, or until nearly doubled.
- Set up your large stovetop pot with a trivet. Place the loaf pan inside the pot.
- Cover the large pot tightly and ‘bake’ over the lowest heat for 50-60 minutes, rotating occasionally, until the top is golden and a skewer comes out clean.
Storage / Serving / Usage Note:
Enjoy warm as a breakfast pastry or snack. Store in an airtight container for up to 3 days.
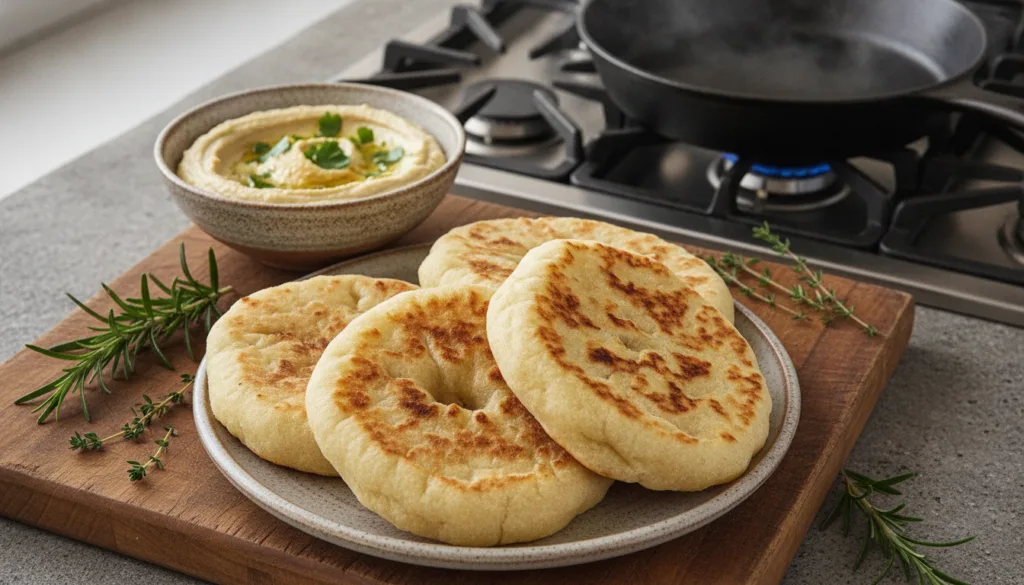
Recipe 5: Stovetop Flatbreads (Naan Style)
These soft, chewy flatbreads cook quickly in a hot skillet, making them a fantastic no-oven option for wraps, dips, or as a side with curries and stews.
Servings: 6 flatbreads
Prep time: 15 minutes + 1 hour rise time
Cook / chill / rest time: 3-4 minutes per flatbread
Ingredients:
- 2 cups all-purpose flour, plus more for dusting
- 1/2 cup warm water (105-115°F / 40-46°C)
- 1 teaspoon active dry yeast
- 1 teaspoon sugar
- 1/2 teaspoon salt
- 1/4 cup plain yogurt (full-fat works best)
- 1 tablespoon olive oil, plus more for brushing
Instructions:
- In a small bowl, combine warm water, yeast, and sugar. Let sit for 5 minutes until foamy.
- In a large bowl, combine flour and salt. Add the yeast mixture, yogurt, and olive oil. Mix until a shaggy dough forms.
- Knead on a lightly floured surface for 5-7 minutes until smooth and elastic.
- Place dough in a lightly oiled bowl, cover, and let rise in a warm place for 1 hour, or until doubled.
- Divide the dough into 6 equal pieces. Roll each piece into an oval or round shape, about 1/8-inch thick.
- Heat a cast iron skillet or heavy-bottomed frying pan over medium-high heat until very hot.
- Place one flatbread in the dry hot skillet. Cook for 1-2 minutes until bubbles appear on the surface and the bottom is golden brown.
- Flip the flatbread and cook for another 1-2 minutes until the second side is golden and slightly charred.
- Remove from skillet and brush with a little melted butter or olive oil (optional). Repeat with remaining dough.
Storage / Serving / Usage Note:
Serve warm with curries, dips, or as a wrap. Store leftovers in an airtight bag for 1-2 days, reheat gently.
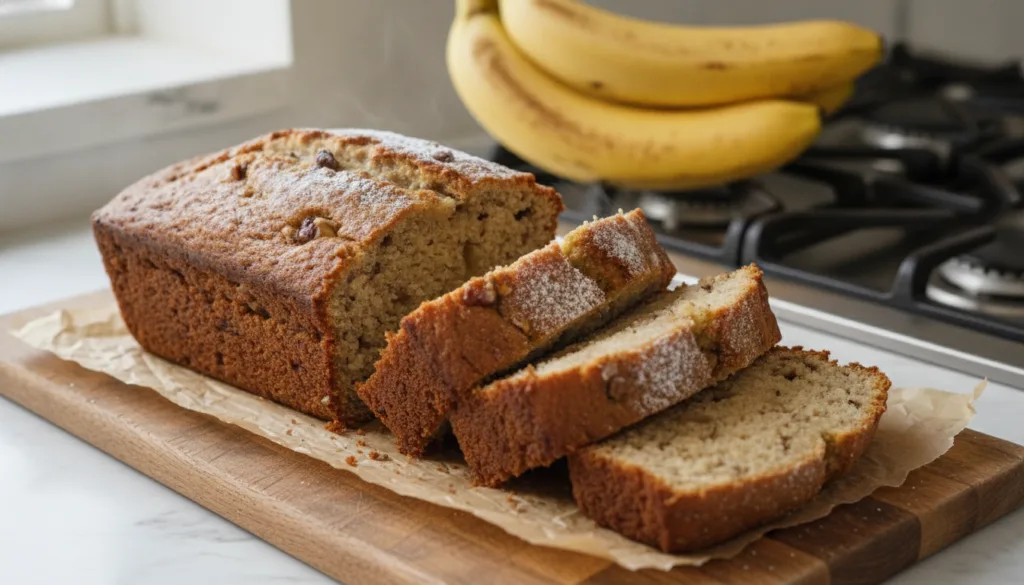
Recipe 6: Stovetop Banana Bread
This beloved quick bread gets a clever stovetop makeover. Moist, sweet, and bursting with banana flavor, it’s a comforting treat that proves you don’t need an oven for delicious results.
Servings: 8-10 slices
Prep time: 15 minutes
Cook / chill / rest time: 45-60 minutes
Ingredients:
- 3 ripe medium bananas, mashed
- 1 3/4 cups all-purpose flour
- 1/2 cup granulated sugar
- 1/4 cup melted unsalted butter
- 1 large egg
- 1 teaspoon baking soda
- 1/2 teaspoon salt
- 1 teaspoon vanilla extract
Instructions:
- In a large bowl, mash the ripe bananas until mostly smooth with a few lumps remaining.
- Stir in the melted butter, granulated sugar, egg, and vanilla extract until well combined.
- In a separate bowl, whisk together the flour, baking soda, and salt.
- Add the dry ingredients to the wet ingredients, mixing gently until just combined. Do not overmix.
- Pour the batter into a lightly greased 8×4-inch loaf pan.
- Set up your large stovetop pot with a trivet. Place the loaf pan inside the pot.
- Cover the large pot tightly and ‘bake’ over the lowest heat for 45-60 minutes. Check for doneness by inserting a wooden skewer into the center – it should come out clean.
- Carefully remove the loaf pan from the pot. Let the bread cool in the pan for 10 minutes before transferring it to a wire rack to cool completely.
Storage / Serving / Usage Note:
Perfect for breakfast or a snack. Store in an airtight container at room temperature for up to 3 days, or freeze for longer.
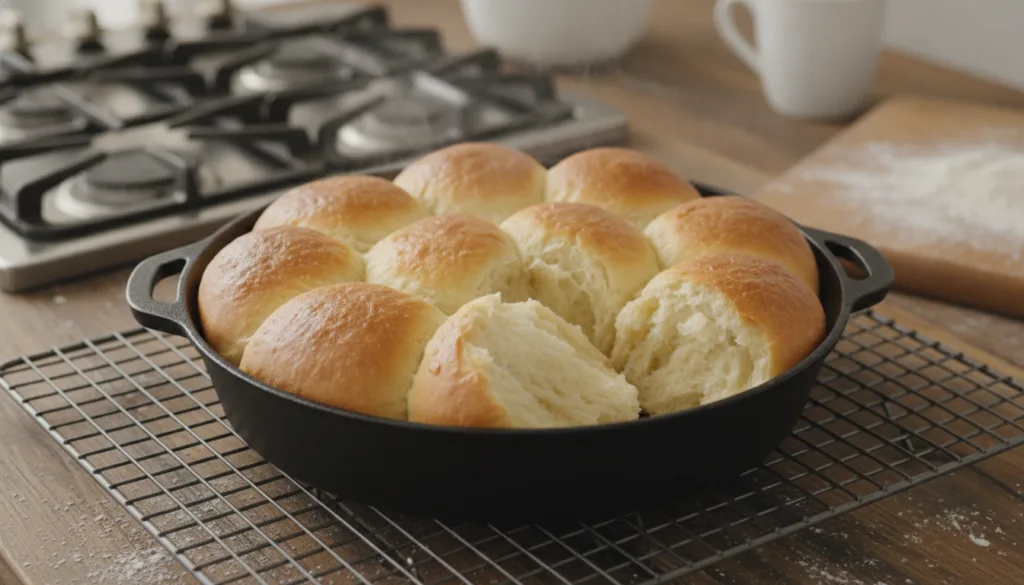
Recipe 7: Stovetop Milk Bread Rolls
These incredibly soft and fluffy milk bread rolls are a delight, and yes, you can bake them on your stovetop! Their tender crumb and lightly sweet flavor make them irresistible.
Servings: 8-12 rolls
Prep time: 30 minutes + 2-3 hours rise time
Cook / chill / rest time: 20-25 minutes
Ingredients:
- 3 cups all-purpose flour
- 1 cup warm milk (105-115°F / 40-46°C)
- 2 1/4 teaspoons active dry yeast
- 1/4 cup granulated sugar
- 1/4 cup unsalted butter, softened
- 1 large egg
- 1 teaspoon salt
Instructions:
- In a large bowl, combine warm milk, yeast, and 1 tablespoon of the sugar. Let sit for 5-10 minutes until foamy.
- Stir in the remaining sugar, softened butter, egg, and salt.
- Gradually add the flour, mixing until a soft dough forms. Knead on a lightly floured surface for 8-10 minutes until smooth and elastic.
- Place dough in a greased bowl, cover, and let rise in a warm place for 1-1.5 hours, or until doubled.
- Punch down the dough and divide it into 8-12 equal pieces. Shape each piece into a smooth roll.
- Arrange the rolls in a lightly greased round cake pan (or another heatproof pan that fits in your stovetop pot). Cover and let proof again for 45-60 minutes, or until nearly doubled.
- Set up your large stovetop pot with a trivet. Place the pan with the rolls inside the pot.
- Cover the large pot tightly and ‘bake’ over the lowest heat for 20-25 minutes, rotating occasionally, until the tops are golden brown.
Storage / Serving / Usage Note:
Serve warm with meals or as a snack. Best enjoyed fresh. Store in an airtight container for up to 2 days.
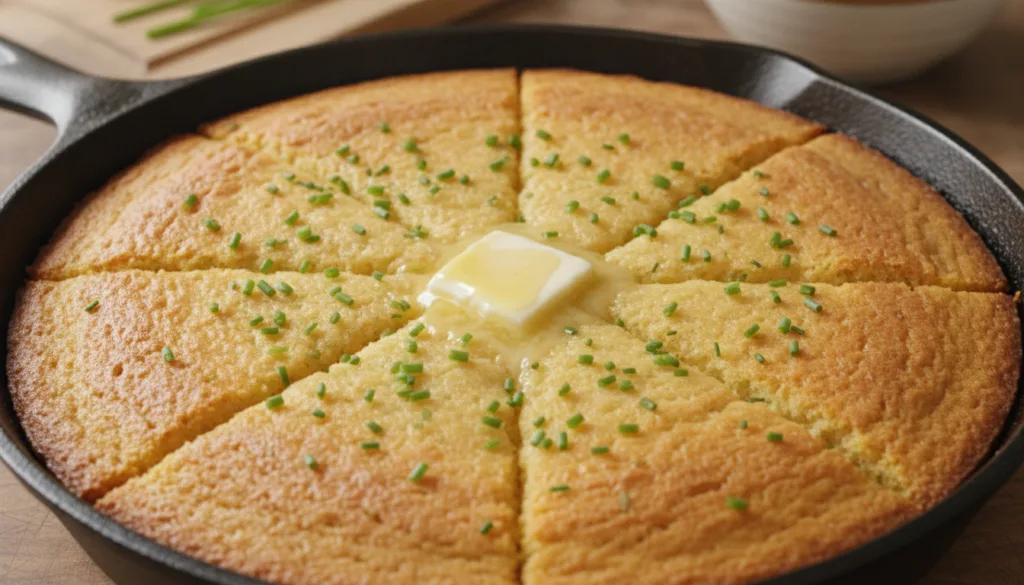
Recipe 8: Stovetop Skillet Cornbread
A classic comfort food, this cornbread bakes beautifully in a cast iron skillet on your stovetop. It’s perfectly moist with a tender crumb, ideal with chili, stews, or a drizzle of honey.
Servings: 6-8
Prep time: 10 minutes
Cook / chill / rest time: 20-25 minutes
Ingredients:
- 1 cup yellow cornmeal
- 1 cup all-purpose flour
- 1 cup buttermilk
- 1 large egg
- 1/4 cup melted unsalted butter, plus more for greasing
- 2 tablespoons granulated sugar
- 1 tablespoon baking powder
- 1/2 teaspoon salt
Instructions:
- Preheat a 9-inch cast iron skillet (or similar heatproof pan) over medium heat for 5 minutes. Add a tablespoon of butter to melt and coat the bottom and sides.
- In a large bowl, whisk together cornmeal, flour, sugar, baking powder, and salt.
- In a separate bowl, whisk together buttermilk, egg, and melted butter.
- Pour the wet ingredients into the dry ingredients and mix until just combined. Do not overmix.
- Pour the batter into the hot, greased skillet.
- Set up your large stovetop pot with a trivet. Place the skillet with the cornbread batter inside the pot.
- Cover the large pot tightly and ‘bake’ over low-medium heat for 20-25 minutes, or until a wooden skewer inserted into the center comes out clean and the top is golden brown.
- Carefully remove the skillet from the pot. Let cool slightly before slicing and serving.
Storage / Serving / Usage Note:
Delicious served warm with chili, soup, or a drizzle of honey. Store leftovers in an airtight container at room temperature for 2-3 days.
Simple Tips for Best Results
- Maintain Low, Consistent Heat: Stovetop baking requires careful heat management. Always use the lowest possible heat setting to prevent burning the bottom while allowing the interior to cook through.
- Use a Heavy-Bottomed Pot: A heavy pot (like cast iron or a thick stainless steel pot) distributes heat more evenly and reduces hot spots.
- Trivet or Foil Balls: Always elevate your loaf pan or baking dish with a trivet or crumpled aluminum foil balls at the bottom of the larger stovetop pot. This creates an air gap, preventing direct heat contact and burning.
- Tight-Fitting Lid: A tight lid is crucial to trap heat and create an oven-like environment. You can wrap your lid in a clean kitchen towel to absorb condensation and prevent it from dripping onto your bread.
- Don’t Peek Too Soon: Resist the urge to lift the lid frequently, especially during the initial baking phase, as this releases heat and can affect the rise and texture of your bread.
- Rotate for Evenness: If your stovetop burner has hot spots, gently rotate the pot halfway through the cooking time to ensure even browning.
- Check for Doneness: Use a wooden skewer or toothpick to test yeast breads and quick breads; it should come out clean. For yeast breads, an instant-read thermometer should register around 200-210°F (93-99°C) in the center.
- Cool Completely: Allow your bread to cool on a wire rack before slicing. This allows the internal structure to set and prevents a gummy texture.
FAQ
What kind of pot should I use for stovetop baking?
A large, heavy-bottomed pot with a tight-fitting lid is best. A Dutch oven or a large stockpot works perfectly, provided your loaf pan or baking dish fits inside with some clearance.
Can I bake cakes or muffins on the stovetop too?
Yes, many quick bread recipes (like banana bread or cornbread) can be adapted. For cakes and muffins, you would use a similar method, ensuring your cake or muffin pan fits inside the larger stovetop pot.
How do I know if my stovetop bread is cooked through?
For yeast breads and quick breads, insert a wooden skewer or toothpick into the center; it should come out clean. For yeast breads, an internal temperature of 200-210°F (93-99°C) is a good indicator.
Final Thoughts
Who knew you could achieve such delightful results without an oven? From the satisfyingly classic stovetop raisin bread to fragrant garlic loaves and quick flatbreads, your culinary horizons are now wider than ever. These no-oven bread recipes are perfect for anyone seeking flexibility, simplicity, or just a fun new baking challenge. So gather your ingredients, fire up your stovetop, and enjoy the incredible aroma of fresh, homemade bread filling your kitchen!