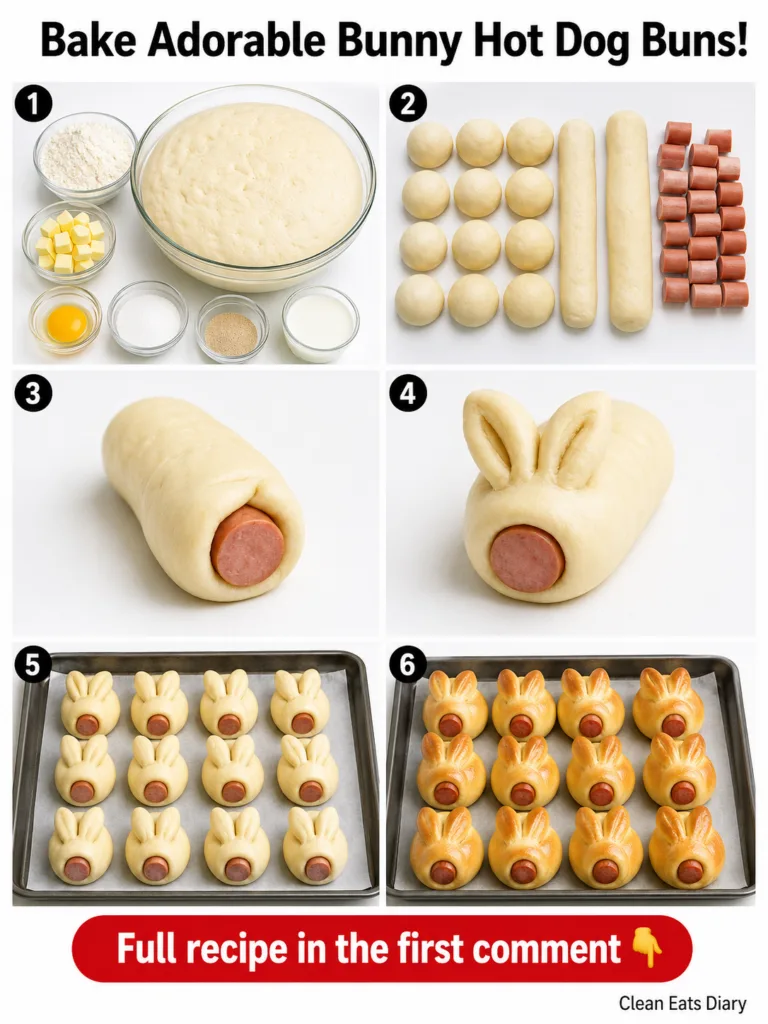
Bake Adorable Bunny Hot Dog Buns! Easy Recipe, Healthier Fun.
Transform ordinary hot dogs into an extraordinary meal with these adorable bunny hot dog buns! Perfect for kids’ parties, lunchboxes, or just a fun family dinner, this recipe brings a touch of whimsy to your table. Homemade hot dog buns are a game-changer, offering a healthier and more delicious alternative to store-bought options, and shaping them into cute bunnies is easier than you think.
Beyond the fun, baking your own buns gives you control over the ingredients, ensuring a wholesome treat. This guide not only walks you through making the charming bunny hot dog buns but also explores other creative and kid-friendly baked goods that are sure to be a hit. Get ready to knead, shape, and bake your way to smiles!
Quick Overview
- Main topic: Fun, shaped baked goods for kids and family
- Best for: Family meals, parties, lunchbox ideas, creative baking
- Number of recipes: 7
- Prep style: Yeast dough baking, shaping
- Reader benefit: Healthier homemade alternatives, engaging family cooking activities, visually appealing food
Recipe 1: Adorable Bunny Hot Dog Buns
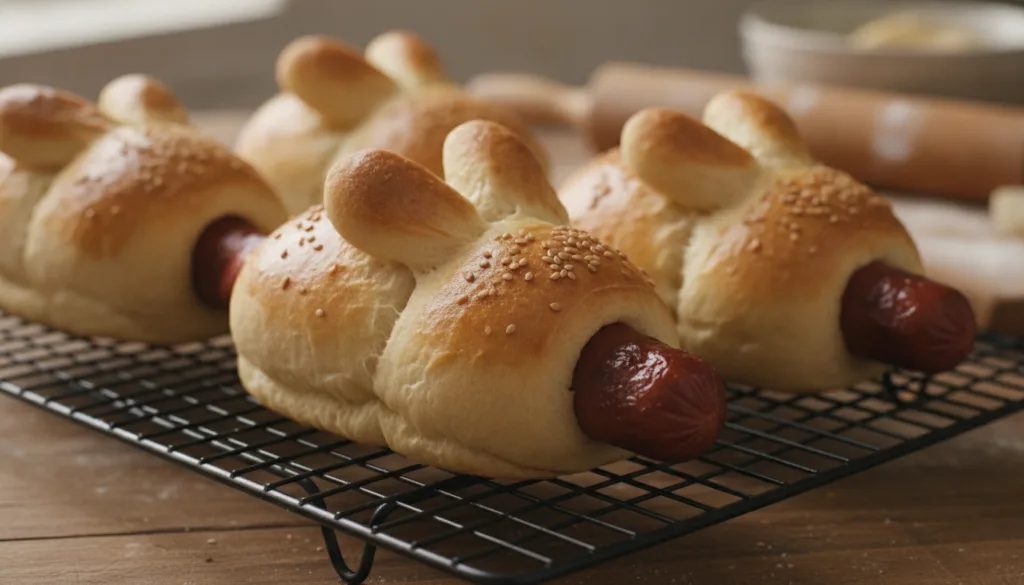
Making these adorable bunny hot dog buns is a delightful project that yields soft, fluffy bread wrapped around savory hot dogs. It’s a fantastic way to involve kids in the kitchen and make mealtime more exciting.
Servings: 6-8 buns
Prep time: 40 minutes (plus 1-1.5 hours rise time)
Cook / chill / rest time: 15-20 minutes bake time
Ingredients:
- 3 cups (360g) all-purpose flour, plus more for dusting
- 1 packet (2 1/4 tsp or 7g) active dry yeast
- 2 tablespoons granulated sugar
- 1 teaspoon salt
- 1 cup (240ml) warm milk (105-115°F / 40-46°C)
- 1 large egg, lightly beaten
- 4 tablespoons (1/4 cup) unsalted butter, melted
- 6-8 hot dogs, cut in half crosswise (12-16 pieces)
- Optional: 1 egg yolk mixed with 1 tablespoon water for egg wash
Instructions:
- In a large bowl, combine warm milk, yeast, and sugar. Let stand for 5-10 minutes until foamy.
- Stir in the melted butter and beaten egg.
- In a separate bowl, whisk together the flour and salt. Gradually add the dry ingredients to the wet ingredients, mixing until a shaggy dough forms.
- Turn the dough out onto a lightly floured surface and knead for 8-10 minutes until smooth and elastic.
- Place the dough in a lightly oiled bowl, cover with plastic wrap or a damp cloth, and let rise in a warm place for 1 to 1.5 hours, or until doubled in size.
- Punch down the dough and divide it into 12-16 equal portions. Roll each portion into a log about 6-7 inches long.
- Take a hot dog half and carefully wrap a dough log around it, spiraling the dough to cover the hot dog. Pinch the ends firmly to seal.
- For the bunny ears, take a small pinch of dough (about 1/2 inch) from one end of the wrapped hot dog bun. Cut it lengthwise about halfway down, then gently shape into two small ears. Repeat for each bun.
- Place the shaped bunny buns on a baking sheet lined with parchment paper, leaving some space between them. If desired, brush with egg wash for a golden sheen.
- Preheat oven to 375°F (190°C). Let the buns rest for another 15 minutes while the oven heats.
- Bake for 15-20 minutes, or until the buns are beautifully golden brown and puffed up.
Storage / Serving / Usage Note: Serve warm with your favorite condiments. Leftovers can be stored in an airtight container at room temperature for up to 2 days or frozen for longer storage.
Recipe 2: Cheesy Star Pull-Apart Bread
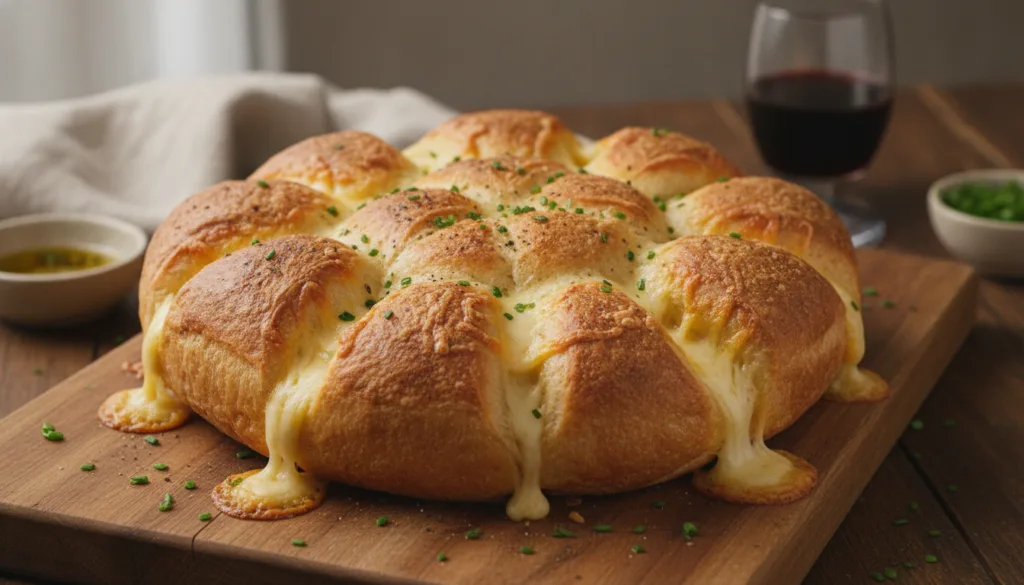
This savory pull-apart bread is a showstopper for any gathering and incredibly fun for kids. Each cheesy segment is soft and delicious.
Servings: 8-10
Prep time: 30 minutes (plus 1 hour rise time)
Cook / chill / rest time: 25-30 minutes bake time
Ingredients:
- 1 batch basic yeast dough (using 3 cups flour as in Recipe 1, without the egg wash)
- 1 cup shredded mozzarella cheese
- 1/2 cup shredded cheddar cheese
- 2 tablespoons melted butter
- 1 teaspoon garlic powder (optional)
- 1 tablespoon chopped fresh parsley (optional, for garnish)
Instructions:
- Prepare the basic yeast dough as in steps 1-5 of Recipe 1.
- Once risen, punch down the dough and divide into 4 equal pieces.
- Roll each piece into a thin circle, about 10-12 inches in diameter.
- Place one dough circle on a parchment-lined baking sheet. Brush with melted butter and sprinkle generously with mixed cheeses and a pinch of garlic powder.
- Layer the next two dough circles, brushing with butter and cheese after each layer. Place the final dough circle on top, but do not add butter or cheese to the very top.
- Place a small, round cookie cutter or glass in the center of the stacked dough (do not press down). Cut the dough from the edge of the glass outwards into 16 equal strips, but do not cut through the center.
- Take two adjacent strips and twist them twice away from each other. Pinch the ends together to form a point, creating a star shape. Repeat with all strips.
- Remove the center glass. Cover loosely and let rise for another 30 minutes.
- Preheat oven to 375°F (190°C). Bake for 25-30 minutes, or until golden brown and cheese is bubbly.
Storage / Serving / Usage Note: Garnish with fresh parsley. Best served warm as an appetizer or side dish. Stores well at room temperature for up to 2 days.
Recipe 3: Mini Pizza Pinwheels

These mini pizza pinwheels are quick, easy, and endlessly customizable. They’re a fantastic way to use leftover dough and satisfy pizza cravings in a fun, portable format.
Servings: 12-16 pinwheels
Prep time: 20 minutes (plus 30 minutes rise time)
Cook / chill / rest time: 15-18 minutes bake time
Ingredients:
- 1/2 batch basic yeast dough (from Recipe 1, using 1.5 cups flour)
- 1/2 cup pizza sauce
- 1 cup shredded mozzarella cheese
- 1/4 cup mini pepperoni slices (or diced ham/veggies)
- 1 teaspoon dried oregano (optional)
Instructions:
- Prepare half the basic yeast dough, allowing it to rise once until doubled.
- Punch down the dough and roll it into a large rectangle, approximately 12×15 inches, on a lightly floured surface.
- Spread the pizza sauce evenly over the dough, leaving a small border around the edges.
- Sprinkle with mozzarella cheese, mini pepperoni (or your chosen toppings), and dried oregano.
- Starting from one long side, tightly roll up the dough into a log.
- Using a sharp knife, cut the log into 1/2 to 3/4-inch thick slices.
- Place the pinwheels cut-side up on a parchment-lined baking sheet.
- Cover loosely and let rise for 15-20 minutes while the oven preheats to 375°F (190°C).
- Bake for 15-18 minutes, or until the edges are golden brown and the cheese is bubbly.
Storage / Serving / Usage Note: Great served warm or at room temperature. Perfect for snacks, lunchboxes, or appetizers. Store in an airtight container for 2-3 days.
Recipe 4: Caterpillar Sausage Rolls
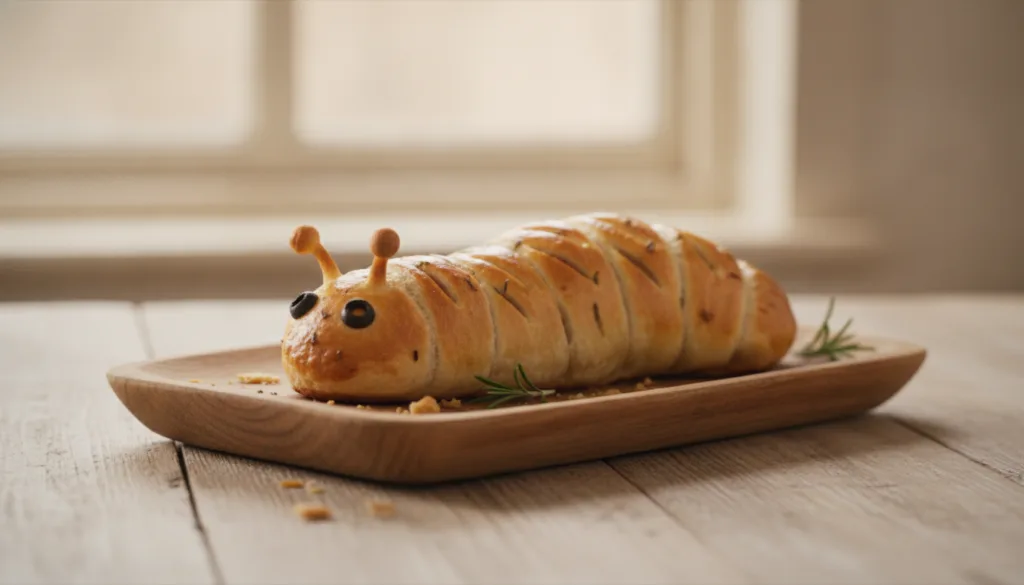
Another fantastic way to make food fun for kids, these caterpillar sausage rolls are easy to hold and delicious. They’re savory, satisfying, and perfect for little hands.
Servings: 6-8 caterpillar rolls
Prep time: 25 minutes (plus 1 hour rise time)
Cook / chill / rest time: 20-25 minutes bake time
Ingredients:
- 1 batch basic yeast dough (from Recipe 1)
- 6-8 breakfast or small dinner sausages (precooked or raw, depending on type)
- 1 egg, beaten (for egg wash)
- Sesame seeds (optional, for garnish)
Instructions:
- Prepare the basic yeast dough as in steps 1-5 of Recipe 1.
- Punch down the dough and divide it into 6-8 equal portions.
- Roll each portion into a rectangle approximately 4×6 inches.
- Place one sausage along one long edge of a dough rectangle. Roll the dough tightly around the sausage, sealing the seam.
- Place the seam-side down on a parchment-lined baking sheet. Repeat for all sausages.
- Using kitchen scissors or a sharp knife, make several shallow cuts (about halfway through the dough) along the top of each roll to create the caterpillar segments. Do not cut completely through.
- Brush the rolls with beaten egg wash and sprinkle with sesame seeds, if using.
- Cover loosely and let rise for 30 minutes while the oven preheats to 375°F (190°C).
- Bake for 20-25 minutes, or until the dough is golden brown and the sausages are cooked through (if using raw sausages).
Storage / Serving / Usage Note: Serve warm with dipping sauces. These are great for packed lunches. Store in an airtight container for 2 days.
Recipe 5: Bear Paw Sweet Buns
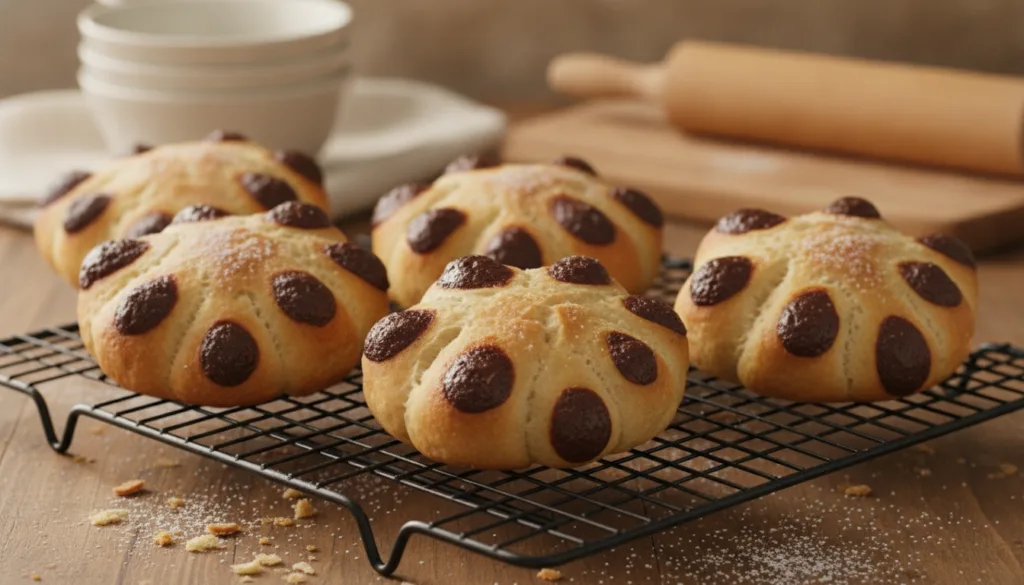
These charming bear paw buns are a sweet variation, perfect for breakfast or a dessert snack. The soft dough and a hint of sweetness make them irresistible, especially with their cute shape.
Servings: 8-10 buns
Prep time: 30 minutes (plus 1.5 hours rise time)
Cook / chill / rest time: 18-22 minutes bake time
Ingredients:
- 1 batch sweet yeast dough (use recipe 1’s dough, but add an extra 1/4 cup sugar and 1 tsp vanilla extract, omit salt)
- 1/2 cup chocolate chips (for claws)
- Optional: Powdered sugar glaze (1/2 cup powdered sugar + 1-2 tsp milk)
Instructions:
- Prepare the sweet yeast dough (as per Recipe 1, with increased sugar and vanilla, no salt), allowing it to rise until doubled.
- Punch down the dough and divide into 8-10 equal portions.
- Take each portion and shape it into a slightly oval