Imagine stepping into your garden, plucking fresh, fragrant herbs for your dinner, all from a compact, beautiful, and highly efficient growing space. For many home gardeners, especially those with limited room, maximizing every square foot is a delightful challenge. The answer? A spiral herb garden! This ingenious design is not just a charming garden feature; it’s a powerhouse of productivity, allowing you to grow a diverse collection of herbs with ease. Whether you’re a seasoned gardener or just starting out, learning how to build and maintain an herb spiral will transform your growing experience, offering a bountiful harvest and a touch of artistic flair to your landscape.
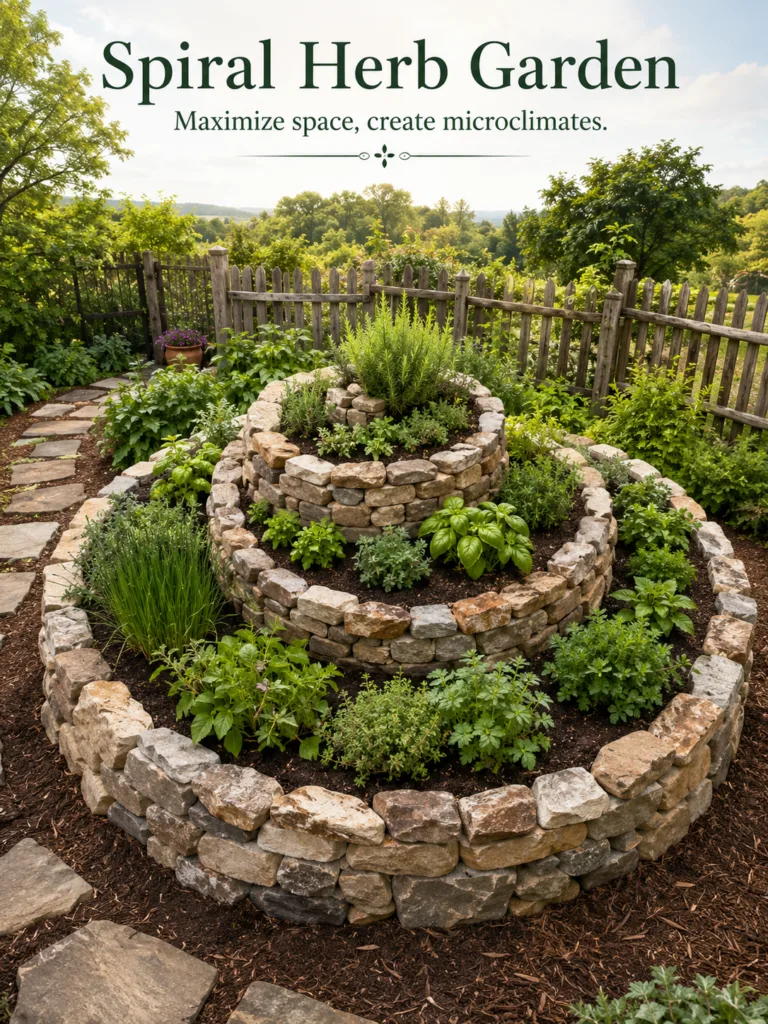
The Magic of a Spiral Herb Garden
At its heart, a spiral herb garden is a three-dimensional, circular garden bed built in a rising spiral. This structure is more than just aesthetically pleasing; it’s a masterclass in horticultural efficiency. By varying height, sun exposure, and drainage, a spiral garden creates multiple distinct microclimates within a very small footprint. The top of the spiral, being highest and most exposed, provides excellent drainage and full sun, ideal for drought-tolerant Mediterranean herbs. As you move down and inward, the soil retains more moisture, and parts of the structure create partial shade, perfect for herbs that prefer a slightly cooler, damper environment. This clever design allows you to cultivate a wider range of herbs in a concentrated area, maximizing your yield and minimizing your effort.
Designing Your Own Herb Spiral
Building an herb spiral is a rewarding DIY project. It typically involves stacking natural materials like stone or brick to create the rising form, then filling it with a custom soil mix tailored to different herb needs.
Choosing the Right Location
Select a spot that receives at least six hours of direct sunlight per day. While the spiral creates varied light conditions, a sunny base ensures that even the shadier spots get enough ambient light. Consider proximity to your kitchen for easy harvesting and good drainage for the entire area.
Gathering Your Materials
- Building Material: Stones, bricks, concrete blocks, or even salvaged broken concrete pieces (known as ‘urbanite’) work well. Natural stones offer a rustic look and excellent thermal mass.
- Soil: You’ll need a good quality potting mix, compost, sand, and possibly gravel for drainage layers.
- Optional: Cardboard or weed barrier for the base, mulch for pathways, and a small pond liner or basin for the very bottom if you plan for water-loving plants.
Building the Structure
Start by marking a circle approximately 6-8 feet in diameter. Lay down your first course of stones in a spiral pattern, gradually building upwards. The highest point should be in the center or slightly off-center, creating a gentle slope as it spirals down to the outer edge. Ensure your walls are stable; you may need to offset stones slightly for interlocking strength or use mortar for a permanent structure. The height can reach 3-4 feet at its peak.
Filling with Soil and Creating Microclimates
This is where the magic truly happens. Customize your soil zones:
- Top/Center (Driest, Sunniest): Fill with a mix high in sand and grit for excellent drainage, mimicking arid conditions.
- Middle (Moderate): Use a rich, well-draining potting mix blended with compost.
- Bottom/Outer Edge (Moistest, Shadiest): Incorporate more compost and loam for better moisture retention. If adding a pond, this is where it would be placed, creating a boggy area.
Selecting the Perfect Herbs for Your Spiral
The beauty of the spiral is accommodating diverse needs. Here are some popular choices:
Rosemary (Rosmarinus officinalis)
The iconic choice for the very top of your spiral. Its woody stems and needle-like leaves thrive in full sun and excellent drainage.
Hardiness: USDA Zones 7-10 as a perennial; often grown as an annual or overwintered indoors in colder zones.
Plant type: Woody evergreen shrub/herb
Exposure: Full sun
Height: 2-6 feet
Spread: 2-4 feet
Practical Tip: Prune regularly to maintain shape and encourage bushy growth, harvesting stems from the top and sides.
Thyme (Thymus vulgaris)
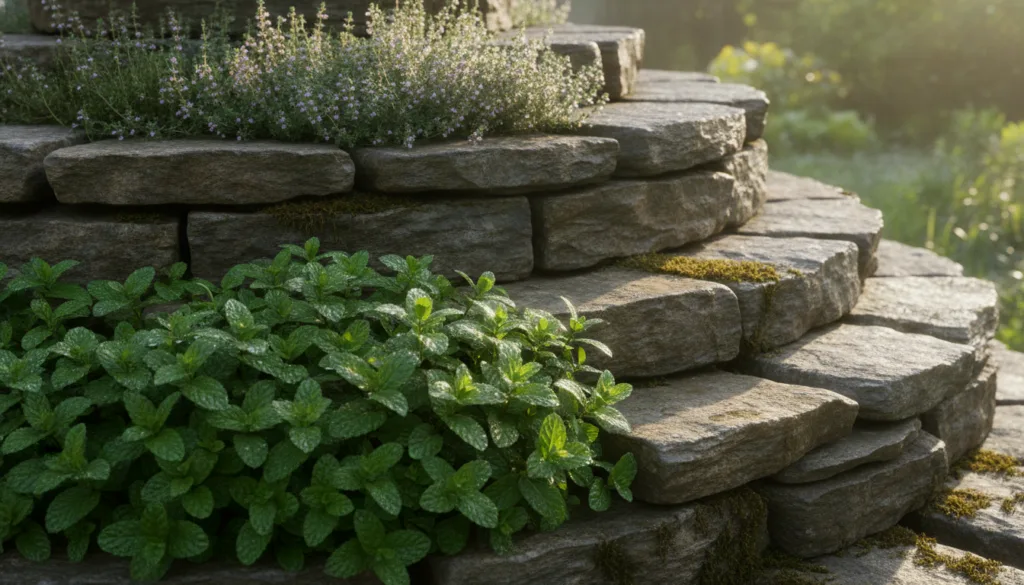
Another sun-loving, drought-tolerant herb perfect for the upper to middle tiers. Thyme enjoys sharp drainage and bright light.
Hardiness: USDA Zones 5-9
Plant type: Perennial subshrub
Exposure: Full sun to partial shade
Height: 6-12 inches
Spread: 12-18 inches
Practical Tip: Shearing back after flowering prevents it from becoming leggy and encourages new, tender growth.
Oregano (Origanum vulgare)
Similar to thyme, oregano prefers sunny, well-drained conditions and will flourish in the middle-to-upper sections of the spiral.
Hardiness: USDA Zones 4-10
Plant type: Perennial herb
Exposure: Full sun
Height: 1-2 feet
Spread: 1-2 feet
Practical Tip: Harvest frequently by pinching back stems to keep the plant compact and flavorful. Allow some to flower for pollinators.
Chives (Allium schoenoprasum)
These oniony delights prefer consistent moisture and good sun, making them suitable for the middle tiers where the soil is richer.
Hardiness: USDA Zones 3-9
Plant type: Perennial bulbous herb
Exposure: Full sun to partial shade
Height: 12-18 inches
Spread: 8-12 inches
Practical Tip: Harvest by snipping outer leaves close to the base. Divide clumps every 3-4 years to maintain vigor.
Basil (Ocimum basilicum)
A warmth-loving herb that thrives in fertile, consistently moist soil and plenty of sun. Place basil in the lower-to-middle sections, ensuring it has enough warmth and protection from cold winds.
Hardiness: Annual (USDA Zones 2-11)
Plant type: Annual herb
Exposure: Full sun
Height: 1-3 feet
Spread: 1-2 feet
Practical Tip: Pinch off flower buds as soon as they appear to encourage more leaf production and extend the harvest. Plant new seeds every few weeks for continuous supply.
Mint (Mentha spp.)
Mint is famously vigorous and moisture-loving. It’s an excellent candidate for the lowest, coolest, and potentially boggiest part of your spiral. However, be cautious: mint can be aggressive. Consider planting it in a pot submerged within the spiral to prevent it from taking over.
Hardiness: USDA Zones 3-11
Plant type: Perennial herb
Exposure: Full sun to partial shade
Height: 1-3 feet
Spread: Indefinite (highly spreading)
Practical Tip: Contain mint in a buried pot or separate area to prevent it from outcompeting other herbs. Regular harvesting of stems also helps manage its spread.
Essential Care for a Thriving Herb Spiral
Once your spiral is built and planted, a few key practices will keep it productive:
Watering
Watering an herb spiral requires a nuanced approach due to the varying microclimates. The top will dry out faster than the bottom. Always check soil moisture with your finger before watering. Water deeply at the top, allowing water to trickle down and irrigate the lower tiers. Drought-tolerant herbs like rosemary and thyme will need less frequent watering once established, while basil and mint will prefer more consistent moisture. Adjust your watering schedule based on weather and plant needs.
Pruning and Harvesting
Regular harvesting is key to healthy, productive herbs. For leafy herbs like basil and mint, pinch off stems just above a leaf node to encourage bushier growth. For woody herbs like rosemary and thyme, trim stems to maintain shape and prevent them from becoming too woody or leggy. Always use clean, sharp pruners.
Pest Management
A diverse herb garden generally experiences fewer severe pest issues. However, keep an eye out for common pests like aphids or spider mites. Inspect your plants regularly, especially the undersides of leaves. If you spot pests, try knocking them off with a strong jet of water or using an insecticidal soap solution. Healthy plants are more resilient to pest attacks.
Common Mistakes to Avoid
- Overcrowding: While the spiral maximizes space, give each herb enough room to reach its mature size for good airflow and light penetration.
- Neglecting Drainage: Even moisture-loving plants hate soggy feet. Ensure your base and upper tiers have proper drainage to prevent root rot.
- Ignoring Microclimates: Don’t plant a sun-loving Mediterranean herb in the shadiest, wettest part of the spiral, and vice versa. Matching plants to their preferred conditions is crucial.
- Using Invasive Herbs Uncontained: Mint, for example, can quickly dominate. Use barriers like buried pots to keep aggressive growers in check.
Regional and Seasonal Considerations
The beauty of the herb spiral is its adaptability. In warmer USDA Zones (7-11), many herbs like rosemary, thyme, and oregano can be perennial, thriving year-round. In colder zones (3-6), you might treat some herbs, like basil, as annuals, replanting them each spring after the last frost. For tender perennials like rosemary, consider covering the top of your spiral with a frost cloth during winter or bringing potted specimens indoors. Always pay attention to your local last and first frost dates and soil temperature when planning your planting schedule. The varied conditions within the spiral can even allow you to push the boundaries a bit, perhaps providing a slightly warmer spot for a tender perennial in a marginally colder zone.
Start Your Own Thriving Herb Spiral
A spiral herb garden is more than just a creative way to grow; it’s a living testament to smart, sustainable gardening. By understanding the principles of microclimates and plant needs, you can create a beautiful, productive space that yields fresh herbs season after season. Gather your materials, choose your favorite herbs, and embark on this rewarding journey. Your kitchen will thank you, and your garden will flourish with new life.