Unveiling Nature’s Core: How to Grow Apple Trees from Seeds
There’s something incredibly rewarding about growing your own food, and starting an apple tree from a tiny seed takes that satisfaction to a whole new level. While it requires a bit of patience and a sprinkle of dedication, the journey of nurturing an apple seed into a thriving tree is a beautiful way to connect with nature’s rhythm. Forget the store-bought saplings for a moment and imagine a future where the apples you harvest come from a tree you started yourself! Let’s dive into the fascinating world of growing apple trees from seeds.
Why Grow Apples from Seed?
Beyond the simple joy of gardening, there are several compelling reasons to embark on this seed-starting adventure:
- A Unique Connection: There’s an unparalleled sense of accomplishment in watching a plant grow from its very beginning.
- Educational Fun: It’s a fantastic project for families and anyone curious about plant life cycles.
- Genetic Surprises: Apples grown from seed won’t be identical to the parent fruit, often leading to new and exciting varieties! This genetic lottery is part of the fun.
- Cost-Effective: All you need are a few apple seeds, and perhaps some basic potting supplies you might already have.
What You’ll Need
Before you begin, gather these simple items:
- Apple seeds (from organic apples if possible, as conventional ones may be treated)
- Paper towels
- A small, sealable plastic bag or container
- A small pot or seed tray
- Well-draining potting mix
- Spray bottle for misting
- A sunny windowsill or grow light
Step-by-Step Guide: Growing Your Apple Tree
Step 1: Preparing Your Apple Seeds (Stratification)
Apple seeds need a period of cold and moisture, known as stratification, to break dormancy and germinate. This mimics winter conditions.
- Extract and Clean: Carefully remove the seeds from your apple. Wash them gently to remove any fruit flesh, which can cause mold.
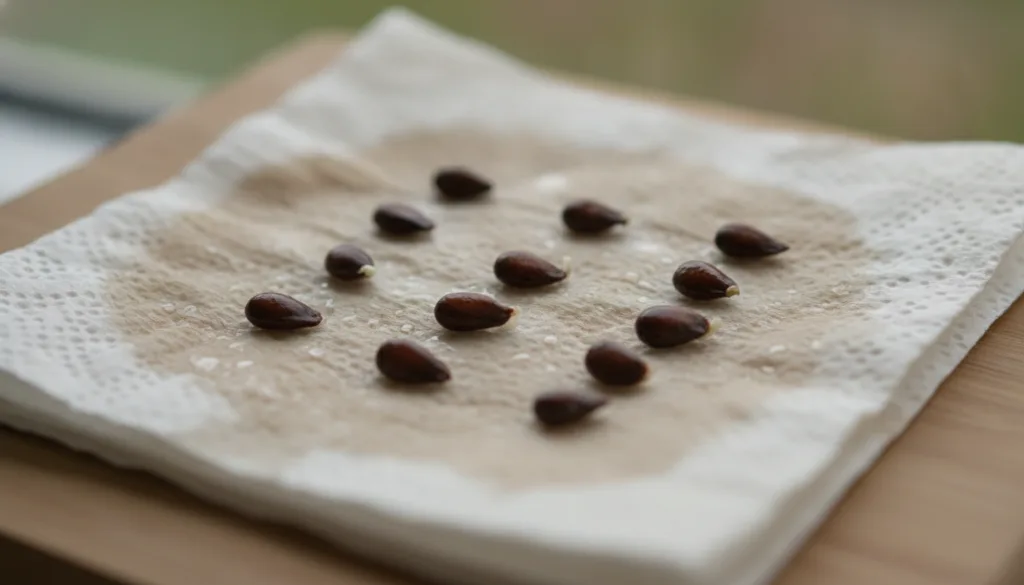
- Moisten Paper Towel: Dampen a paper towel, but don’t make it dripping wet.
- Place Seeds: Place your clean apple seeds on one half of the damp paper towel, then fold the other half over them.
- Seal: Place the folded paper towel with seeds into a sealable plastic bag or a small airtight container. Label it with the date and apple variety (if known).
- Chill: Place the bag in the refrigerator (not the freezer!). The ideal temperature is between 35-45°F (1-7°C).
- Wait (and Check): Leave the seeds in the refrigerator for 60-90 days. Check periodically to ensure the paper towel remains damp and there’s no mold. If mold appears, rinse the seeds, use a fresh paper towel, and return them to the fridge.
Step 2: Planting the Sprouted Seeds
After their cold nap, your seeds should be ready to sprout!
- Prepare Pots: Fill small pots or a seed tray with a good quality, well-draining potting mix.
- Planting: Once you see small roots emerging from the seeds (this might happen in the fridge!), carefully remove them. Plant each sprouted seed about ½ inch deep in the potting mix, with the root facing downwards.
- Water: Gently water the soil until it’s evenly moist.
Step 3: Nurturing Your Seedlings
The first few weeks are crucial for your tiny apple seedlings.
- Light: Place your pots in a location that receives plenty of bright, indirect sunlight, such as a sunny windowsill. If natural light is limited, use a grow light for 12-14 hours a day.
- Temperature: Maintain a consistent room temperature, ideally between 65-75°F (18-24°C).
- Watering: Keep the soil consistently moist but not waterlogged. Use a spray bottle to mist the surface as needed to avoid disturbing the delicate seedlings.
- Thinning: If multiple seeds sprout in one pot, choose the strongest seedling and gently snip the others at the soil line to give the strongest one the best chance.
Step 4: Transplanting to the Garden
Once your apple seedling is about 12-18 inches tall and all danger of frost has passed, it’s time to consider its permanent home.
- Harden Off: Gradually acclimate your seedling to outdoor conditions over a week or two. Start with a few hours in a sheltered outdoor spot, increasing exposure daily.
- Choose a Spot: Select a location in your garden that receives at least 6-8 hours of direct sunlight per day and has well-draining soil.
- Prepare Soil: Dig a hole twice as wide as the root ball and just as deep. Amend the soil with compost to improve fertility and drainage.
- Plant: Carefully remove the seedling from its pot and place it in the center of the hole. Backfill with soil, gently firming it around the roots.
- Water Thoroughly: Give your newly transplanted tree a good drink of water.
Step 5: Ongoing Care for Your Young Apple Tree
- Watering: Young apple trees need consistent watering, especially during dry spells. Water deeply a few times a week, rather than light daily sprinkles.
- Fertilizing: Once established, you can apply a balanced, organic fertilizer in spring.
- Pest and Disease Control: Monitor your tree for any signs of pests or diseases. Healthy soil and proper care are your best defense.
- Pruning: Begin light pruning after the first year to shape the tree and encourage strong growth.
Things to Keep in Mind
- Genetic Variation: Remember, apples grown from seed are genetically unique. They may not produce fruit identical to the parent apple, and the quality can vary. This is often seen as an exciting discovery!
- Patience is Key: Apple trees grown from seed can take 7-10 years (or even longer) to bear fruit. This is a long-term project!
- Pollination: Most apple varieties need another apple tree (of a different variety) nearby for cross-pollination to produce fruit.
Embrace the Journey
Growing an apple tree from seed is a commitment, but it’s one that promises a unique and deeply satisfying connection to the natural world. From the thrill of seeing that first tiny sprout to the anticipation of one day tasting fruit from your very own tree, it’s an adventure worth undertaking. So, grab those seeds, embrace the process, and get ready to unveil nature’s core in your own backyard!