Ready to unlock the secret to naturally rosy cheeks and skin that glows from within? ✨ We all dream of that healthy, radiant flush, and it often feels like it requires a cabinet full of expensive products. But what if we told you the secret could be found right in your kitchen, with just a few simple, natural ingredients?
Here at Beauty – Thảo, Ngọc, we believe in embracing natural beauty solutions that are both effective and kind to your wallet. That’s why we’re so excited to share our easy DIY Natural Glow Balm recipe! Say goodbye to complicated routines and hello to a beautiful, healthy glow that radiates effortlessly. Imagine having plump, radiant skin that looks like you just had a wonderful day outdoors, all thanks to your own homemade creation.
Why Choose a DIY Glow Balm?
In a world full of chemical-laden cosmetics, opting for a DIY glow balm offers numerous benefits:
- Natural Ingredients: You control exactly what goes onto your skin, ensuring it’s free from harsh chemicals, synthetic fragrances, and preservatives.
- Cost-Effective: High-end glow products can be pricey. This DIY alternative uses affordable, everyday ingredients that you might already have.
- Customizable: Adjust the color, scent, and moisturizing properties to perfectly suit your skin type and preferences.
- Nourishing: Unlike some commercial products that can dry out your skin, this balm is packed with moisturizing and skin-loving ingredients.
- Empowering: There’s a wonderful sense of accomplishment in creating your own beauty products!
Essential Ingredients for Your Rosy Cheeks Secret
The beauty of this balm lies in its simplicity. You only need a few key ingredients:
1. The Base: Nourishing Waxes and Butters
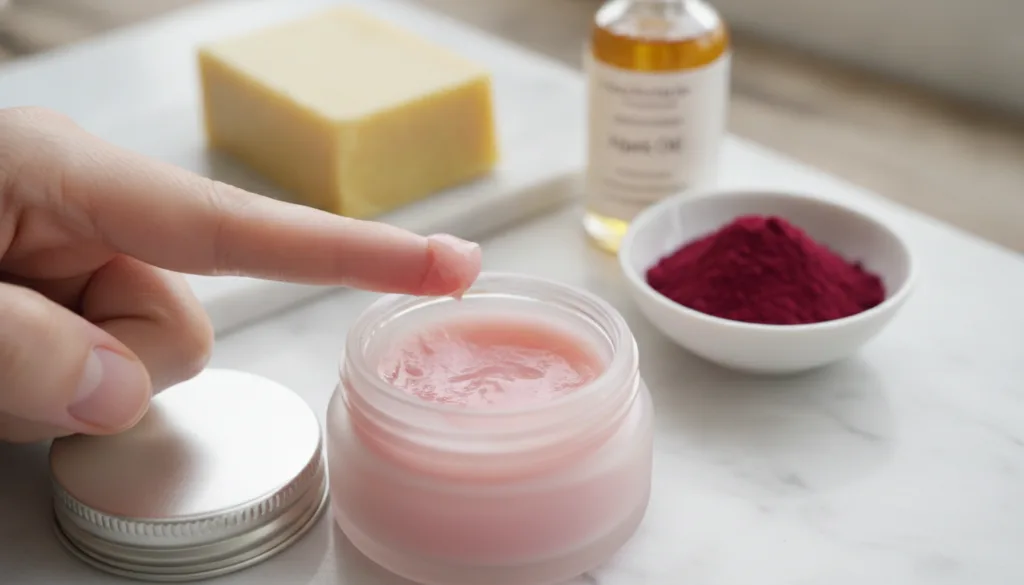
- Beeswax Pellets (1 tablespoon): Provides structure to the balm, making it solid yet spreadable. It also creates a protective barrier on the skin, locking in moisture. For a vegan option, you can use Candelilla wax or Carnauba wax.
- Shea Butter (1 teaspoon): A rich emollient that deeply moisturizes and softens the skin. It’s packed with vitamins A and E, known for their skin-healing properties.
2. The Carrier Oil: Liquid Gold for Your Skin
- Jojoba Oil (2 tablespoons): Mimics the skin’s natural sebum, making it an excellent moisturizer for all skin types, even oily or acne-prone. It’s non-comedogenic and quickly absorbed. You can also use sweet almond oil or apricot kernel oil.
3. The Rosy Tint: Natural Colorants
- Beetroot Powder (1/4 – 1/2 teaspoon): This is your secret to that gorgeous, natural rosy hue! Beetroot powder is a safe, plant-based colorant that gives a lovely pink-red tint. Start with a small amount and add more for a deeper color.
- Alternatively: Hibiscus Powder: Can also provide a beautiful reddish tint.
4. Optional Add-ins: Boost & Scent
- Vitamin E Oil (5-10 drops): A powerful antioxidant that helps preserve the balm and offers additional skin benefits, promoting healing and reducing UV damage.
- Essential Oils (1-2 drops, optional): For a lovely scent and added benefits. Choose skin-friendly oils like lavender (calming), rosehip (rejuvenating), or geranium (balancing). Always use high-quality, pure essential oils and perform a patch test first.
Step-by-Step: Crafting Your Glow Balm
This recipe is incredibly easy to follow, even for beginners!
-
Melt the Base
In a small, heat-safe glass jar or bowl, combine the beeswax pellets, shea butter, and jojoba oil. Create a double boiler by placing this jar into a pot with about an inch or two of simmering water. Gently heat until all ingredients are completely melted and combined. Stir occasionally.
-
Remove from Heat & Add Color
Once melted, carefully remove the jar from the heat. Now it’s time to add your beetroot powder. Start with 1/4 teaspoon and stir well until the color is evenly distributed. If you desire a deeper rosy tint, add another 1/4 teaspoon and mix thoroughly. Remember, the color will intensify slightly as it cools.
-
Add Optional Boosters
If using, stir in your vitamin E oil and any essential oils. Mix gently to ensure everything is incorporated.
-
Pour and Set
Carefully pour the liquid balm into a small, clean, airtight container or a lip balm tube. Small tins, recycled lip balm containers, or tiny jars work perfectly. Allow the balm to cool and solidify completely at room temperature, which usually takes a couple of hours. You can speed up the process by placing it in the refrigerator for 30 minutes.
How to Use Your Homemade Rosy Glow Balm
Once your balm has set, it’s ready to bring that natural glow to your skin!
- For Rosy Cheeks: Gently swirl your fingertip over the balm, pick up a small amount, and dab it onto the apples of your cheeks. Blend outwards and upwards with your finger for a natural, healthy flush. Layer for more intensity.
- For Hydrated Lips: Use it as a nourishing lip balm for a hint of color and deep hydration.
- On Eyelids: For a subtle, dewy sheen on your eyelids without glitter.
- As a Highlighter: Apply a tiny bit to the high points of your face, like your brow bone or cupid’s bow, for a natural, radiant highlight.
Tips for Customization & Storage
- Adjust Color: Experiment with different amounts of beetroot powder or even try a tiny pinch of cocoa powder for a bronzy glow.
- Different Oils: Explore other nourishing carrier oils like argan oil for anti-aging benefits or rosehip oil for its regenerative properties.
- Shelf Life: Stored in an airtight container in a cool, dark place, your DIY glow balm should last for 3-6 months. Always check for any changes in scent or texture, and if in doubt, make a fresh batch!
Embracing natural beauty doesn’t have to be complicated or expensive. This DIY Natural Glow Balm is a testament to how simple ingredients can create powerful, beautiful results. You’re not just making a beauty product; you’re crafting a little pot of self-care and confidence.
What natural ingredients do you love for a healthy glow? Share your favorite tips and experiences in the comments below! We love hearing from our amazing community!