Unlock Youthful Radiance with Our DIY Collagen Cream!
Hey beauty besties! Who else dreams of turning back time and rocking that youthful, radiant glow? ✨ We all want skin that feels fresh, firm, and fabulous, right? Well, guess what – you don’t need fancy, expensive treatments to get there. Your secret weapon might just be waiting in your kitchen!
Today, we’re spilling the beans on an incredible homemade ‘Collagen Cream’ recipe designed to refresh, rejuvenate, and give your skin that luminous look we all adore. It’s natural, affordable, and super easy to whip up. Ready to discover the magic of DIY skincare and boost your skin’s natural radiance?
What is Collagen and Why Does Your Skin Love It?
Before we dive into our amazing DIY recipe, let’s talk a little about collagen. Collagen is like the scaffolding of our skin – it’s a protein that provides structure, elasticity, and firmness. Think of it as what keeps your skin plump and smooth!
As we get older, our natural collagen production starts to slow down, leading to those pesky fine lines, wrinkles, and a loss of firmness. While we can’t create actual collagen molecules to apply topically at home, we can use natural ingredients that support our skin’s health, hydrate deeply, and provide a temporary firming effect, helping our skin look and feel more youthful.
Why Go DIY for Your Collagen Boost?
Choosing to make your own skincare comes with a ton of amazing benefits:
- Natural Ingredients: You know exactly what’s going onto your skin – no hidden chemicals, artificial fragrances, or questionable preservatives.
- Cost-Effective: Save your pennies! Many DIY ingredients are kitchen staples or easily found at your local grocery store, much cheaper than high-end creams.
- Customizable: Tailor the ingredients to your skin type and preferences.
- Fresh & Potent: You’re making it fresh, ensuring the active ingredients are at their peak performance.
Star Ingredients for Your DIY Collagen Cream
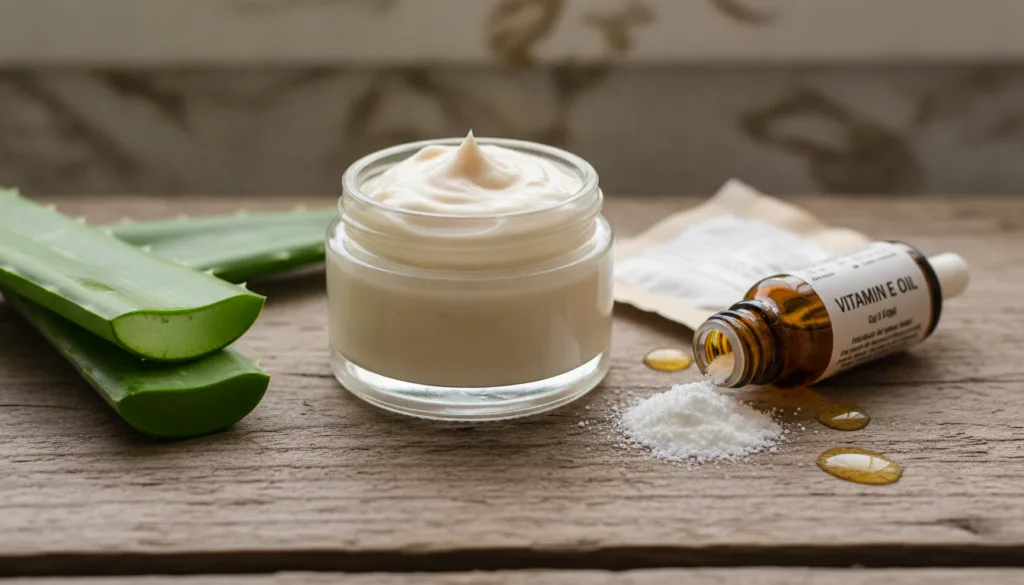
Our special blend uses simple, powerful ingredients that work together to nourish your skin:
Gelatin Powder
- Not actual collagen, but gelatin is derived from collagen and is packed with amino acids. When applied topically, it can create a temporary tightening and firming effect, making your skin feel smoother and look more lifted.
Aloe Vera Gel
- A true skincare superstar! Aloe vera is incredibly soothing, hydrating, and packed with vitamins and antioxidants. It helps heal, moisturize, and calm irritated skin, promoting a healthy glow.
Vitamin E Oil
- A potent antioxidant that helps protect your skin from environmental damage and supports cell regeneration. It’s fantastic for moisturizing and can help improve the appearance of scars and dark spots.
Sweet Almond Oil (or Jojoba Oil)
- Lightweight yet deeply moisturizing, these carrier oils are rich in vitamins and fatty acids. They nourish the skin without clogging pores, leaving it soft and supple.
Rosewater (or Distilled Water)
- Rosewater is a gentle, natural toner that helps balance the skin’s pH, reduces redness, and adds a beautiful, subtle fragrance. Distilled water works just as well as a pure base.
Your DIY Collagen Cream Recipe
Ready to create your skin’s new best friend? Here’s how:
What You’ll Need:
- 1 teaspoon unflavored gelatin powder
- 2 tablespoons hot (not boiling) rosewater or distilled water
- 2 tablespoons pure aloe vera gel
- ½ teaspoon Vitamin E oil
- 1 teaspoon sweet almond oil (or jojoba oil)
- Small, airtight container (sterilized)
- Small whisk or spoon
Step-by-Step Instructions:
- Dissolve Gelatin: In a small, clean bowl, combine the gelatin powder with the hot rosewater (or distilled water). Stir well until the gelatin is completely dissolved and no lumps remain. Let it cool slightly, about 5 minutes.
- Add Oils & Gel: Once the gelatin mixture has cooled down (it should still be liquid but not hot), add the aloe vera gel, Vitamin E oil, and sweet almond oil.
- Whisk Together: Whisk vigorously until all ingredients are thoroughly combined and you have a smooth, creamy consistency. It might look a little lumpy at first, but keep whisking!
- Transfer & Store: Carefully spoon your freshly made collagen cream into your sterilized airtight container.
- Chill: Place the container in the refrigerator for at least 2-3 hours, or until the cream has set and thickened.
How to Use Your DIY Collagen Cream
Once your cream is ready, here’s how to incorporate it into your routine:
- Cleanse: Start with a freshly cleansed face.
- Apply: Take a small amount of the cream (a pea-sized amount is usually enough) and gently massage it into your face and neck using upward strokes.
- Frequency: Use it once or twice a day, ideally in the morning and evening, after your toner and serum.
- Storage: Always store your DIY cream in the refrigerator to keep it fresh. It should last for about 1-2 weeks. If you notice any change in color, smell, or texture, it’s best to discard it and make a fresh batch.
Tips for Best Results & Glowing Skin
- Patch Test: Always do a patch test on a small area of your skin first, especially if you have sensitive skin or are prone to allergies.
- Consistency is Key: Like with any skincare routine, regular use will give you the best visible results.
- Hydrate from Within: Remember that beautiful skin starts from the inside out! Drink plenty of water and eat a balanced diet rich in antioxidants.
- Sun Protection: Always follow up with a broad-spectrum sunscreen during the day to protect your skin from UV damage, which can break down collagen.
Embrace Your Natural Glow!
Making your own DIY Collagen Cream is a wonderful way to take control of your skincare routine, use natural ingredients, and nourish your skin without breaking the bank. Get ready to enjoy a visibly refreshed, firmer, and more radiant complexion!
Give this recipe a try and let us know how your skin loves it in the comments below! Don’t forget to share your glow-up journey with your beauty besties!