Ever wondered if you could turn those everyday kitchen scraps into fresh, delicious produce? Good news, you absolutely can! 🌱 Regrowing your favorite vegetables from their roots and bases is not only incredibly easy and rewarding, but it’s also a fantastic way to reduce waste and enjoy a continuous supply of homegrown food. Imagine crisp lettuce or vibrant green onions, all sprouting from something you might have otherwise tossed away!
This simple act of giving new life to vegetable scraps is a delightful step towards a more sustainable kitchen and a greener garden. It’s perfect for beginners, requires minimal space, and offers a fun, educational activity for all ages. Let’s dive into how you can start your own regrowing adventure today!
Why Regrow Your Veggies? The Benefits Are Abundant!
Before we get our hands (a little) wet, let’s talk about why regrowing veggies is such a wonderful idea:
- Reduce Food Waste: This is a big one! Instead of throwing away the ends of your vegetables, you’re giving them a second chance at life.
- Save Money: Who doesn’t love free food? You’ll cut down on your grocery bill by extending the life of your produce.
- Fresh & Organic Produce: Enjoy fresh, pesticide-free vegetables right from your kitchen counter or garden. You control what goes into them!
- Easy & Fun: It’s a simple project that yields quick results, making it incredibly satisfying, especially for new gardeners or kids.
- Sustainable Living: Embrace a more eco-friendly lifestyle by minimizing waste and maximizing your resources.
- Educational: It’s a fantastic way to learn about plant growth cycles firsthand.
Getting Started: What You’ll Need
You probably have everything you need already!
- Vegetable Scraps: The stars of our show!
- Small Containers: Glasses, jars, plastic containers, or shallow bowls work perfectly.
- Water: Tap water is fine.
- Sunny Spot: A windowsill or a bright corner in your kitchen.
- Potting Soil (optional): For when you’re ready to transplant them.
8 Common Veggies Perfect for Beginners
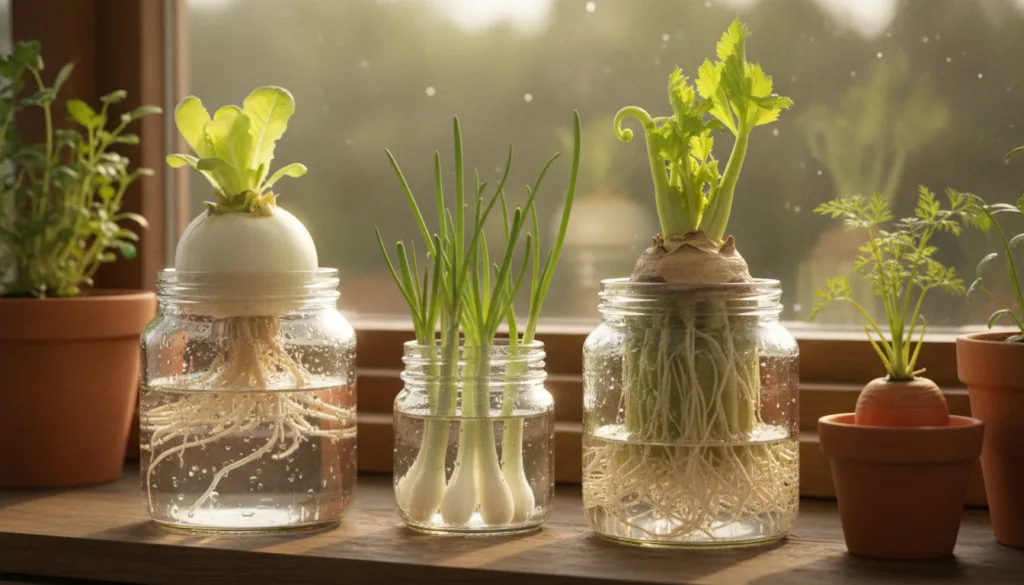
Our visual guide highlights these easy-to-regrow vegetables. Here’s how you can start them:
1. Green Onions (Scallions)
Perhaps the easiest of all! Simply leave about an inch of the white root end attached. Place it root-down in a small glass with about an inch of water. Change the water daily. New green shoots will appear in just a few days! Once they reach a few inches, you can harvest them or plant them in soil.
2. Romaine Lettuce
Cut the bottom 2-3 inches of the head. Place the base in a shallow bowl with about an inch of water. Mist the top daily. New leaves will start forming from the center in about a week. Once roots develop and leaves are visible, plant it in soil for a larger harvest.
3. Celery
Cut off the bottom 2 inches of the celery stalk. Place it in a shallow bowl with about an inch of water. New shoots will emerge from the center and roots will grow from the bottom. Once established, plant it in your garden or a pot.
4. Bok Choy
Similar to lettuce and celery, cut off the base of the bok choy, leaving about an inch. Place it in a shallow dish with water. New leaves will grow from the center. Transplant into soil once roots and new growth are significant.
5. Cabbage
Cut off the bottom core of a cabbage head, leaving a few outer leaves attached. Place it in a shallow bowl of water. New leaves will grow from the center. You might not get a full head of cabbage, but you’ll get plenty of fresh leaves for salads and stir-fries.
6. Carrot Tops
While you won’t regrow carrots themselves from their tops, you can grow lovely carrot greens! Cut off the top inch of a carrot. Place it cut-side down in a shallow dish with a small amount of water. New green shoots will appear quickly, perfect for garnishes or adding to salads.
7. Ginger
Look for a piece of ginger root with visible ‘eyes’ or buds (they look like little bumps). Plant it directly in moist potting soil with the eyes facing upwards. Keep the soil consistently damp but not waterlogged. It takes a bit longer, but eventually, you’ll see shoots emerge, and new ginger will form underground.
8. Garlic
If a garlic clove starts to sprout in your kitchen, don’t throw it out! Plant the sprouted clove in potting soil, pointed end up, about an inch deep. Keep the soil moist. You’ll soon have delicious garlic greens (scapes) that taste milder than the bulb itself, perfect for cooking!
Tips for Success
- Change Water Daily: Fresh water prevents mold and ensures your scraps get enough oxygen.
- Plenty of Light: Place your regrowing veggies in a sunny spot, like a windowsill.
- Patience is Key: Some veggies sprout faster than others. Don’t get discouraged if it takes a few days.
- Transition to Soil: For larger, more sustained harvests, transplant your rooted scraps into good quality potting soil once they’ve developed a strong root system and some new growth.
- Organic Scraps: If possible, use organic vegetables to avoid any lingering pesticides.
Beyond the Kitchen Counter: Planting in Soil
Once your vegetable scraps have developed a good set of roots (usually 1-2 inches long) and some new foliage, they are ready for their permanent home. Prepare a pot with well-draining potting mix or a spot in your garden. Plant them carefully, ensuring the roots are covered and the new growth is above the soil line. Water them well, and continue to provide plenty of sunlight.
Ready to Start Your Regrowing Journey?
Regrowing vegetables from scraps is a simple, satisfying way to connect with your food and embrace a more sustainable lifestyle. It’s a small effort that yields fresh rewards and helps reduce waste, making your garden and your kitchen a little greener.
Which veggie will you try regrowing first, or what have you had success with? Share your tips and triumphs in the comments below! We’d love to hear about your homegrown adventures. Happy gardening!