Dreaming of fresh, homegrown produce but short on space? You’re not alone! Many aspiring gardeners face the challenge of limited yard space, apartment living, or simply wanting a more manageable way to cultivate their green thumb. The good news is, you don’t need acres of land to enjoy the bounty of your own garden.
This guide introduces you to a surprisingly effective and budget-friendly solution: laundry basket gardening! Yes, those everyday plastic baskets you use for clothes can be transformed into fantastic mini-gardens, perfect for growing a variety of vegetables, herbs, and even some fruits.
Whether you’re a complete beginner or an experienced gardener looking for an innovative container solution, this comprehensive guide is for you. We’ll walk you through everything from selecting the right baskets to planting, caring for your crops, and harvesting your delicious produce. Get ready to turn your balcony, patio, or small backyard into a thriving home harvest hub!
Why This Guide Matters
- Beginner-friendly: Simple techniques make gardening accessible to everyone.
- Saves space: Ideal for small balconies, patios, or urban dwellings.
- Budget-friendly: Utilizes common household items, reducing initial costs.
- Prevents common mistakes: Learn best practices for container gardening success.
- Helps plants grow healthier: Focuses on optimal conditions for basket-grown plants.
- Portable: Easily move your plants to follow the sun or protect from harsh weather.
- Versatile: Suitable for a wide range of vegetables, herbs, and small fruits.
- Encourages sustainability: Repurpose household items and grow your own food.
Tools & Materials Needed
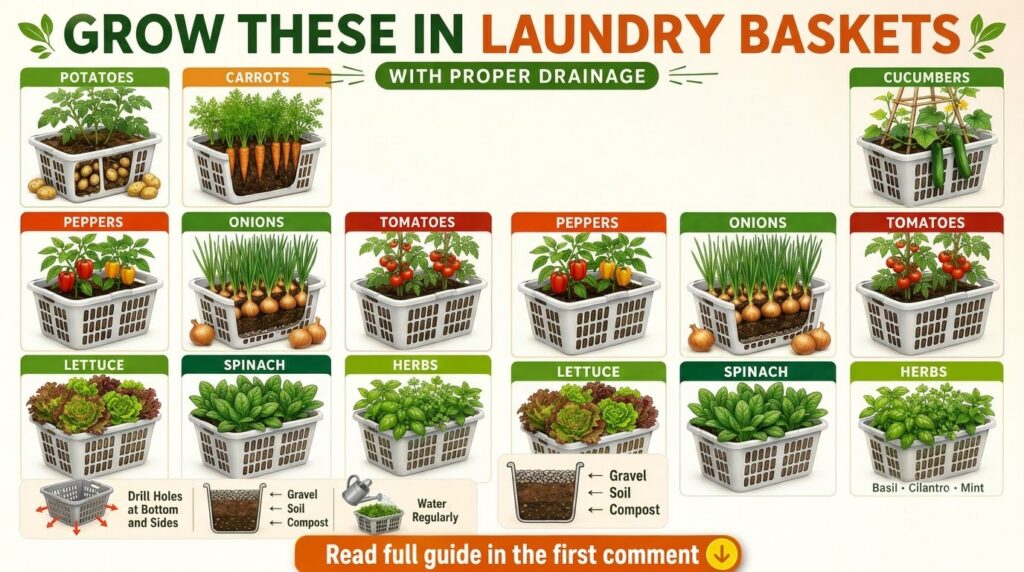
- Sturdy plastic laundry baskets (with ample drainage holes, or make your own)
- Potting mix (high-quality, well-draining)
- Organic compost or aged manure
- Pebbles or broken pottery (for extra drainage, optional)
- Garden gloves
- Small hand trowel
- Watering can or hose with a gentle sprayer
- Selected seeds or seedlings (e.g., lettuce, spinach, herbs, potatoes, peppers)
- Organic liquid fertilizer (optional)
- Pruning shears (for harvesting)
Step-by-Step Guide: Your Laundry Basket Garden
Step 1: Choose and Prepare Your Laundry Baskets
- What to do: Select sturdy plastic laundry baskets. Ensure they have plenty of drainage holes. If not, you’ll need to drill additional holes (at least 1/2 inch in diameter) along the bottom and lower sides.
- Why it matters: Good drainage is crucial in container gardening to prevent waterlogging, which can lead to root rot and kill your plants.
- Common mistakes to avoid: Using baskets with too few or no drainage holes. This is the fastest way to drown your plants.
- Helpful tips: Darker baskets absorb more heat, which can be beneficial for some warm-season crops but might dry out faster. Lighter baskets reflect heat, ideal for cooler weather crops or hot climates.
Step 2: Create a Drainage Layer (Optional but Recommended)
- What to do: Place a 1-2 inch layer of pebbles, gravel, or broken pottery at the bottom of the basket.
- Why it matters: This layer helps ensure that excess water can easily escape the soil, preventing it from sitting at the roots.
- Common mistakes to avoid: Using too much drainage material, which reduces the space for soil and roots.
- Helpful tips: You can also line the bottom with a piece of landscape fabric or an old t-shirt to prevent soil from washing out through larger holes, while still allowing water to pass.
Step 3: Fill with Quality Potting Mix
- What to do: Fill your prepared baskets with a high-quality, well-draining potting mix. Incorporate a good amount of organic compost or aged manure (about 1 part compost to 3-4 parts potting mix) for added nutrients.
- Why it matters: Garden soil is often too dense for containers and can compact, suffocating roots. Potting mix provides the ideal balance of aeration and moisture retention. Compost enriches the soil, feeding your plants naturally.
- Common mistakes to avoid: Using heavy garden soil or cheap, low-quality potting mixes that lack nutrients and drainage.
- Helpful tips: Leave about 1-2 inches of space from the rim of the basket to allow for watering without overflow and future mulching.
Step 4: Plant Your Seeds or Seedlings
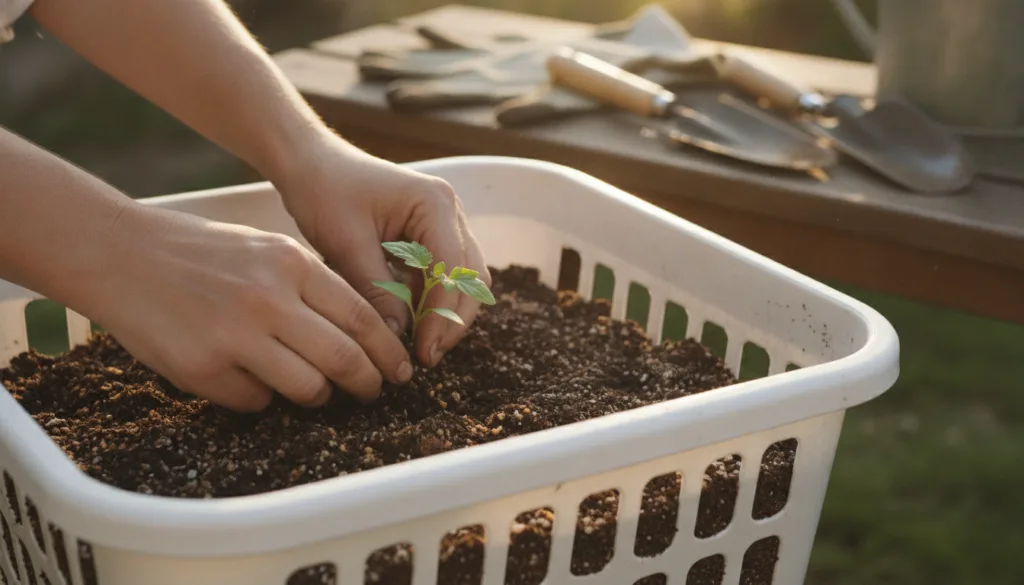
- What to do: Plant your chosen seeds or seedlings according to their specific depth and spacing requirements. For seeds, follow package instructions. For seedlings, gently remove them from their nursery pots and plant them at the same depth they were previously growing.
- Why it matters: Correct planting depth and spacing ensure plants have enough room to grow and access nutrients, preventing overcrowding and competition.
- Common mistakes to avoid: Planting too many plants in one basket, leading to stunted growth. Planting seedlings too deep or too shallow.
- Helpful tips: For larger plants like tomatoes or peppers, one plant per basket is often best. For leafy greens or herbs, you can plant multiple smaller plants. Consider companion planting within a single basket if appropriate.
Step 5: Water Thoroughly and Place in Sunlight
- What to do: After planting, water your baskets thoroughly until water drains from the bottom. Then, place your baskets in a location that receives the appropriate amount of sunlight for your chosen plants (most vegetables need 6-8 hours of direct sun).
- Why it matters: Initial watering settles the soil around the roots, and adequate sunlight is essential for photosynthesis and healthy growth.
- Common mistakes to avoid: Underwatering immediately after planting, leaving air pockets around roots. Placing sun-loving plants in shade or shade-loving plants in scorching sun.
- Helpful tips: Observe how quickly your baskets dry out. Containers generally need more frequent watering than in-ground gardens.
Expert Gardening Tips
- Water Wisely: Check soil moisture daily by sticking your finger an inch or two into the soil. Water when the top inch feels dry. Water deeply until you see drainage, rather than frequent shallow watering.
- Rotate Baskets: If your plants aren’t getting even sunlight, rotate the baskets every few days to ensure all sides of the plant receive light.
- Fertilize Regularly: Container plants exhaust soil nutrients faster. Use a balanced organic liquid fertilizer every 2-4 weeks, especially for heavy feeders like tomatoes and peppers.
- Mulch for Moisture: Add a layer of organic mulch (like straw, shredded leaves, or wood chips) on top of the soil. This helps retain moisture, regulate soil temperature, and suppress weeds.
- Support Vining Plants: For plants like cucumbers or smaller tomatoes, provide stakes or small trellises directly in the basket to support their growth.
- Harvest Often: Regular harvesting encourages plants to produce more. Don’t let ripe vegetables or herbs sit on the plant too long.
- Pest Watch: Inspect your plants regularly for signs of pests. Early detection makes natural pest control much easier.
- Elevate Your Baskets: Placing baskets on bricks or pot feet can improve air circulation around the drainage holes and further prevent root rot.
Common Mistakes
- Overwatering: A common killer of container plants. Roots need oxygen, and saturated soil suffocates them. Always check soil moisture before watering.
- Underwatering: While overwatering is bad, letting containers dry out completely too often also stresses plants, leading to wilting, yellowing leaves, and poor yield.
- Not Enough Sunlight: Most vegetables require at least 6 hours of direct sunlight. Placing them in a shady spot will result in leggy plants and minimal produce.
- Using Poor Soil: Garden soil can be too heavy and compact in containers. Always use a good quality potting mix designed for containers, preferably enriched with compost.
- Overcrowding: Planting too many seeds or seedlings in one basket means plants compete for limited resources, leading to smaller, less productive plants.
- Neglecting Fertilization: Nutrients in potting mix are used up quickly. Without supplemental feeding, plants will struggle to produce.
Seasonal Care
- Spring: This is planting season! Start seeds indoors or transplant seedlings once the danger of frost has passed. Gradually acclimate plants to outdoor conditions before moving baskets permanently outside.
- Summer: Focus on consistent watering, especially during hot spells. Mulch to retain moisture. Fertilize regularly as plants are actively growing and producing. Provide shade during extreme heat if necessary.
- Autumn: Harvest your last summer crops. For cool-season vegetables like lettuce, spinach, or radishes, you can often plant a second round. Protect plants from early frosts by covering them or moving baskets indoors overnight.
- Winter: For many temperate regions, outdoor gardening in baskets slows or stops. You can bring cold-hardy plants like kale or some herbs indoors to a sunny window. Clean out emptied baskets, sanitize them, and prepare for next spring.
Frequently Asked Questions
How often should I water my laundry basket garden?
Check daily. Water when the top 1-2 inches of soil feel dry to the touch. In hot, windy weather, it might be once or even twice a day. Always ensure water drains from the bottom.
What kind of plants can I grow in laundry baskets?
Almost any compact vegetable or herb! Great options include lettuce, spinach, radishes, carrots (shorter varieties), bush beans, peppers, small tomato varieties, potatoes, and a wide range of herbs like basil, mint, and parsley.
How much sunlight does it need?
Most fruiting vegetables (tomatoes, peppers, cucumbers) need at least 6-8 hours of direct sunlight daily. Leafy greens and herbs can tolerate 4-6 hours.
What fertilizer works best for container plants?
A balanced organic liquid fertilizer (e.g., 5-5-5 or 4-6-4 NPK ratio) is often best for container plants, applied every 2-4 weeks during the growing season. Granular slow-release fertilizers can also be incorporated into the potting mix.
Can beginners really grow a garden in laundry baskets?
Absolutely! It’s one of the easiest and most forgiving ways to start gardening, perfect for beginners due to its low cost, flexibility, and manageable size.
Do I need to worry about the plastic baskets leaching chemicals into the soil?
Most modern plastic laundry baskets are made from inert plastics (like HDPE or polypropylene) which are generally considered food-safe and stable, meaning they are unlikely to leach harmful chemicals. However, if you are concerned, look for baskets marked with recycling symbols #2 (HDPE) or #5 (PP), which are widely considered safe.
How do I prevent pests in my laundry basket garden?
Regularly inspect your plants for signs of pests. Use organic pest control methods like neem oil, insecticidal soap, or hand-picking. Companion planting can also deter some pests naturally.
Conclusion
Who knew your laundry room held the secret to a thriving home garden? Laundry basket gardening is a testament to how creative and resourceful we can be when it comes to growing our own food. It’s an accessible, affordable, and incredibly satisfying way to connect with nature and enjoy the freshest produce right from your patio or balcony.
By following these practical steps and tips, you’re well on your way to a successful harvest. Don’t let a lack of traditional garden space deter you any longer. Grab a basket, some soil, and your favorite seeds, and start planting today!
Happy gardening!