Every garden tells a story, and the paths we create are its narrative threads, guiding visitors through our green spaces. While we often focus on the plants and flowers that fill our beds, the hardscaping elements—like pathways—are just as crucial for defining character, providing function, and adding aesthetic appeal. Imagine a garden path that seems to bloom underfoot, not with actual petals, but with a clever arrangement of repurposed materials. This inviting design principle uses the humble brick and simple gravel to create a visually stunning, flower-inspired pathway that adds charm and a touch of whimsy to any landscape.
This approach transforms a utilitarian walkway into a captivating design feature, inviting interaction and bringing a unique texture to your outdoor living space. It’s an accessible DIY project that combines creativity with sustainability, proving that you don’t always need to plant a seed to make your garden blossom with beauty.
The Art of the ‘Blooming’ Path Design
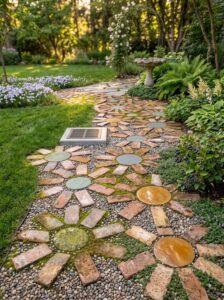
The core concept behind this charming pathway is a playful arrangement of common hardscaping materials. Instead of laying bricks in traditional patterns, you arrange them radially around a central, round stepping stone. Each stepping stone becomes the ‘heart’ of a flower, with bricks fanning out like petals. The spaces between these brick ‘petals’ and around the stepping stones are then filled with fine gravel, which acts as the subtle backdrop, making the brick flowers pop. This pattern repeats along the length of your path, creating a continuous, enchanting walkway.
This design is not only visually appealing but also practical. It encourages the use of reclaimed or salvaged bricks, adding a layer of sustainable gardening practice. The combination of solid stepping stones, permeable gravel, and durable bricks creates a robust path that handles foot traffic well while allowing for good drainage.
Planning Your Pathway Oasis
Before you start digging, thoughtful planning ensures your path is both beautiful and functional. Consider these aspects:
- Location and Purpose: Where will your path lead? From the back door to a seating area, through a flower bed, or to a shed? Determine the most logical and frequent routes.
- Path Width: A comfortable single-person path is typically 24-30 inches wide. For two people to walk side-by-side, aim for 36-48 inches. This design with its distinct ‘flower’ modules might naturally dictate a width based on the size of your stepping stones and brick arrangement.
- Sunlight and Drainage: Observe how sunlight falls on the area throughout the day. Ensure good drainage; you don’t want puddles accumulating on your path. If your area is prone to standing water, consider a slight crown or gentle slope for runoff.
- Style Integration: How will this path complement your garden’s existing style? The rustic charm of reclaimed bricks and natural gravel fits well with cottage, informal, or naturalistic garden designs.
Gathering Your Materials and Tools
You’ll need a few key items to bring this design to life:
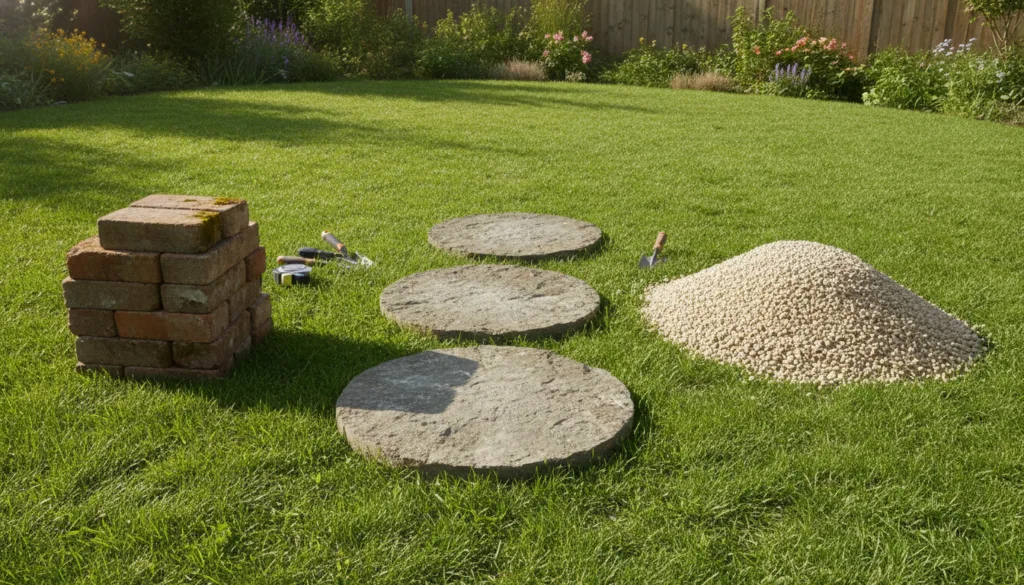
- Round Stepping Stones: These will be the centers of your ‘flowers’. Choose durable, weather-resistant stones of a consistent size for a cohesive look. Concrete pavers, natural stone, or even large, flat river rocks can work.
- Old Bricks: Salvaged bricks add character and an eco-friendly touch. Standard red bricks work well, but varied colors can create a mosaic effect. Ensure they are relatively consistent in size for easier arrangement.
- Gravel: Pea gravel, decomposed granite, or crushed stone are excellent choices for filling the gaps. The size should be small enough to settle well but not so fine that it washes away easily. A contrasting color to your bricks will highlight the ‘petals’.
- Landscape Fabric: Essential for weed suppression and preventing your gravel from sinking into the soil.
- Edging Material (Optional): Steel, plastic, or flexible paver edging can help contain the gravel and define the path’s borders.
- Tools: Shovel, pickaxe (for tough spots), wheelbarrow, rake, hand tamper or plate compactor (for firming the base), level, string line, measuring tape, rubber mallet, and a stiff broom.
Step-by-Step Installation Guide
Creating your ‘blooming’ path is a rewarding process that can be tackled over a weekend or two:
1. Mark and Excavate the Path
Use stakes and a string line, or spray paint, to outline the desired width and shape of your path. Once marked, excavate the area to a depth of about 4-6 inches. This depth accounts for a base layer, landscape fabric, your stepping stones, bricks, and gravel. Aim for a relatively flat, even trench.
2. Prepare the Base
Lay down a 2-3 inch layer of crushed gravel or paver base material. This provides a stable, well-draining foundation. Rake it smooth and then compact it thoroughly with a hand tamper or a rented plate compactor. A well-compacted base prevents future settling and unevenness.
3. Install Landscape Fabric
Roll out a layer of high-quality landscape fabric over the compacted base. Overlap seams by at least 6 inches. This crucial step acts as a weed barrier and prevents your gravel from mixing with the soil underneath, ensuring better drainage and longevity.
4. Lay the Stepping Stones
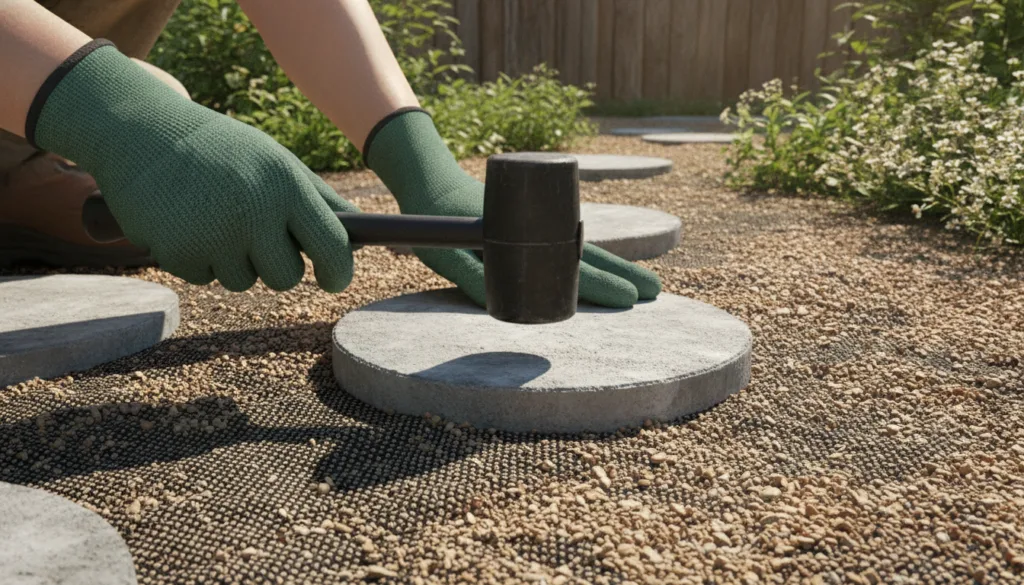
Begin by placing your round stepping stones along the center line of your path, spacing them evenly according to your desired ‘flower’ pattern. You might want them closer for a dense look or further apart for more distinct flowers. Ensure they are level and firmly seated. You can use a small amount of sand underneath each stone to adjust its height and stability, tapping it gently with a rubber mallet.
5. Arrange the Bricks
Now for the creative part! Around each stepping stone, arrange your bricks in a radial pattern, fanning them out like petals. You’ll likely need to experiment with the spacing to achieve a pleasing look. Some designs use bricks laid flat, others on their sides for more height. Press them firmly into the base. Ensure the top surface of the bricks is roughly level with the top of the stepping stone, or slightly lower, to prevent tripping hazards. Use a level frequently.
6. Fill with Gravel
Once your stepping stones and bricks are in place, carefully fill all the gaps with your chosen gravel. Pour it slowly and spread it evenly with a rake. Work it into all the crevices between the bricks and around the stepping stones. Once distributed, use a stiff broom to sweep the gravel into place and achieve a smooth, even surface. Water the path lightly to help the gravel settle, then add more gravel if needed. If using edging, install it before the final gravel layer.
Integrating Your Path with the Garden
A beautiful path is even better when it’s integrated seamlessly into its surroundings. Consider planting low-growing, creeping plants like creeping thyme (Thymus serpyllum), sedum (Sedum album), or Irish moss (Sagina subulata) along the edges of your path. These plants can soften the hard lines, spill over the bricks, and even grow into the gravel, creating a truly living pathway. Ensure these plants are suitable for your USDA hardiness zone (e.g., creeping thyme is hardy in Zones 4-9) and can tolerate some foot traffic.
For paths running through garden beds, ensure adjacent plants are not overhanging too much, which could make the path damp and slippery or difficult to navigate. A well-designed path should enhance access and views, not obstruct them.
Maintenance and Longevity
While relatively low-maintenance, a gravel and brick path benefits from occasional care:
- Weeding: Even with landscape fabric, some weeds may sprout in the gravel from airborne seeds. Regular hand-weeding or an eco-friendly weed spray will keep them at bay.
- Gravel Replenishment: Over time, some gravel may shift, wash away, or compact. Top up thin areas with fresh gravel as needed.
- Edge Management: If you used edging, check it periodically to ensure it’s still firm and holding the path’s shape.
- Cleaning: A stiff broom or leaf blower can remove debris. For moss or algae on bricks, a gentle scrub with a brush and water, or a specialized cleaner, can help.
In regions with harsh winters (USDA Zones 3-5), frost heave can sometimes lift pavers or bricks. A well-prepared, deep, and compacted base with good drainage is your best defense against this. In hotter climates (Zones 9-11), ensure the path doesn’t get excessively hot to walk on barefoot, especially if using dark-colored materials, and consider the impact on surrounding plants from reflected heat.
Common Mistakes to Avoid
- Insufficient Base Preparation: Skimping on the depth or compaction of your base layer is the most common mistake, leading to an uneven, unstable path that settles poorly over time.
- Skipping Landscape Fabric: Without a weed barrier, you’ll be constantly battling weeds growing through your gravel.
- Uneven Laying: Bricks and stepping stones that aren’t level create tripping hazards and an unprofessional look. Take your time with a level.
- Poor Drainage: A path that collects water will become slippery, encourage moss, and potentially undermine its own foundation.
- Not Ordering Enough Materials: Always order about 10-15% more materials than you calculate, accounting for cuts, breakage, and future repairs.
Create Your Own Garden Masterpiece
A garden path built with a little creativity and care can be so much more than just a way to get from one point to another. This ‘blooming’ brick and gravel pathway offers a unique opportunity to infuse your garden with personality, using simple, sustainable materials. It’s a project that combines the satisfaction of DIY with the joy of creating something truly special and beautiful in your outdoor space. Take the first step, grab your tools, and watch as your garden path magically comes to life!