Looking for a way to brighten your day or share a little homemade joy? There’s nothing quite like the satisfaction of making your own sweet treats, and with these 6 easy homemade chocolate candies, you’ll be a confectionary star in no time. Forget store-bought; these delightful recipes, from classic Peanut Butter Cups to rich Chocolate Hazelnut Truffles, are simple to make and taste even better. Get ready to indulge your sweet tooth and impress friends and family with these irresistible chocolate creations!
Quick Overview
- Main topic: Easy homemade chocolate candies
- Best for: Sweet cravings, gift giving, family treats
- Number of recipes: 6
- Prep style: Mostly no-bake, simple assembly
- Reader benefit: Delicious, easy-to-make chocolate confections
Recipe 1: Easy Homemade Peanut Butter Cups

These homemade peanut butter cups are incredibly easy to make and taste so much better than anything you’d buy. The perfect balance of sweet and salty, they’re a timeless treat.
Servings: 12-18 mini cups
Prep time: 20 minutes
Cook / chill / rest time: 30 minutes chill time
Ingredients:
- 1 cup semi-sweet chocolate chips
- 1 tablespoon coconut oil (optional, for smoother chocolate)
- 1/2 cup creamy peanut butter
- 1/4 cup powdered sugar
- 2 tablespoons unsalted butter, softened (or coconut oil for vegan)
- 1/4 teaspoon salt
- Mini paper cupcake liners
Instructions:
- Line a mini muffin tin with paper liners.
- In a microwave-safe bowl, combine chocolate chips and coconut oil. Microwave in 30-second intervals, stirring until completely melted and smooth.
- Spoon about 1 teaspoon of melted chocolate into the bottom of each liner, spreading to cover. Place in the freezer for 5-10 minutes to set.
- In a separate bowl, mix together peanut butter, powdered sugar, softened butter, and salt until smooth and combined.
- Remove the muffin tin from the freezer. Roll the peanut butter mixture into small balls (about 1 teaspoon each) and gently flatten them slightly. Place one peanut butter disc on top of the set chocolate in each liner.
- Spoon another 1-2 teaspoons of melted chocolate over each peanut butter disc, ensuring it’s fully covered. Gently tap the muffin tin on the counter to level the chocolate.
- Refrigerate for at least 20 minutes, or until the chocolate is fully set.
Storage / Serving / Usage Note:
Store these peanut butter cups in an airtight container in the refrigerator for up to 2 weeks. They are best served chilled.
Recipe 2: Decadent Chocolate Hazelnut Truffles
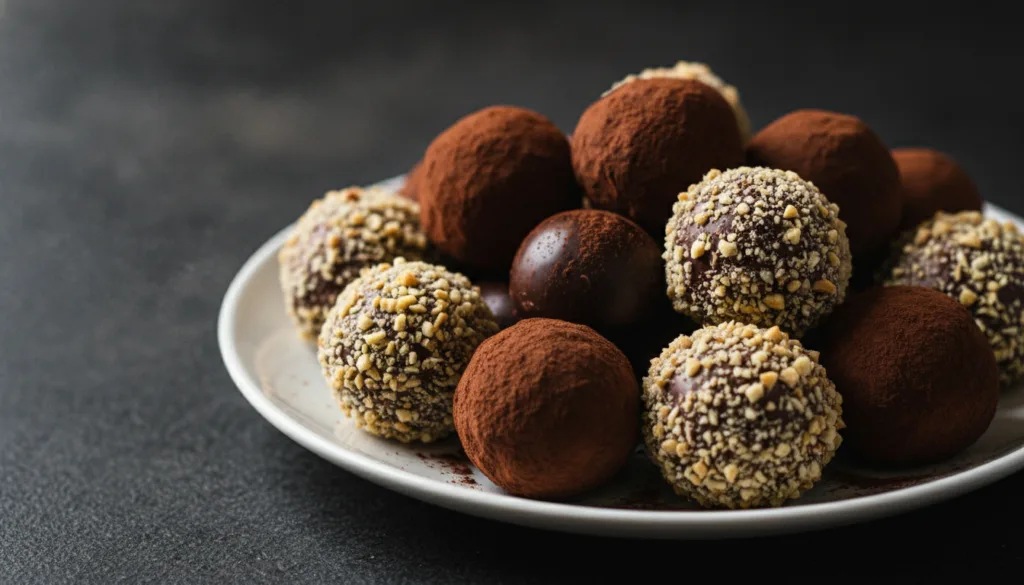
Indulge in these rich and creamy chocolate hazelnut truffles. They’re surprisingly simple to make and perfect for a sophisticated sweet treat or an impressive homemade gift.
Servings: 15-20 truffles
Prep time: 25 minutes
Cook / chill / rest time: 2 hours chill time
Ingredients:
- 8 ounces good quality dark chocolate, finely chopped
- 1/2 cup heavy cream
- 2 tablespoons unsalted butter
- 1/4 cup hazelnut spread (like Nutella) or 1/2 teaspoon hazelnut extract
- 1/4 cup unsweetened cocoa powder, for coating
- 1/4 cup finely chopped toasted hazelnuts, for coating (optional)
Instructions:
- Place the chopped chocolate in a heatproof bowl.
- In a small saucepan, heat the heavy cream and butter over medium heat until it just begins to simmer. Do not boil.
- Pour the hot cream mixture over the chopped chocolate. Let it sit for 5 minutes, then whisk until smooth and glossy.
- Stir in the hazelnut spread or extract until fully combined.
- Cover the bowl and refrigerate for at least 2 hours, or until firm enough to roll.
- Once chilled, scoop small portions of the ganache (about 1 tablespoon) and roll them into smooth balls.
- Roll half of the truffles in cocoa powder and the other half in chopped hazelnuts.
Storage / Serving / Usage Note:
Store truffles in an airtight container in the refrigerator for up to 1 week. Bring to room temperature for 10-15 minutes before serving for the best texture.
Recipe 3: Quick & Easy Chocolate Bark
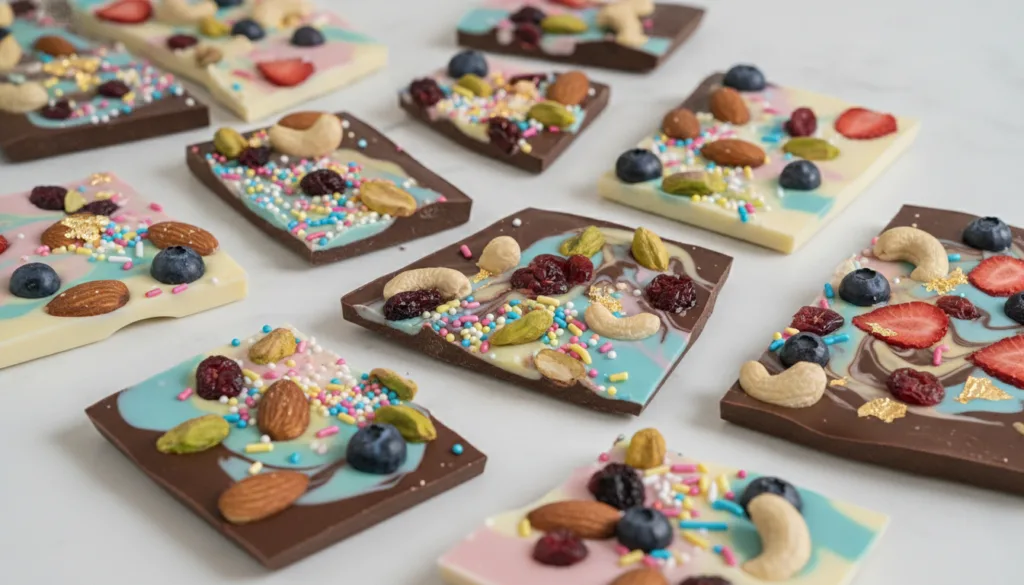
Chocolate bark is one of the easiest ways to make a beautiful and customizable chocolate treat. Simply melt, spread, top, and chill!
Servings: Varies
Prep time: 10 minutes
Cook / chill / rest time: 30 minutes chill time
Ingredients:
- 12 ounces chocolate chips (milk, dark, or white)
- Optional toppings: chopped nuts, dried fruit, sprinkles, crushed peppermint, sea salt, mini marshmallows
Instructions:
- Line a baking sheet with parchment paper.
- Melt the chocolate chips in a microwave-safe bowl in 30-second intervals, stirring until smooth. Alternatively, use a double boiler.
- Pour the melted chocolate onto the prepared baking sheet and spread it evenly into a thin layer (about 1/4 inch thick).
- Immediately sprinkle your desired toppings over the melted chocolate.
- Refrigerate for at least 30 minutes, or until the chocolate is completely set.
- Once firm, break the chocolate bark into irregular pieces.
Storage / Serving / Usage Note:
Store chocolate bark in an airtight container at room temperature for up to 2 weeks. If your toppings are sensitive to moisture (like sprinkles), store in the refrigerator.
Recipe 4: Sweet & Salty Chocolate Covered Pretzels
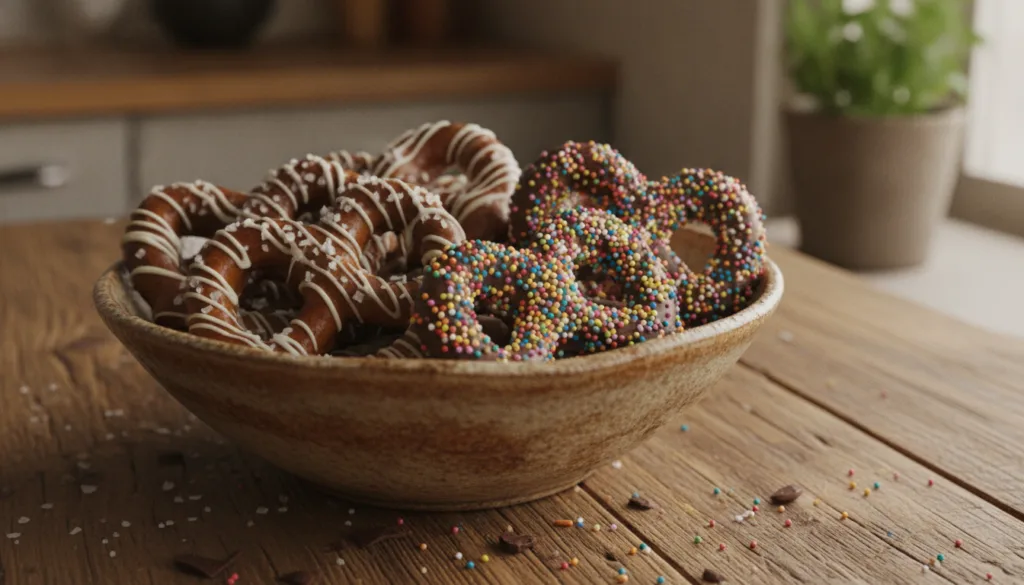
The irresistible combination of sweet chocolate and salty, crunchy pretzels makes these a crowd-pleasing treat. They’re incredibly simple to make and customize!
Servings: 20-30 pretzels
Prep time: 15 minutes
Cook / chill / rest time: 15 minutes chill time
Ingredients:
- 10 ounces chocolate chips (milk, dark, or white)
- 1 teaspoon coconut oil (optional, for thinner chocolate)
- 1 bag (10-12 ounces) pretzel rods or twists
- Optional toppings: sea salt, sprinkles, chopped nuts, white chocolate for drizzling
Instructions:
- Line a baking sheet with parchment paper.
- Melt the chocolate chips with coconut oil (if using) in a microwave-safe bowl in 30-second intervals, stirring until smooth.
- Dip each pretzel rod or twist into the melted chocolate, covering about two-thirds of the pretzel. Allow excess chocolate to drip off.
- Place the dipped pretzels on the prepared baking sheet.
- If using, immediately sprinkle with sea salt, sprinkles, or nuts before the chocolate sets. If drizzling with white chocolate, let the dark/milk chocolate set first.
- If drizzling, melt white chocolate and drizzle over the set dark/milk chocolate pretzels.
- Refrigerate for 15-20 minutes, or until the chocolate is fully set.
Storage / Serving / Usage Note:
Store in an airtight container at room temperature for up to 1 week. For best crunch, keep them away from excessive humidity.
Recipe 5: Classic No-Bake Chocolate Fudge
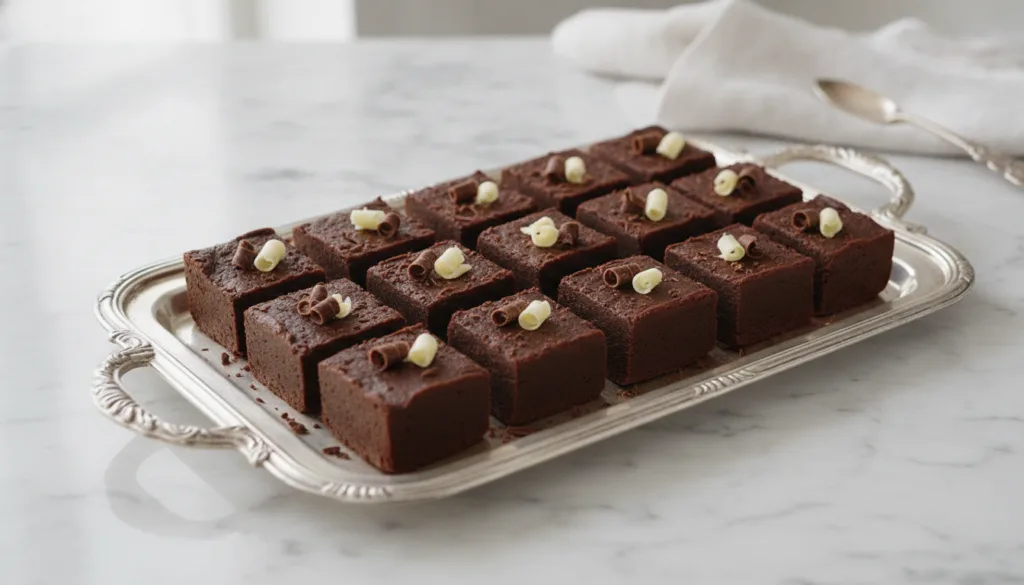
This classic no-bake chocolate fudge is incredibly easy to make with just a few ingredients, resulting in a rich, dense, and utterly satisfying treat. Perfect for gifting or a quick indulgence.
Servings: 24 pieces
Prep time: 10 minutes
Cook / chill / rest time: 2 hours chill time
Ingredients:
- 1 (14 ounce) can sweetened condensed milk
- 2 cups semi-sweet chocolate chips
- 1/2 cup unsalted butter
- 1 teaspoon vanilla extract
- Pinch of salt
- Optional: 1/2 cup chopped nuts (walnuts or pecans)
Instructions:
- Line an 8×8-inch baking pan with parchment paper, leaving an overhang on the sides for easy lifting.
- In a medium saucepan over low heat, combine sweetened condensed milk, chocolate chips, and butter. Stir constantly until the chocolate is completely melted and the mixture is smooth.
- Remove from heat and stir in the vanilla extract and salt. If using nuts, fold them in now.
- Pour the fudge mixture into the prepared baking pan and spread evenly.
- Refrigerate for at least 2 hours, or until firm.
- Once firm, lift the fudge out of the pan using the parchment paper overhang and cut into squares.
Storage / Serving / Usage Note:
Store fudge in an airtight container at room temperature for up to 1 week, or in the refrigerator for up to 2 weeks. It can also be frozen for up to 3 months.
Recipe 6: Crunchy Chocolate Nut Clusters
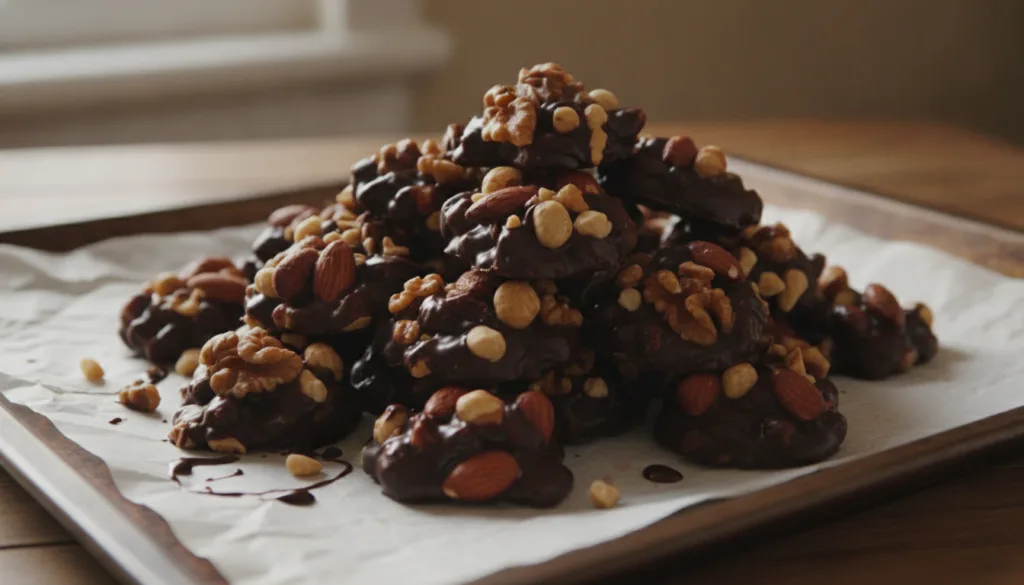
When you need a quick and satisfying chocolate fix, these crunchy chocolate nut clusters are the answer. They require minimal effort but deliver maximum flavor and texture.
Servings: 15-20 clusters
Prep time: 10 minutes
Cook / chill / rest time: 20 minutes chill time
Ingredients:
- 10 ounces chocolate chips (milk, dark, or semi-sweet)
- 1 teaspoon coconut oil (optional, for smoother melting)
- 2 cups mixed nuts (peanuts, almonds, cashews, walnuts), lightly toasted if desired
- Pinch of sea salt (optional)
Instructions:
- Line a baking sheet with parchment paper.
- Melt the chocolate chips with coconut oil (if using) in a microwave-safe bowl in 30-second intervals, stirring until smooth.
- Add the mixed nuts to the melted chocolate and stir gently until all nuts are evenly coated.
- Drop spoonfuls of the mixture onto the prepared baking sheet, forming clusters. If using, sprinkle a pinch of sea salt over each cluster.
- Refrigerate for 20 minutes, or until the chocolate is completely set.
Storage / Serving / Usage Note:
Store in an airtight container at room temperature for up to 1 week. If your kitchen is warm, storing them in the refrigerator can prevent melting.
Simple Tips for Best Results
- Use Quality Chocolate: The better the chocolate you start with, the better your homemade candies will taste.
- Proper Melting: When melting chocolate, do so gently in 30-second bursts in the microwave or over a double boiler. Avoid overheating to prevent scorching or seizing.
- Chill Thoroughly: Allow ample time for your candies to chill and set. This ensures they hold their shape and have the best texture.
- Get Creative with Toppings: Don’t be afraid to experiment with different nuts, dried fruits, sprinkles, or flavor extracts to personalize your candies.
- Parchment Paper is Your Friend: Always use parchment paper to line your baking sheets for easy removal and cleanup.
FAQ
What kind of chocolate is best for homemade candies?
Semi-sweet, dark, milk, or white chocolate chips, baking bars, or wafers all work well. The best choice depends on your personal preference and the specific recipe.
Can I make these chocolate candies ahead of time?
Absolutely! Most homemade chocolate candies store well for at least a week in an airtight container, making them perfect for meal prep or holiday gifting.
How do I prevent my chocolate from seizing when melting?
Ensure all your equipment (bowls, spatulas) are completely dry, as even a drop of water can cause chocolate to seize. Melt slowly and stir consistently.
Final Thoughts
Making homemade chocolate candies is a rewarding and delicious experience that offers endless possibilities for customization and enjoyment. Whether you’re whipping up a batch of creamy Peanut Butter Cups or crafting elegant truffles, these easy recipes prove that the best treats often come from your own kitchen. So go ahead, sweeten your day, and share the joy of these delightful homemade chocolate candies with everyone you love!