Looking for a natural way to address the appearance of skin tags at home? This traditional approach, often shared as a ‘grandma’s secret,’ offers a simple method using everyday ingredients to help improve the look of skin tags and support visibly smoother skin.
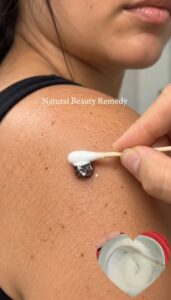
Quick Recipe
Prep time: 2 minutes
Best for: Addressing the appearance of small skin tags
Use type: Topical application
Main ingredients:
- Apple Cider Vinegar
- Cotton ball or swab
- Adhesive bandage
Ingredients
- 1-2 teaspoons Apple Cider Vinegar (raw, unfiltered is often preferred)
- 1 small cotton ball or cotton swab
- 1 small adhesive bandage or a piece of medical tape
- Optional: A tiny amount of coconut oil or petroleum jelly for skin protection
How to Make It
This remedy doesn’t require any complex mixing. Simply gather your ingredients and get ready to apply them directly.
How to Use It
- Prepare the Area: Gently clean the skin around the skin tag with mild soap and water, then pat dry.
- Protect Surrounding Skin (Optional but Recommended): Apply a thin layer of coconut oil or petroleum jelly to the healthy skin surrounding the skin tag. This acts as a barrier to protect it from the acidity of the apple cider vinegar.
- Saturate Cotton: Soak a small cotton ball or the tip of a cotton swab thoroughly with apple cider vinegar.
- Apply and Secure: Place the soaked cotton directly onto the skin tag, ensuring it covers the entire tag. Secure it in place with an adhesive bandage or a piece of medical tape to keep it from moving.
- Leave On: Leave the cotton in place for 15-30 minutes. If your skin is not sensitive, and you’ve protected the surrounding skin well, you may choose to leave it on overnight.
- Rinse: After the recommended time, remove the cotton and bandage, then rinse the treated area gently with clean water.

How Often to Use It
Repeat this process once or twice daily. Consistency is key with natural remedies, and results can vary. It may take several days to a few weeks to see changes.
Why These Ingredients Are Used
Apple Cider Vinegar
Apple cider vinegar is often touted in home beauty for its acetic acid content. In this context, it’s traditionally believed that the acidity may help to dry out and break down the tissue of the skin tag, leading to its eventual separation from the skin.
Cotton Ball or Swab
These are essential for precise application, allowing you to directly target the skin tag while minimizing contact with the surrounding healthy skin. This helps to maximize the remedy’s effectiveness on the tag itself.
Adhesive Bandage or Tape
The bandage serves to hold the vinegar-soaked cotton firmly against the skin tag, ensuring prolonged contact. This direct and sustained application is crucial for the remedy to work as intended.
What Results to Expect
With consistent and careful use, you may notice the skin tag gradually changing in appearance. It might darken, shrink, or become dry, potentially leading to it detaching from the skin over time. The goal is to support visibly smoother-looking skin. Individual results can vary widely, and patience is key.

Safety Notes
- Patch Test First: Always perform a patch test on a small, inconspicuous area of your skin before applying to the skin tag to check for any adverse reactions.
- Skin Irritation: Apple cider vinegar is acidic and can cause stinging, redness, irritation, or a burning sensation. If you experience significant discomfort or severe irritation, discontinue use immediately and rinse the area thoroughly with water.
- Avoid Sensitive Areas: Do not use this remedy on skin tags located on eyelids, around the eyes, on genitals, or on any other sensitive or broken skin.
- Consult a Professional: Never attempt to remove large, painful, bleeding, or suspicious skin growths at home. Always consult a dermatologist or healthcare professional for proper diagnosis and safe removal options for any unusual skin lesions.
- Keep Out of Reach: Store apple cider vinegar out of reach of children.
FAQ
How long does it take for skin tags to disappear with this method?
The time frame varies greatly from person to person. Some individuals report seeing results within a few days to a week, while for others, it might take several weeks of consistent daily application. Patience and consistency are crucial.
Can I use this remedy on any skin tag?
This remedy is generally recommended for small skin tags. It’s important to avoid using it on larger skin tags, skin tags that are irritated, bleeding, or located in very sensitive areas like around the eyes or on mucous membranes. Always consult a healthcare professional for a proper diagnosis of any skin growth.
What if my skin gets irritated by the apple cider vinegar?
If you experience excessive redness, stinging, or irritation, stop using the remedy immediately and rinse the affected area with plenty of water. You can try diluting the apple cider vinegar with an equal amount of water for future applications or ensure you’re using a protective barrier (like petroleum jelly) on the surrounding skin to minimize contact.
Final Thoughts
This traditional ‘grandma’s secret’ offers a natural and accessible way to potentially address skin tags and achieve a smoother-looking complexion at home. Remember that individual results can vary, and consistency is key. Always prioritize your skin’s health and consult with a healthcare professional if you have any concerns about skin tags or other skin growths. We love hearing about your natural beauty journeys, so feel free to share your experiences in the comments below!

