In an era where sustainability is more crucial than ever, finding simple ways to reduce our ecological footprint at home has become a priority. One area often overlooked but with significant impact is water consumption, especially in the bathroom. The toilet, a daily necessity, uses a substantial amount of water with every flush. While modern toilets are more efficient, many older models still consume gallons of water per use.
We all want to contribute to a greener planet, but sometimes the methods seem complicated or expensive. This is where practical, budget-friendly home hacks come into play. Many people face the dilemma of wanting to save water but not knowing where to start, or thinking that it requires costly renovations. The good news is that there’s an ingenious, old-school trick that can help you reduce water usage with every flush, without a significant investment or complex installation.
This guide is for anyone looking for an easy, effective, and low-cost way to conserve water at home. Whether you’re a seasoned eco-warrior or just starting your journey towards a more sustainable lifestyle, this simple DIY project is perfect for you. You don’t need to be a plumbing expert or spend a fortune on new fixtures. All you need are a few common household items and a few minutes of your time.
In this article, you will learn a straightforward technique to modify your toilet’s water usage, understand why it works, and get expert tips to ensure it’s done safely and effectively. Get ready to transform your bathroom into a more eco-friendly space, one flush at a time!
Why You’ll Love This Guide
- Effortlessly Reduces Water Use: Once installed, it works automatically with every flush.
- Uses Common Household Items: No special tools or expensive gadgets needed.
- Budget-Friendly: Costs next to nothing to implement.
- Beginner-Friendly: Simple, step-by-step instructions anyone can follow.
- Eco-Friendly: Contributes directly to water conservation and a lower utility bill.
- Quick to Implement: Takes only a few minutes from start to finish.
- Reversible: Can be easily removed if needed without damaging the toilet.
Materials Needed
- Plastic Bottle (0.5 to 1 liter): An empty soda bottle, milk jug, or water bottle works perfectly. Choose a size that fits comfortably in your toilet tank without obstructing mechanisms.
- Water: To fill the bottle.
- Pebbles, Sand, or Small Rocks (Optional): To add weight to the bottle, ensuring it stays submerged and doesn’t float.
Equipment Needed
- Measuring Cup or Funnel (Optional): To help fill the bottle cleanly if using sand or small pebbles.
- Permanent Marker (Optional): To mark the bottle if you want to remember its size.
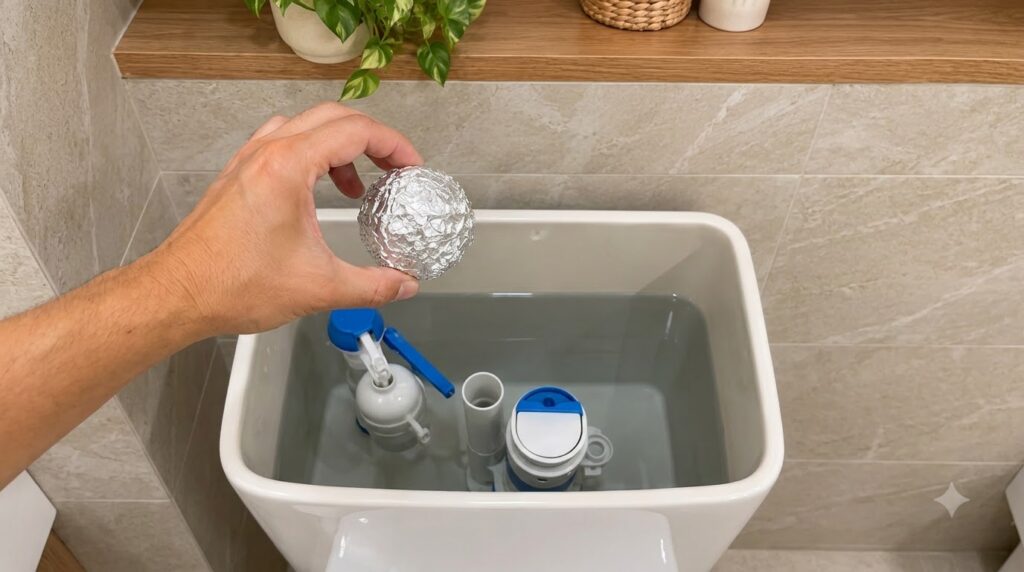
Step-by-Step Instructions: The Water-Saving Bottle Hack
This hack works by displacing a small volume of water in your toilet tank, meaning less water is needed to fill the tank, and thus less water is used with each flush. Follow these simple steps for a quick installation:
-
Choose and Prepare Your Bottle (5 minutes)
Select a plastic bottle that is small enough to fit inside your toilet tank without touching any of the flushing mechanisms (the float, flapper, fill valve, or flush lever arm). A 0.5-liter (16-20 oz) bottle is often a good starting point, as a 1-liter bottle might displace too much water in smaller tanks. Fill the bottle completely with water. If you’re concerned about it floating, add a handful of pebbles or sand before filling with water to give it extra weight. Securely cap the bottle.
-
Lift the Toilet Tank Lid (1 minute)
Carefully remove the lid from your toilet tank and set it aside in a safe place where it won’t break. This will expose the internal workings of the tank.
-
Position the Bottle in the Tank (2 minutes)
Gently place the filled bottle inside the toilet tank. The key is to position it so it doesn’t interfere with any moving parts. Typically, the best spot is against the back wall of the tank, opposite the flush handle, or along one of the side walls. Make sure it stands upright and is stable. If it’s too large or wobbly, try a smaller bottle or adjust its contents.
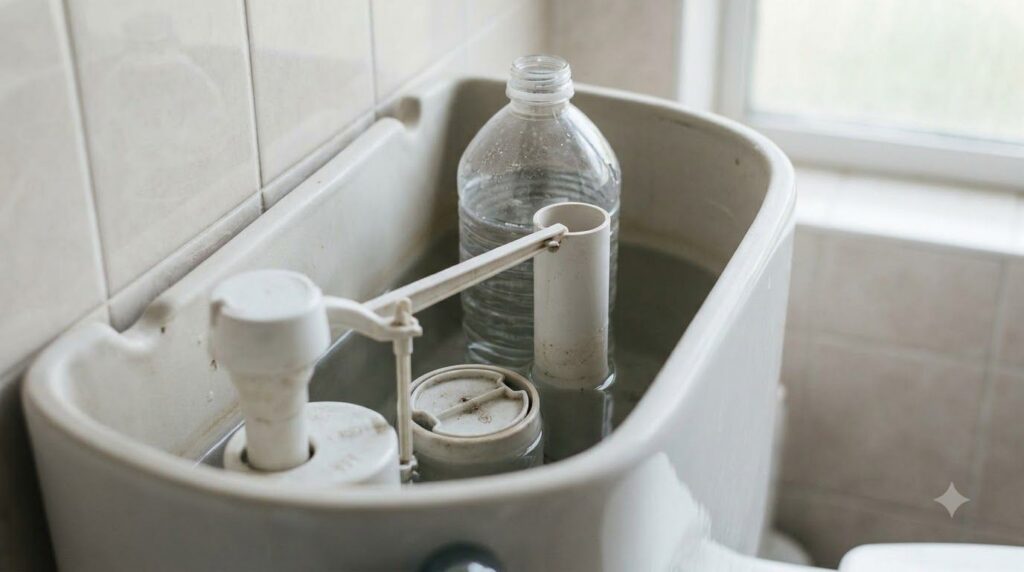
Place the bottle carefully to avoid interfering with any moving parts. -
Test the Flush (1 minute)
Once the bottle is in place, flush the toilet to ensure everything works correctly. Watch closely: the water should drain normally, and the tank should refill without any issues. The bottle should remain stationary and not impede the flapper or float mechanism. If you notice any problems, adjust the bottle’s position or remove it.
-
Check for Water Savings (Ongoing)
After a few flushes, you might notice that the tank refills slightly faster, indicating less water is being used. You can also mark the original water line inside the tank with a pencil before installing the bottle, and then compare it to the new, lower water line after installation to visually confirm the savings.
-
Replace the Tank Lid (1 minute)
Carefully place the toilet tank lid back on, ensuring it’s properly seated.
Expert Tips
- Start Small: If unsure, begin with a smaller bottle (e.g., 0.5 liters) and observe the flush performance. You can always add a second small bottle or use a larger one if the flush is still strong enough.
- Avoid Glass: Never use a glass bottle. If it breaks, it could damage the toilet tank or create a hazardous situation.
- Check for Obstruction: After placing the bottle, manually move the flapper and float arm to ensure they have a full range of motion. Any interference can lead to a running toilet or an incomplete flush.
- Secure the Bottle: If the bottle tends to shift, you can use a small amount of waterproof adhesive or wrap it in a non-corrosive material to keep it in place, as long as it doesn’t damage the tank. However, usually, a weighted bottle is sufficient.
- Consider Tank Size: Toilets with smaller tanks may not accommodate a large bottle without affecting flush performance. Always prioritize an effective flush over maximum water displacement.
- Beyond Bottles: For even greater savings or if this hack isn’t suitable, consider installing a dual-flush converter kit or a low-flow toilet.
- Regular Checks: Periodically check that the bottle is still in place and not causing any issues.
Variations
- Different Containers: Instead of a plastic bottle, you can use a small plastic jug, a sealed plastic container, or even a heavy-duty plastic bag filled with water and sealed (though a bottle is generally more stable).
- The Brick Method (with caution): Historically, people used a brick. However, modern bricks can dissolve over time, releasing sediment that can damage toilet mechanisms. If you choose this method, use a heavy plastic-wrapped brick or a purpose-made toilet tank brick.
- Commercial Water Displacement Devices: You can purchase specialized bladder bags or displacement dams designed specifically for toilet tanks. These are often flat and flexible, making them easier to fit in various tanks.
Maintenance and Durability
This water-saving hack requires minimal maintenance. The plastic bottle, once placed, can remain in the tank indefinitely. However, it’s a good practice to periodically (e.g., once a year) lift the tank lid during routine bathroom cleaning:
- Check Bottle Position: Ensure the bottle hasn’t shifted and is still clear of all moving parts.
- Inspect for Wear: While rare, check if the plastic bottle is degrading. If it looks brittle or discolored, it might be time to replace it with a new one.
- Clean the Tank: This is a good opportunity to clean the inside of your toilet tank if there’s any mineral buildup or discoloration.
Safety Notes
- No Glass: As mentioned, never use glass bottles in the toilet tank due to the risk of breakage and potential injury or damage.
- Avoid Absorbent Materials: Do not use absorbent materials like sponges or cloth to displace water, as they can retain water and lead to mold or interfere with the flushing mechanism.
- Do Not Obstruct Mechanisms: Ensure the bottle does not touch or interfere with the float, flapper, fill valve, or flush lever. Any obstruction can lead to a continuously running toilet, incomplete flushes, or water leakage.
- Children and Pets: Keep the toilet tank lid securely on to prevent children or pets from tampering with the bottle or other internal components.
- Chemicals: Do not add any chemicals to the water in the bottle, as this is unnecessary and could potentially interact negatively with the tank’s components.
Frequently Asked Questions
How much water can I really save with this trick?
The amount of water saved depends on the size of the bottle you use and the capacity of your toilet tank. A 0.5-liter bottle will save about half a liter per flush. Over a year, for an average household, this can amount to thousands of liters saved.
Will this affect the toilet’s flushing power?
If done correctly, it should not significantly affect the flushing power. The goal is to displace only a small portion of the water. If the flush seems weak, try a smaller bottle or remove some of the weight from inside the bottle.
Can I use any type of plastic bottle?
Yes, most standard plastic beverage bottles (PET plastic) work well. Just ensure it’s clean and strong enough to withstand being submerged in water long-term without degrading.
Is this safe for all toilets?
This hack is generally safe for most standard gravity-fed toilets. However, it’s not recommended for pressure-assisted toilets or toilets with very compact tanks where space is extremely limited.
What if my toilet starts running continuously after I put the bottle in?
This usually means the bottle is interfering with the flapper not sealing properly or the float not dropping all the way. Remove the bottle and reposition it so it’s completely clear of all moving parts, then retest.
How long does the bottle last in the tank?
A good quality plastic bottle can last for many years in a toilet tank without issues. Periodically check it during tank cleaning or if you notice any changes in flushing performance.
Can I use more than one bottle?
Yes, if your tank is large enough and the flush power remains adequate, you can use two smaller bottles. Just ensure both are stable and do not obstruct any mechanisms.
Conclusion
Adopting more sustainable practices at home doesn’t have to be daunting or expensive. This simple toilet water-saving hack is a testament to how small changes can lead to significant environmental benefits and even reduce your utility bills. By displacing just a fraction of the water in your toilet tank, you’re making a conscious choice to conserve a precious resource with every single flush.
We encourage you to try this easy DIY project today. It’s a quick, practical step towards a more eco-friendly lifestyle that requires minimal effort but delivers tangible results. Imagine the collective impact if every household implemented such simple measures!
Take pride in contributing to a healthier planet. Your toilet, and the environment, will thank you.