Are you tired of your favorite white socks looking dingy and worn, even after a thorough wash? Stubborn stains from mud, grass, dirt, or daily wear and tear can make socks look old before their time, leading many to simply discard them. It’s a common problem for busy households and active individuals, and finding an effective solution that doesn’t involve harsh chemicals can be a real challenge.
This guide is for anyone who wants to revive their stained socks and bring them back to life without resorting to expensive or complicated methods. Whether you’re a parent dealing with children’s playtime messes, an athlete battling sports-related grime, or simply someone who appreciates a fresh, clean pair of socks, you’ll find this natural cleaning trick incredibly useful.
We understand the frustration of seeing a beloved pair of socks succumb to persistent dirt. That’s why we’ve compiled this easy-to-follow guide, which leverages common household ingredients to tackle even the most entrenched stains. You’ll learn a practical, budget-friendly approach to cleaning your socks that will leave them looking almost new, extending their life and saving you money.
Say goodbye to the endless cycle of stained socks and hello to a brighter, cleaner laundry routine. This method is not only effective but also gentle on your fabrics, making it a sustainable choice for your home and wardrobe. Let’s dive in and transform your laundry experience!
Why You’ll Love This Guide
- Effortlessly Removes Tough Stains: Say goodbye to persistent dirt, mud, grass, and general grime that standard washes leave behind.
- Restores Socks to a Like-New Condition: Watch as your discolored socks regain their original brightness and freshness.
- Uses Common Household Ingredients: No need for specialized or expensive cleaning products; everything you need is likely already in your pantry.
- Budget-Friendly Solution: Save money on new socks and harsh chemical cleaners by using economical ingredients.
- Simple, Step-by-Step Instructions: Designed for beginners, this guide makes the process straightforward and easy to follow.
- Gentle on Fabrics: This method cleans effectively without damaging the fibers of your socks, helping them last longer.
- Eco-Friendly Approach: Utilizes natural alternatives, reducing your reliance on chemical-laden products.
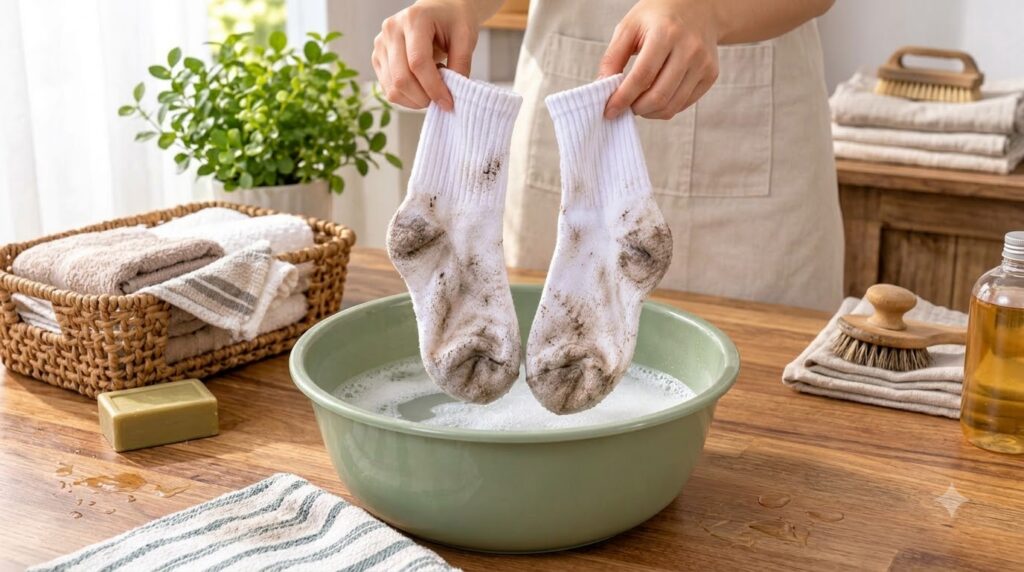
Materials You’ll Need
Gathering your materials before you start will make the process smooth and efficient. You’ll be surprised at how few items are required to achieve such impressive results.
- Warm Water: Approximately 2-3 liters (or enough to fully submerge your socks in a basin). The warmth helps to loosen dirt and activate cleaning agents.
- Liquid Laundry Detergent: 2-3 tablespoons. Use your regular detergent, preferably a good quality one that you trust.
- Baking Soda (Sodium Bicarbonate): 1/2 cup. A natural deodorizer and gentle abrasive that helps lift stains.
- White Vinegar (Distilled): 1/4 cup. An excellent natural stain remover, whitener, and fabric softener. Its acidic nature breaks down grime.
- Optional: Oxygen Bleach (Non-Chlorine): 1 tablespoon. For exceptionally tough, set-in stains or to boost whitening for white socks. Ensure it’s non-chlorine to avoid damage or dangerous reactions.
Equipment Needed
These tools will help you prepare and apply your cleaning solution effectively and safely.
- Large Basin or Bucket: A plastic basin or a clean bucket large enough to comfortably soak your socks.
- Stiff Brush (Optional): A small laundry brush or an old toothbrush for gently scrubbing particularly stubborn spots.
- Rubber Gloves (Optional but Recommended): Protects your hands from prolonged contact with cleaning solutions, especially if you have sensitive skin.
- Measuring Cups and Spoons: For accurate measurement of ingredients, ensuring the solution is balanced and effective.
Step-by-Step Instructions: Reviving Your Socks
Follow these detailed steps to transform your dirty socks into clean, fresh pairs. Each step is designed to be simple and effective.
Step 1: Prepare Your Soaking Solution (Estimated Time: 5 minutes)
In your large basin or bucket, combine the warm water, liquid laundry detergent, baking soda, and white vinegar. Stir gently until the baking soda dissolves and the ingredients are well mixed. If using oxygen bleach, add it now. The mixture might fizz slightly due to the vinegar and baking soda reacting; this is normal and indicates the active ingredients are at work. This solution begins the process of breaking down grime and odors.
Step 2: Submerge and Soak Your Socks (Estimated Time: 2-4 hours, or overnight)
Place your stained socks into the prepared solution, making sure they are fully submerged. Gently press them down to ensure complete saturation. Leave the socks to soak for a minimum of 2-4 hours. For very stubborn stains or extremely dirty socks, an overnight soak (8-12 hours) can be even more effective. Soaking allows the active ingredients to penetrate the fabric fibers and lift embedded dirt, significantly reducing the effort needed later.
Step 3: Gentle Scrub (Optional, Estimated Time: 5-10 minutes)
After soaking, remove the socks from the basin. If there are still visible tough spots, use a stiff brush or an old toothbrush to gently scrub these areas. Focus on the soles, heels, and toes, where dirt tends to accumulate most. This physical action helps to dislodge any remaining particles that the soak may not have fully removed. Be gentle to avoid damaging the fabric.
Step 4: Rinse Thoroughly (Estimated Time: 5 minutes)
Rinse each sock individually under cold, running water. Squeeze out excess water until the water runs clear and no suds remain. Thorough rinsing is crucial to remove all traces of the cleaning solution and loosened dirt, preventing residue buildup that can stiffen fabric or attract new dirt.
Step 5: Machine Wash (Estimated Time: 45-60 minutes, depending on cycle)
Once rinsed, place the socks in your washing machine. Wash them on a regular cycle with your usual laundry detergent, along with other similar items if desired. This final wash ensures any last bits of grime or cleaning solution are completely removed and the socks are thoroughly cleaned and refreshed. Using a mesh laundry bag for socks can prevent them from getting lost in the wash.
Step 6: Air Dry or Tumble Dry (Estimated Time: Varies)
Either air dry your socks by hanging them on a clothesline or drying rack, or tumble dry them on a low heat setting. Air drying is often preferred for maintaining fabric integrity and preventing shrinkage. If using a dryer, check the sock’s care label. Once dry, your socks should look noticeably cleaner and brighter, ready to be worn again!
Expert Tips for Spotless Socks
- Pre-Treat Tough Stains: For very fresh or dark stains (like blood or ink), rinse them immediately with cold water before soaking. You can also apply a small amount of concentrated liquid detergent directly to the stain before the main soak.
- Don’t Overload the Basin: Ensure there’s enough room for the socks to move freely in the soaking solution. Overcrowding can reduce the effectiveness of the clean.
- Use Hot Water for Extreme Cases: While warm water is generally sufficient, for heavily soiled cotton socks (especially white ones), you can use hotter water during the initial soak to enhance the cleaning power. Always check fabric care labels first.
- Consider Sunshine: After washing, hang white socks in direct sunlight to dry. The sun’s UV rays act as a natural whitener and disinfectant, helping to bleach out any lingering yellowing.
- Avoid Chlorine Bleach: Although effective, chlorine bleach can be harsh on fabric fibers, weaken them over time, and cause yellowing on synthetic materials. Stick to oxygen bleach for a safer alternative.
- Regular Maintenance: Don’t let stains set. Try to address dirty socks as soon as possible. A quick soak after wear can prevent stains from becoming permanent.
- Separate by Color: Always separate white socks from colored socks, even during the soaking stage, to prevent any potential color transfer, especially if they are heavily soiled.
- Check Sock Material: This method is generally safe for cotton and synthetic blends. For delicate materials like wool or silk, use a milder detergent and test a small, inconspicuous area first.
Variations for Specific Needs
- Sensitive Skin Version: If you’re sensitive to strong detergents or bleach, reduce the amount of liquid laundry detergent. You can also omit the oxygen bleach and rely solely on the powerful combination of baking soda and white vinegar.
- Eco-Friendly Boost: For an even greener approach, consider using an eco-friendly or plant-based laundry detergent. The baking soda and vinegar are already natural alternatives.
- Extra Whitening Power: For extremely yellowed or dingy white socks, after the initial soak and rinse, you can prepare a second soaking solution with just warm water and a generous amount of oxygen bleach (following product instructions). Soak for another 1-2 hours before the final machine wash.
- Fragrance-Free Option: If you prefer your socks to be completely scent-free, ensure you use an unscented liquid laundry detergent and rinse thoroughly. Vinegar’s smell dissipates completely once dry.
Storage Instructions
Once your socks are sparkling clean and completely dry, proper storage will help maintain their freshness and organization.
- Ensure Complete Dryness: Never store socks that are even slightly damp, as this can lead to mildew, odors, and fabric damage.
- Folding or Rolling: Fold or roll your socks neatly. This helps them retain their shape and prevents stretching.
- Drawer Dividers: Use drawer dividers or dedicated sock organizers to keep pairs together and prevent them from getting lost or mixed up.
- Cool, Dry Place: Store socks in a cool, dry, and well-ventilated drawer or closet. Avoid damp areas, which can encourage mildew.
Safety Notes
While this method uses common household ingredients, it’s important to follow certain safety precautions to protect yourself and your laundry.
- Wear Gloves: Always wear rubber gloves, especially if you have sensitive skin or any open cuts, to protect your hands from prolonged contact with the cleaning solution.
- Ventilation: Ensure you’re working in a well-ventilated area, especially if using oxygen bleach. Open a window or work near a fan.
- Chemical Interactions: NEVER mix oxygen bleach with chlorine bleach or any other strong cleaning chemicals. This can create dangerous fumes.
- Children and Pets: Keep all cleaning solutions and buckets out of reach of children and pets. Supervise children if they are assisting with laundry tasks.
- Test First: For delicate fabrics, brightly colored socks, or unknown materials, always perform a patch test on an inconspicuous area first to ensure colorfastness and prevent damage.
- Avoid Ingestion: The cleaning solution is for external use only. Do not ingest any of the ingredients. In case of accidental ingestion, seek medical attention immediately.
Frequently Asked Questions
How long do I need to soak the socks?
For most stains, 2-4 hours is sufficient. For very stubborn or old stains, soaking overnight (8-12 hours) can yield better results.
Can I use this method for colored socks?
Yes, this method is generally safe for colored socks, especially with white vinegar and baking soda. However, always perform a patch test on an inconspicuous area first to ensure colorfastness, especially if using oxygen bleach.
Can I skip the machine wash step?
While you can, the machine wash ensures a thorough rinse and helps remove any lingering residues from the pre-soak, providing the freshest and cleanest results. It’s highly recommended for complete cleanliness.
Is oxygen bleach necessary?
No, it’s optional. The combination of baking soda, white vinegar, and liquid detergent is often powerful enough for most stains. Oxygen bleach is for an extra boost for very tough stains or yellowed white socks.
Will my socks smell like vinegar?
No, the vinegar smell dissipates completely once the socks are thoroughly rinsed and dried. It acts as a deodorizer and cleaner, leaving no lingering scent.
Can this method damage delicate sock materials like wool or silk?
It’s best to use caution with delicate materials. For wool or silk, use a very mild, pH-neutral detergent, skip the oxygen bleach, and reduce the soaking time. Always test a small area first.
How often can I use this cleaning method?
You can use this method whenever your socks have stubborn stains. For regular laundry, your usual washing routine is sufficient.
Can I soak multiple pairs of socks at once?
Yes, as long as they are similar colors (e.g., all white together) and there is enough room in the basin for them to be fully submerged and move freely.
Conclusion
Reviving your stained socks doesn’t have to be a daunting task. With this simple, natural, and highly effective cleaning method, you can effortlessly tackle even the most stubborn grime, making your socks look and feel fresh again. By utilizing common household ingredients like baking soda and white vinegar, you’re choosing a budget-friendly and eco-conscious approach that is gentle on your fabrics while being tough on stains.
We hope this guide empowers you to extend the life of your favorite socks and transform your laundry routine. Say goodbye to the frustration of dingy footwear and embrace the satisfaction of perfectly clean, bright socks. Give this trick a try—you’ll be amazed at the results!
Happy cleaning!