Are stale smells lurking in your closets or drawers, making your clothes feel less than fresh? Instead of reaching for synthetic air fresheners, consider a beautiful and natural alternative: DIY scented wax sachets! These charming little blocks of scented wax not only infuse your personal spaces with delightful aromas but also add a touch of handcrafted elegance.
Crafting your own wax sachets is a simple, rewarding project that allows you to customize scents and designs. They’re perfect for keeping your wardrobe, linen cupboards, and even small rooms smelling lovely, and they make wonderful, thoughtful gifts too.
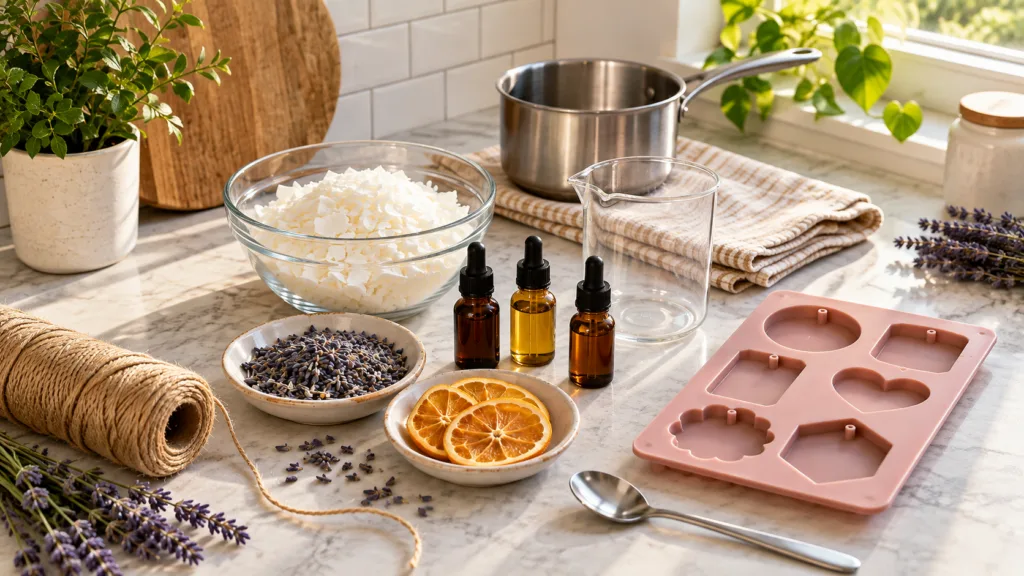
What You’ll Need
Materials
- 1 cup (approximately 8 oz or 225g) soy wax flakes or beeswax pellets
- 15-20 drops of your favorite fragrance oil or essential oil blend (adjust to desired strength)
- Dried botanicals for decoration (e.g., lavender buds, rose petals, dried citrus slices, small cinnamon sticks, star anise)
- Ribbon, twine, or jute string for hanging
Tools
- Heat-safe pouring pitcher or glass measuring cup
- Saucepan (for creating a double boiler)
- Silicone molds or cookie cutters (various shapes and sizes, ensuring they are shallow enough for sachets)
- Stirring stick or spoon
- Skewer or straw (for making holes)
- Parchment paper or silicone mat (to protect your work surface)
Why This DIY Can Be Useful
Wax sachets are more than just pretty decorations; they’re a clever way to keep small spaces smelling fresh. The wax acts as a natural carrier, slowly releasing the fragrance oil over time without the need for electricity or open flames. This makes them a safe and passive way to add continuous scent to enclosed areas.
Using essential oils or high-quality fragrance oils allows you to control the ingredients and avoid many of the harsh chemicals often found in commercial air fresheners. Plus, the addition of dried botanicals provides a visual appeal and can even contribute a subtle, natural aroma.
How to Make It
-
Prepare Your Molds: Lay out your silicone molds or arrange cookie cutters on a parchment paper-lined baking sheet. If using cookie cutters, press them gently onto the parchment paper to minimize leaks, or seal the bottoms with a bit of painter’s tape if needed.
-
Melt the Wax: Create a double boiler by placing your heat-safe pouring pitcher with the wax flakes into a saucepan filled with about 1-2 inches of water. Heat the water over medium-low heat, stirring the wax occasionally until it is completely melted and clear. Avoid direct heat to prevent scorching the wax.
-
Cool Slightly & Add Fragrance: Once the wax is fully melted, carefully remove the pitcher from the saucepan. Let the wax cool for a few minutes (it should still be liquid but not piping hot). This helps the fragrance bind better to the wax. Add your chosen fragrance oil or essential oil blend and stir gently but thoroughly for about 30 seconds to ensure even distribution.
-
First Pour & Decorate: Pour a thin layer of scented wax into the bottom of each mold, just enough to cover the base. Quickly arrange your dried botanicals on this layer. This base layer helps to ‘glue’ the botanicals in place so they don’t sink to the bottom when you add the rest of the wax.
-
Second Pour: Once the botanicals are arranged, carefully pour the remaining scented wax over them, filling the molds to your desired thickness (typically 1/4 to 1/2 inch).
-
Create Hanging Holes: While the wax is still soft and not fully set (usually within 5-10 minutes after pouring, depending on the wax and room temperature), use a skewer or straw to gently poke a hole near the top of each sachet. Make sure the hole goes all the way through. If the wax starts to harden too much, you can slightly warm the skewer to make it easier.
-
Harden & Demold: Allow the wax sachets to cool and harden completely, which can take several hours at room temperature, or you can place them in the refrigerator for about 30 minutes to speed up the process. Once fully hardened, gently pop them out of the silicone molds or lift them from the cookie cutters.
-
Add Ribbon: Thread a piece of ribbon, twine, or string through the hole of each sachet and tie it to form a loop for hanging.
How to Use It
Your beautiful scented wax sachets are now ready to bring freshness to your home! Here are some ideas:
- Closets: Hang them on hangers or hooks inside your wardrobe to keep clothes smelling clean and pleasant.
- Drawers: Tuck them into dresser drawers among your folded garments.
- Linen Closets: Place them on shelves with towels and bedding for a refreshing scent.
- Small Spaces: Use them in shoe cupboards, gym bags, or even a car (as long as it’s not exposed to direct sun or extreme heat).
The scent will gradually diminish over weeks or months, depending on the strength of your fragrance oil and the exposure to air. When the scent fades, you can refresh them by gently scraping off a thin layer of wax, or simply make new ones!
What to Expect
You can expect a subtle, pleasant aroma that provides continuous freshness in enclosed spaces. Wax sachets are designed for gentle, long-lasting diffusion, not for overpowering a large room like a candle or air diffuser would. The scent will be most noticeable when you open a drawer or closet. The lifespan of the fragrance will vary, but you should enjoy several weeks to a few months of noticeable scent.
Helpful Tips
- Experiment with Scents: Don’t be afraid to mix essential oils for custom blends like lavender and cedarwood for closets, or citrus and peppermint for a refreshing boost.
- Seasonal Sachets: Tailor your botanicals and scents to the seasons. Think cinnamon sticks and dried orange peels for fall/winter, or rose petals and jasmine for spring/summer.
- Gift Giving: Package a few sachets in a small fabric bag or tied with a pretty ribbon for a thoughtful, handmade gift.
- Layering Scents: If you want a stronger scent, you can add slightly more fragrance oil, but be careful not to add too much as it can affect the wax’s ability to harden properly.
Important Notes / Safety
- Hot Wax Safety: Always exercise caution when melting wax. Use oven mitts and be careful of steam from the double boiler.
- Heat Exposure: Keep wax sachets away from direct sunlight, heaters, or hot car interiors, as they can melt and cause damage to surfaces.
- Surface Protection: While hardened, direct contact of the wax sachet with delicate wooden or painted surfaces for extended periods might leave a residue in very warm conditions. Consider placing them on a small piece of fabric or a coaster if concerned.
- Ventilation: Ensure good ventilation when working with fragrance oils or essential oils, especially if you are sensitive to strong scents.
- Children and Pets: Keep sachets out of reach of small children and pets, as some essential oils can be harmful if ingested.