Have you ever admired a beautiful plant and wished you could have another one just like it without buying a new specimen? Or perhaps you’re looking for a cost-effective way to expand your garden or share your favorite plants with friends? The answer lies in the wonderful world of plant propagation!
Propagating plants from cuttings is a simple, rewarding, and incredibly satisfying way to multiply your green family. It’s a fantastic skill for any gardener, from beginners to seasoned enthusiasts, and it works for a surprising variety of plants, including many trees and shrubs.
What is Plant Propagation?
Plant propagation is the process of creating new plants from existing ones. While it can involve seeds, division, or layering, one of the most popular and accessible methods is using cuttings. A cutting is essentially a piece of a parent plant (stem, leaf, or root) that is encouraged to grow into a whole new plant.
Why Propagate from Cuttings?
- Cost-Effective: Save money by creating new plants for free!
- Genetic Duplicates: New plants will be identical to the parent plant, preserving desirable traits.
- Faster Growth: Cuttings often establish faster than seeds.
- Share the Love: Easily share your favorite plants with friends and family.
- Rewarding Experience: There’s immense satisfaction in watching a small cutting transform into a thriving plant.
Getting Started: Tools You’ll Need
Before you dive in, gather a few essential tools:
- Sharp Pruners or Shears: Clean cuts prevent damage and disease. Sterilize them with rubbing alcohol before and after use.
- Rooting Hormone: (Optional but recommended) Available in powder or liquid form, it encourages root development.
- Growing Medium: For soil propagation, a light, well-draining mix like perlite, vermiculite, or a seed-starting mix. For water propagation, simply water!
- Pots or Jars: Small pots with drainage holes or clear glass jars/vases.
- Labels: Essential for remembering what you’ve planted!
- Spray Bottle: For misting.
Step-by-Step Guide to Rooting Cuttings
1. Choosing and Taking Your Cuttings
The best time to take cuttings often depends on the type of plant, but generally, spring to early summer is ideal when plants are actively growing. Look for healthy, disease-free stems.
- Select a Stem: Choose a non-flowering stem that is firm and healthy, not too new and soft, nor too old and woody. For many plants, a stem about 4-6 inches long works well.
- Make a Clean Cut: Using your sterilized pruners, make a clean cut just below a leaf node (the point where a leaf or branch emerges). Nodes contain hormones that aid in root development.
- Prepare the Cutting: Remove any leaves from the bottom 1-2 inches of the stem. If the cutting has large leaves, you might cut them in half to reduce moisture loss.
2. Applying Rooting Hormone (Optional)
Dip the cut end of the stem into rooting hormone. If using powder, tap off any excess. This step can significantly increase your success rate, especially for plants that are a bit more challenging to root.
3. Choosing Your Propagation Method
Method 1: Water Propagation
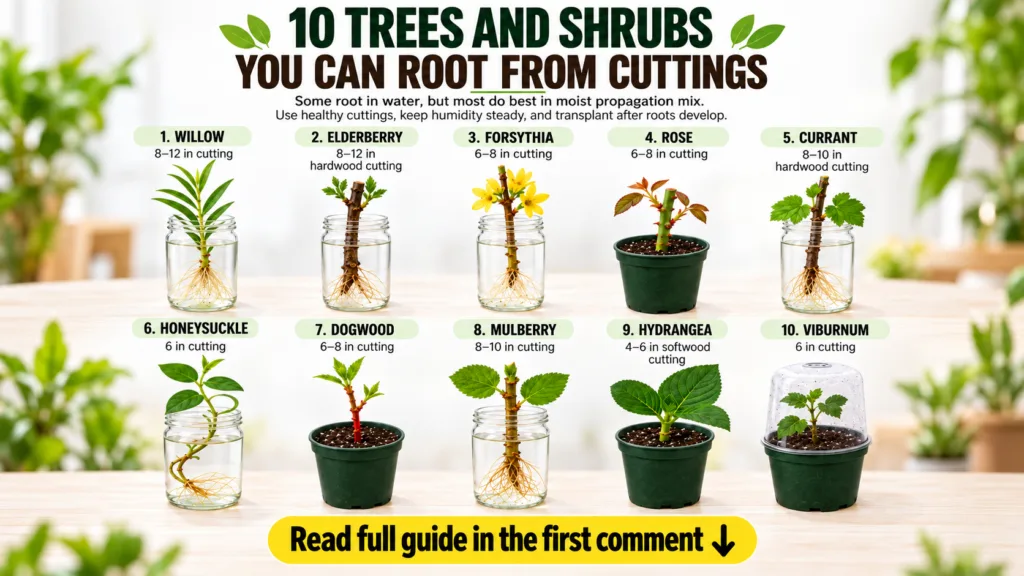
This method is popular for many houseplants and some shrubs because it allows you to watch the roots grow!
- Place in Water: Put the prepared cutting into a clean glass jar or vase filled with room-temperature water. Ensure at least one node is submerged.
- Bright, Indirect Light: Place the jar in a spot with bright, indirect sunlight. Avoid direct, harsh sun, which can heat the water too much.
- Change Water Regularly: Change the water every few days to keep it fresh and oxygenated, preventing bacterial growth.
- Wait for Roots: Roots typically appear within a few weeks to a few months, depending on the plant. Once roots are about 1-2 inches long, they are ready for potting.
Method 2: Soil Propagation
Many plants, especially woody shrubs and trees, root better directly in a soil-based medium.
- Prepare the Pot: Fill a small pot (with drainage holes!) with a light, well-draining propagation mix. Moisten the mix thoroughly.
- Make a Hole: Use a pencil or finger to create a small hole in the center of the potting mix.
- Insert Cutting: Gently insert the prepared cutting into the hole, ensuring the bottom node is buried. Firm the soil lightly around the stem.
- Create Humidity (Optional but Recommended): To create a mini-greenhouse effect and prevent the cutting from drying out, you can cover the pot with a plastic bag (supported by stakes so it doesn’t touch the leaves) or place it under a humidity dome.
- Bright, Indirect Light: Place the potted cutting in a warm spot with bright, indirect light.
- Keep Moist: Keep the soil consistently moist but not waterlogged. Mist the leaves regularly, especially if not under a humidity dome.
- Test for Roots: After a few weeks to a few months, gently tug on the cutting. If you feel resistance, roots have likely formed.
Caring for Your New Plants
Once your cuttings have developed a good root system, they are ready to be transplanted into larger pots or their permanent garden spot. Continue to provide consistent care, gradually acclimatizing them to their new environment if they’ve been in a humid setup.
Tips for Success
- Patience is Key: Rooting takes time. Don’t get discouraged if you don’t see results immediately.
- Experiment: Different plants root differently. Try various methods to see what works best for your specific plants.
- Sterilization: Always use clean tools and containers to prevent disease.
- Warmth and Light: Most cuttings prefer warm temperatures and bright, indirect light to encourage root growth.
- Humidity: Many cuttings benefit from high humidity, especially when rooting in soil.
Plant propagation is a truly magical part of gardening. With a little practice and patience, you’ll soon be growing your own collection of beautiful plants from simple cuttings. Happy propagating!