Are you dreaming of luscious, thicker-looking hair and smoother strands without breaking the bank? You’re not alone! Many people are discovering the incredible benefits of a simple, natural ingredient often found in our kitchens: okra! This humble vegetable is gaining popularity in the DIY beauty world, with people raving about homemade okra gel for stronger, thicker-looking hair and amazing frizz control.
Here at BEAUTY 2, we love exploring natural solutions that are easy to make at home. So, let’s dive into how you can create your very own okra hair gel and unlock this simple beauty secret that’s worth learning about!
Why Okra for Your Hair?
Okra, often known as “lady’s finger,” is more than just a vegetable for your stew. It’s packed with vitamins (like A, C, and K), minerals, and antioxidants that can be wonderfully beneficial for your hair. The mucilage (that slightly gooey substance) found in okra is what makes it a fantastic natural conditioner and styling agent.
- Natural Conditioning: The mucilage acts as a natural humectant, drawing moisture into your hair, leaving it soft and hydrated.
- Frizz Control: It can help smooth the hair cuticle, making your hair appear less frizzy and more manageable.
- Adds Shine: By smoothing the hair, it reflects light better, contributing to a natural, healthy shine.
- Supports Hair Strength: The vitamins and minerals nourish the scalp and hair follicles, which can support the appearance of stronger, healthier hair over time.
- Gentle Detangling: Its slippery texture can aid in detangling knots, reducing breakage.
Your Simple Guide to Homemade Okra Hair Gel
Making okra gel is incredibly straightforward and requires only a few basic items. Let’s get started!
What You’ll Need:
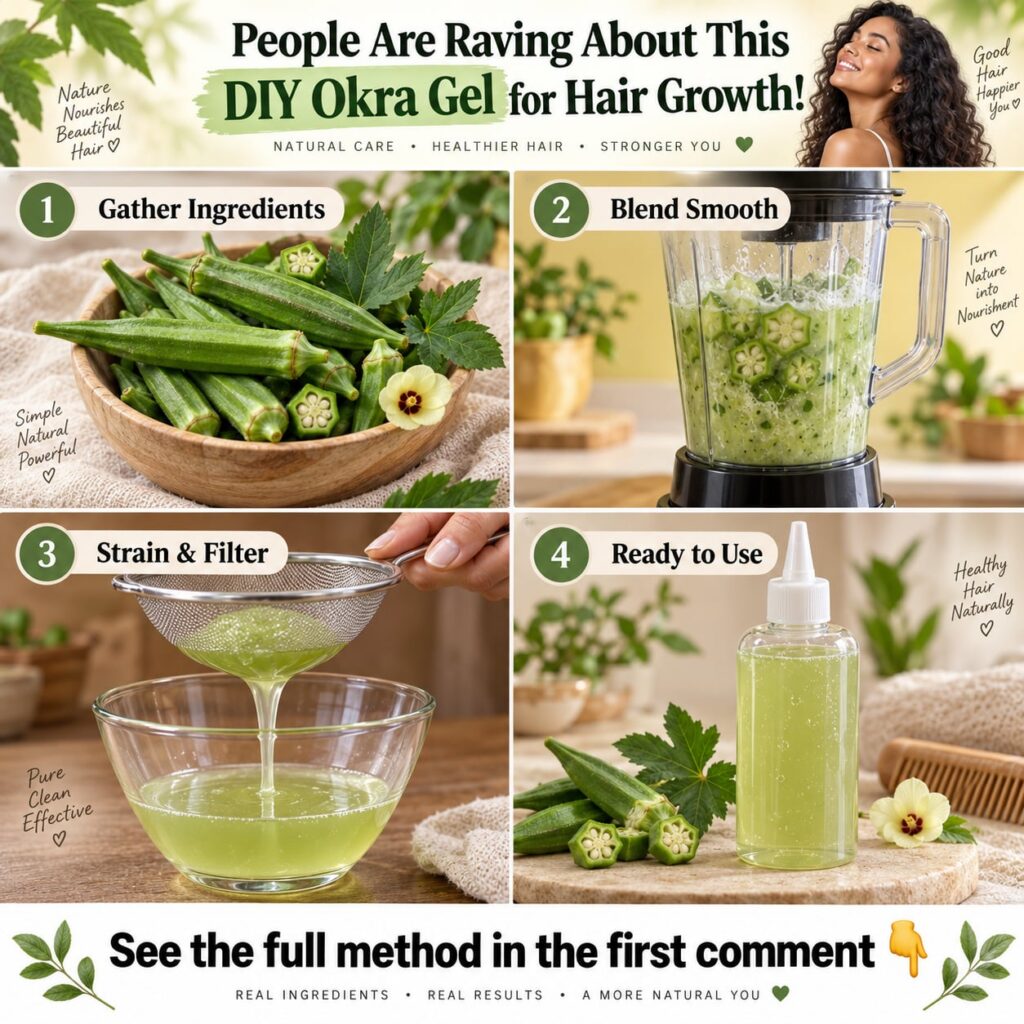
- 5-7 fresh okra pods
- 2 cups of filtered water
- A saucepan
- A fine-mesh strainer or cheesecloth
- A clean glass jar or bottle for storage
- (Optional) A few drops of your favorite essential oil (like rosemary, lavender, or peppermint) for added scent and potential benefits
Step-by-Step Instructions:
- Wash and Slice: Thoroughly wash your okra pods to remove any dirt. Slice the okra into small rounds, about 1/2 inch thick. The smaller the slices, the more surface area for the mucilage to release.
- Boil the Okra: Place the sliced okra in the saucepan with 2 cups of filtered water. Bring the mixture to a boil over medium heat, then reduce the heat to low and simmer for about 10-15 minutes.
- Watch for Gel Consistency: As it simmers, you’ll notice the water starting to thicken and become slimy – this is the mucilage doing its magic! Stir occasionally. The goal is a slightly thick, gel-like consistency, not too watery but not overly dense.
- Cool Down: Remove the saucepan from the heat and let the mixture cool completely. This is crucial as the gel will continue to thicken as it cools.
- Strain the Gel: Once cooled, pour the okra mixture through a fine-mesh strainer or a cheesecloth into your clean glass jar or bottle. Press down on the okra pieces with a spoon or your hands (if using cheesecloth) to extract all the gel. You want to separate all the okra pieces from the clear, slippery gel.
- Add Essential Oils (Optional): If desired, add a few drops of your chosen essential oil to the strained gel and stir well.
- Store: Cap your jar or bottle tightly.
How to Use Your Okra Hair Gel:
This natural gel can be used in several ways, depending on your hair type and desired results:
- As a Leave-In Conditioner: Apply a small amount to clean, damp hair, focusing on the mid-lengths and ends, to provide moisture and reduce frizz.
- For Styling: Use it to define curls, smooth flyaways, or set your hairstyle. It offers a light to medium hold without the stiffness or crunch of many commercial gels.
- As a Hair Mask: Apply a generous amount to your scalp and hair, leave it on for 20-30 minutes, then rinse thoroughly. This can be a nourishing treatment for your scalp and strands.
Tips for Best Results & Storage
- Patch Test: As with any new product, especially DIY, it’s a good idea to do a patch test on a small area of your skin or hair first to ensure no adverse reactions.
- Adjust Consistency: If your gel is too thick, you can add a tiny bit of water and stir. If it’s too thin, you might need to simmer a fresh batch with less water or more okra.
- Storage: Store your homemade okra gel in the refrigerator. Due to its natural composition, it typically lasts for about 1-2 weeks. If you notice any unusual smell or discoloration, it’s best to discard it and make a fresh batch.
- Consistency is Key: For best results, incorporate this gel into your routine regularly.
Embrace Your Natural Hair Journey
Making your own okra hair gel is a wonderful way to embrace natural ingredients and take a more hands-on approach to your beauty routine. It’s affordable, easy, and many people find it to be a fantastic natural alternative to conventional hair products, helping them achieve stronger, thicker-looking, and wonderfully frizz-free hair.
Please note: While many people report positive results, individual experiences may vary. This DIY recipe is intended for cosmetic purposes and is not a substitute for professional medical advice or treatment for hair loss conditions. Always consult with a healthcare professional for any concerns.
Ready to try this natural beauty secret and see what okra can do for your hair?