Homemade Chocolate Ice Cream – Rich, Creamy & Easy Recipe
Nothing beats a scoop of rich, creamy Homemade Chocolate Ice Cream, especially when you can make it with just a few simple ingredients. This recipe combines cream cheese, heavy whipping cream, cocoa powder, and sweetened condensed milk to create an incredibly smooth and chocolatey frozen dessert.
You don’t need an ice cream machine, either. Simply mix, whip, freeze, and enjoy!
The cream cheese gives the ice cream an extra-rich texture, while cocoa provides an intense chocolate flavor. It’s an easy dessert for summer, family gatherings, or whenever you’re craving chocolate.
Homemade Chocolate Ice Cream Recipe
Prep Time: 15 minutes
Freezing Time: 6–8 hours
Total Time: About 8 hours
Servings: 6–8
Difficulty: Easy
Ingredients
For the Chocolate Ice Cream
- 8 oz (225 g) cream cheese, softened
- 2 cups (480 ml) cold heavy whipping cream
- 1 can (14 oz / 396 g) sweetened condensed milk
- 1/2 cup (45–50 g) unsweetened cocoa powder
- 1 teaspoon vanilla extract
- 1/4 teaspoon salt
Optional Add-Ins
For extra flavor and texture, you can add:
- 1/2 cup chocolate chips
- Chopped dark chocolate
- Crushed chocolate cookies
- Chopped almonds or hazelnuts
- Chocolate sauce
- Caramel sauce
How to Make Homemade Chocolate Ice Cream
Step 1: Soften the Cream Cheese
Remove 8 oz (225 g) cream cheese from the refrigerator and allow it to soften at room temperature for about 20–30 minutes.
Softened cream cheese is much easier to mix and helps prevent small lumps in the finished ice cream.
Place the cream cheese in a large mixing bowl.
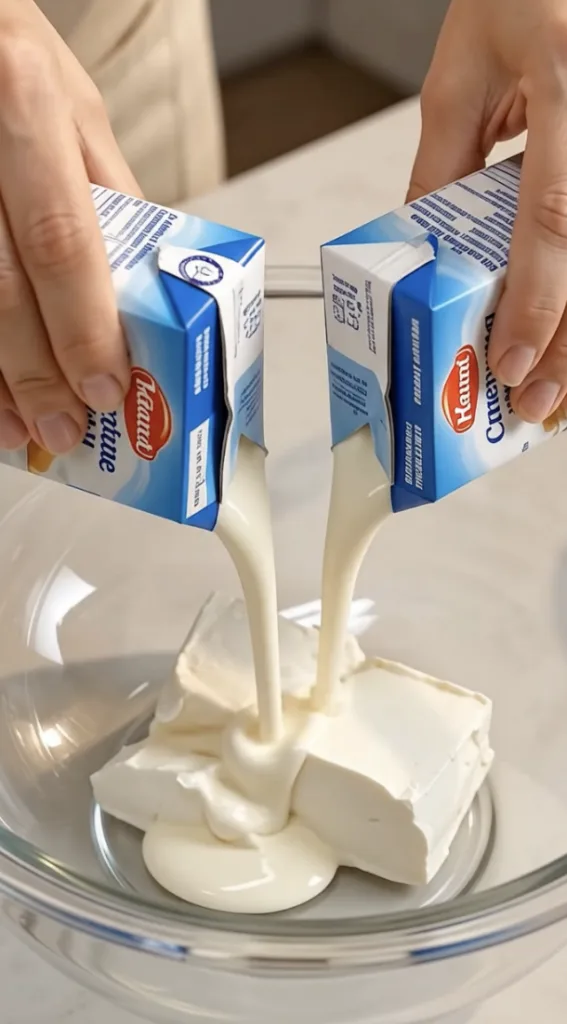
Step 2: Add the Heavy Cream
Pour 2 cups of cold heavy whipping cream into the bowl with the cream cheese.
For the best results, make sure the heavy cream is very cold. Cold cream whips more easily and helps create a light, creamy ice cream texture.
Step 3: Beat Until Smooth
Using an electric hand mixer, begin mixing the cream cheese and heavy cream on low speed.
Once they start combining, gradually increase the mixer to medium speed.
Continue beating until the cream cheese is completely incorporated and the mixture becomes smooth and slightly fluffy.
Make sure there are no large pieces of cream cheese remaining.
Step 4: Add the Sweetened Condensed Milk
Pour one 14-ounce can of sweetened condensed milk into the cream mixture.
Sweetened condensed milk provides both sweetness and creaminess, which makes it particularly useful for no-churn ice cream.
Mix on low speed until evenly combined.
Step 5: Add the Cocoa Powder
Sift 1/2 cup of unsweetened cocoa powder into the bowl.
Sifting is recommended because cocoa powder can easily form small lumps.
Start mixing on low speed to prevent cocoa powder from flying out of the bowl.
Once incorporated, increase to medium speed.
The mixture should gradually turn into a deep, rich chocolate color.
Step 6: Add Vanilla and Salt
Add:
- 1 teaspoon vanilla extract
- 1/4 teaspoon salt
Vanilla enhances the chocolate flavor, while a small amount of salt balances the sweetness.
Mix again until everything is thoroughly combined.
Step 7: Whip Until Thick and Creamy
Continue whipping the chocolate mixture until it becomes thick, fluffy, smooth, and creamy.
When you lift the mixer, the mixture should hold soft peaks.
Avoid overmixing. Stop once the mixture has reached a thick whipped consistency.
Step 8: Add Chocolate Pieces – Optional
If you want more chocolate texture, fold in approximately 1/2 cup of chocolate chips or chopped chocolate.
Use a spatula to fold them gently into the mixture.
You can also add crushed cookies or chopped nuts at this stage.
Step 9: Transfer to a Container
Pour the chocolate ice cream mixture into a freezer-safe container or loaf pan.
Use a spatula to spread the mixture evenly and smooth the surface.
For an extra-chocolatey version, drizzle some chocolate sauce over the surface and gently swirl it through the mixture with a spoon.
Step 10: Cover and Freeze
Cover the container tightly with a lid or food-safe wrap.
Place it in the freezer for at least 6–8 hours, preferably overnight.
Try not to open or disturb the container while the ice cream is setting.
Step 11: Let It Soften Before Scooping
Remove the chocolate ice cream from the freezer approximately 5–10 minutes before serving.
Allowing it to soften briefly makes it much easier to scoop.
Dip your ice cream scoop into warm water, shake off the excess, and scoop the ice cream into bowls or cones.
Step 12: Add Your Favorite Toppings
Finish your homemade chocolate ice cream with toppings such as:
- Chocolate syrup
- Melted chocolate
- Chocolate chips
- Chopped hazelnuts
- Peanuts
- Almonds
- Crushed cookies
- Fresh strawberries
- Banana slices
- Whipped cream
Then serve immediately and enjoy!
Tips for Extra-Creamy Chocolate Ice Cream
Keep the heavy cream cold. Cold cream whips much better and helps create a lighter texture.
Soften the cream cheese first. Very cold cream cheese may leave lumps in the ice cream mixture.
Sift your cocoa powder. This prevents dry cocoa lumps from appearing in the finished ice cream.
Don’t overwhip the cream. Stop once the mixture is thick and fluffy.
Freeze for long enough. Six hours is usually the minimum. Overnight freezing will give you a firmer, more traditional ice cream consistency.
Let it soften before serving. Homemade no-churn ice cream can become quite firm in the freezer, so give it several minutes at room temperature before scooping.
Chocolate Ice Cream Variations
Double Chocolate Ice Cream
Add 1/2 cup of mini chocolate chips or finely chopped dark chocolate to the mixture before freezing.
Finish with chocolate sauce for an intense chocolate dessert.
Chocolate Hazelnut Ice Cream
Add 2–3 tablespoons of chocolate hazelnut spread to the mixture.
Fold in chopped toasted hazelnuts before freezing.
Chocolate Cookie Ice Cream
Crush approximately 6–8 chocolate sandwich cookies and gently fold them into the ice cream mixture.
Save some cookie crumbs to sprinkle over the top.
Chocolate Banana Ice Cream
Add one mashed ripe banana to the chocolate mixture.
Banana pairs beautifully with cocoa and gives the ice cream additional natural sweetness.
Chocolate Peanut Butter Ice Cream
Drizzle 2–3 tablespoons of creamy peanut butter over the mixture after transferring it to the container.
Use a knife or spoon to create peanut butter swirls before freezing.
How to Store Homemade Chocolate Ice Cream
Keep the ice cream in a tightly sealed, freezer-safe container.
For the best texture and flavor, enjoy it within approximately 1–2 weeks.
Keeping the container tightly covered also helps reduce the formation of ice crystals and prevents the ice cream from absorbing other odors from the freezer.
If the ice cream becomes very firm, simply leave it at room temperature for 5–10 minutes before serving.
Why You’ll Love This Recipe
This Homemade Chocolate Ice Cream is rich, creamy, and packed with chocolate flavor without requiring an ice cream machine.
The combination of cream cheese, heavy whipping cream, condensed milk, and cocoa powder creates a thick and velvety base that freezes into a deliciously smooth dessert.
You can keep it simple or customize it with chocolate chips, cookies, nuts, peanut butter, or chocolate sauce.
With a little mixing and a few hours in the freezer, you’ll have a decadent homemade chocolate ice cream that’s perfect for serving in a bowl, waffle cone, or alongside your favorite dessert.