There’s something incredibly satisfying about growing your own food, and sweet potatoes are a fantastic choice for both novice and experienced gardeners. Not only are they delicious and versatile in the kitchen, but the process of growing them from a humble tuber into lush vines is surprisingly simple and deeply rewarding. Forget buying expensive starter plants; you can easily sprout your own sweet potato slips right from a sweet potato you bought at the grocery store!
This guide will walk you through the easy steps of sprouting sweet potato slips at home, turning a simple sweet potato into the foundation of a thriving garden. Let’s get started on your sweet potato adventure!
What Are Sweet Potato Slips?
Before we dive into the ‘how-to,’ let’s clarify what sweet potato slips are. A sweet potato slip is essentially a sprout that grows from the sweet potato itself. These sprouts are what you’ll plant in your garden to grow new sweet potato plants. Unlike regular potatoes, which you can cut into pieces and plant, sweet potatoes need these ‘slips’ to propagate successfully. It’s an exciting process that connects you directly to the life cycle of your food!
Getting Started: Sprouting Your Sweet Potato
The first step in cultivating your sweet potato patch is encouraging a healthy sweet potato to sprout. This process is often called ‘chitting’ or simply ‘sprouting slips.’ Here’s what you’ll need and how to do it:
Supplies You’ll Need:
- 1-2 healthy, organic sweet potatoes (choose ones without blemishes or soft spots)
- A glass jar or container
- Toothpicks
- Fresh water
- A warm, sunny location (a windowsill works perfectly!)
Step-by-Step Guide to Sprouting Slips:
-
Prepare Your Sweet Potato
Wash your sweet potato thoroughly. You can sprout a whole sweet potato, or cut a larger one in half horizontally to potentially get more slips from each piece. If cutting, make sure each half has at least a few ‘eyes’ or tiny bumps where sprouts might emerge.
-
Position for Sprouting
Using three or four toothpicks, pierce the sweet potato around its middle. These toothpicks will act as a support system, allowing the bottom half of the sweet potato to sit submerged in water while the top half remains exposed to air. Place the sweet potato into your glass jar, ensuring about 1/3 to 1/2 of the sweet potato is in the water.

Setting up your sweet potato for sprouting is the first exciting step! -
Find the Perfect Spot
Place your jar in a warm location that receives plenty of indirect sunlight. A bright windowsill is ideal. Consistency in warmth and light will encourage quicker sprouting. Avoid direct, scorching sunlight, which can cook the potato.
-
Maintain Fresh Water
Change the water every few days, or whenever it starts to look cloudy. This prevents mold and ensures your sweet potato has access to clean water for sprouting. You’ll soon see roots beginning to form in the water and tiny sprouts emerging from the top of the potato.
-
Patience is Key!
Sprouting can take anywhere from a few days to several weeks. Be patient! Once the slips are about 4-6 inches long with several leaves, they’re ready to be removed from the parent sweet potato.
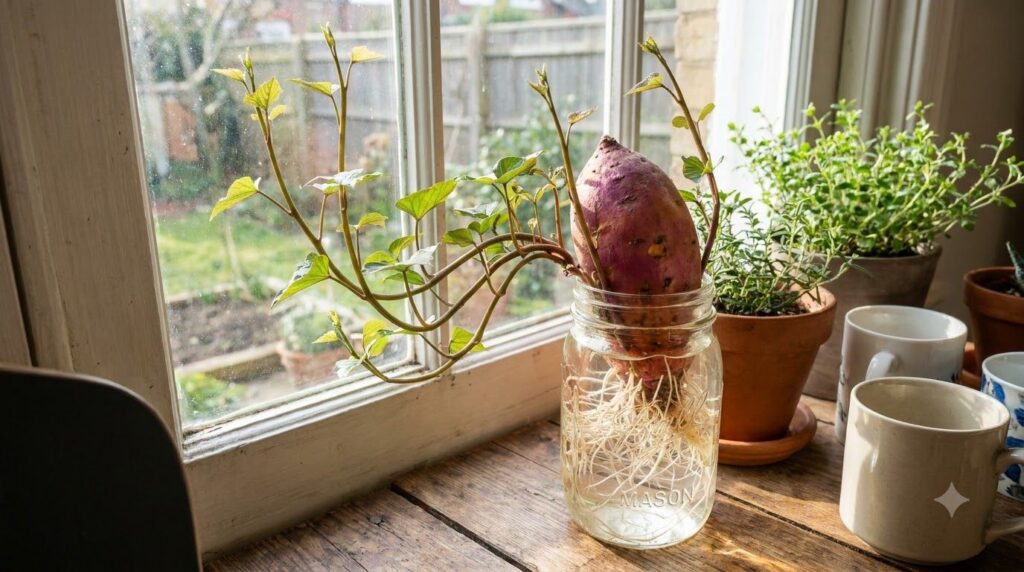
Watch as roots develop and green slips emerge from your sweet potato!
Harvesting and Rooting Your Slips
Once your slips are of a good size, it’s time to separate them and encourage them to form their own root systems, preparing them for planting.
-
Gently Remove the Slips
Carefully twist or snap off the slips from the sweet potato. Aim to get as much of the base of the slip as possible, but don’t worry if a little piece of the sweet potato comes with it. You can also use a clean, sharp knife to cut them if they’re particularly stubborn, ensuring you get a clean break at the base.
-
Rooting the Slips
Place the harvested slips into a new jar of fresh water. Make sure that at least the bottom inch or two of each slip is submerged. The leaves should remain above the waterline. Change this water regularly, just as you did with the parent sweet potato.
-
Watch for New Roots
Within a week or two, you’ll start to see tiny white roots emerging from the submerged ends of your slips. Once these roots are about 1-2 inches long, your slips are ready to be transplanted into soil.
What’s Next? Planting Your Sweet Potato Slips
When your rooted slips are ready, it’s time to plant them in your garden! Sweet potatoes thrive in warm weather and well-draining soil. Make sure all danger of frost has passed before planting them outdoors. Space them about 12-18 inches apart in rows that are 3-4 feet apart to give their vines plenty of room to spread.
With a little care and patience, you’ll be harvesting your own homegrown sweet potatoes in no time. Happy gardening!