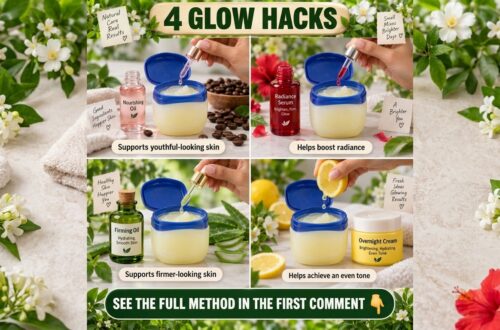
Dreaming of waking up to skin that feels softer, looks brighter, and radiates a healthy glow? You’re not alone! The quest for glowing skin often leads us down paths of expensive serums and complicated routines. But what if we told you that a powerful night repair oil could be made right in your kitchen, using just a few simple, everyday ingredients?
Get ready to discover our secret weapon: a DIY Night Repair Oil featuring baby oil, lemon peels, and cloves. This natural, easy-to-make elixir works wonders while you sleep, helping to nourish your skin and reveal a more luminous complexion by morning. Let’s dive into how these humble ingredients can transform your nightly beauty ritual!
The Power Trio: Baby Oil, Lemon Peels, and Cloves
Each ingredient in this DIY concoction brings its own unique benefits to the table, creating a synergistic blend for radiant skin.
Baby Oil: Your Gentle Hydrator
Often overlooked in adult skincare, baby oil is a fantastic emollient. It’s designed to be gentle and effective, locking in moisture and creating a protective barrier on your skin. This means less moisture loss overnight, leaving your skin feeling incredibly soft and supple when you wake up. It also acts as an excellent carrier oil for infusing the beneficial properties of lemon peels and cloves.

Lemon Peels: Nature’s Brightener
While lemon juice can be too harsh for direct application on skin, lemon peels are a hidden gem! They are packed with antioxidants like Vitamin C and flavonoids, which combat free radicals and environmental damage. The natural alpha-hydroxy acids (AHAs) present in lemon peels can gently exfoliate the skin, promoting cell turnover and helping to fade dark spots and hyperpigmentation over time, revealing a brighter, more even skin tone.
Cloves: The Aromatic Protector
More than just a spice, cloves are rich in eugenol, a powerful antioxidant with anti-inflammatory and antiseptic properties. This makes them excellent for calming irritated skin, fighting off acne-causing bacteria, and providing overall skin protection. Their aromatic essence also adds a delightful, comforting scent to your night oil.
How to Make Your DIY Night Repair Oil
Ready to whip up this skin-loving potion? Here’s what you’ll need and how to do it!
Ingredients:
- 1/2 cup pure baby oil (like Johnson’s Baby Oil)
- Peel from 1 organic lemon (ensure it’s well-washed)
- 1 tablespoon whole cloves
Equipment:
- Small glass jar with a lid
- Small saucepan (for indirect heat method, optional)
- Fine mesh strainer or cheesecloth
- Clean, airtight dropper bottle or serum bottle for storage
Step-by-Step Instructions:
- Prepare the Lemon Peels: Thoroughly wash the lemon. Carefully peel the lemon, trying to get as little of the white pith as possible, as it can be bitter. Chop the peels into smaller pieces to maximize surface area.
- Combine Ingredients: Place the chopped lemon peels and whole cloves into your clean glass jar. Pour the baby oil over them, ensuring all the peels and cloves are fully submerged.
- Infusion Method (Choose One):
- Cold Infusion (Slow Method): Seal the jar tightly. Place it in a cool, dark place for 1-2 weeks, shaking gently every day or two. This allows the oil to slowly infuse the beneficial properties.
- Warm Infusion (Faster Method): For quicker results, place the open glass jar into a saucepan filled with a few inches of water (creating a double boiler). Heat the water over low heat for 1-2 hours. Do not let the oil boil. This gentle warmth helps to extract the compounds more quickly. After heating, let it cool completely.
- Strain the Oil: Once infused, strain the oil through a fine mesh strainer or cheesecloth into a clean bowl, discarding the used lemon peels and cloves.
- Store: Transfer your freshly made night repair oil into a clean, airtight dropper bottle or serum bottle.

How to Use Your DIY Night Repair Oil for Brighter Skin
For best results, incorporate this oil into your nightly skincare routine:
- Cleanse: Start with a clean face. Gently cleanse your skin to remove makeup, dirt, and impurities.
- Tone (Optional): If you use a toner, apply it before the oil.
- Apply the Oil: Dispense 2-3 drops of your DIY night repair oil onto your fingertips. Gently warm the oil between your palms and pat it onto your face and neck. Massage in upward, circular motions until absorbed.
- Sleep: Let the oil work its magic overnight!
- Frequency: Use this oil 2-3 times a week, or as needed. Listen to your skin and adjust accordingly.
Important Considerations & Patch Test
- Patch Test: Always perform a patch test on a small, inconspicuous area of your skin (like behind your ear or on your inner arm) 24 hours before applying it to your entire face. This helps ensure you don’t have an allergic reaction or sensitivity.
- Photosensitivity: While we’re using lemon peels (not juice) and it’s a night oil, it’s still best practice to avoid direct sun exposure immediately after use. Always apply sunscreen in the morning, especially when using brightening ingredients.
- Storage: Store your DIY oil in a cool, dark place away from direct sunlight to maintain its potency and extend its shelf life (typically 2-3 months).
- Purity of Ingredients: Use organic lemons if possible to avoid pesticides on the peels.
Embrace the simplicity and effectiveness of natural ingredients with this DIY Night Repair Oil. You’ll love waking up to softer, brighter, and more refreshed skin, all thanks to a little kitchen magic! Give it a try and share your glowing results with us.