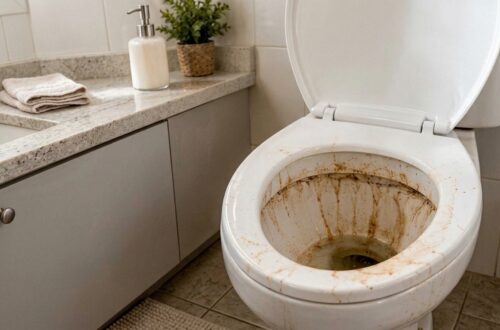
Tired of scrubbing away at stubborn soap scum and unsightly water spots in your bathroom? Many commercial cleaners contain harsh chemicals and strong fumes. What if we told you the secret to sparkling clean bathroom surfaces might already be in your kitchen pantry?
This simple DIY bathroom cleaner uses common, affordable ingredients to tackle tough grime effectively. It’s a practical and budget-friendly alternative that can leave your bathroom shining.
What You’ll Need
- 2 cups warm water
- 1/2 cup white vinegar
- 1/4 cup baking soda
- 1 tablespoon liquid dish soap (like a grease-cutting brand)
- Empty spray bottle (at least 20 oz capacity)
- Funnel (optional, but recommended for easy pouring)
Why This DIY Can Be Useful
Each ingredient in this homemade cleaner plays a specific role in breaking down bathroom buildup:
- White Vinegar: An acidic powerhouse, vinegar is excellent at dissolving hard water stains, mineral deposits, and soap scum. Its acidity helps to loosen and break apart the bonds that hold these residues to your surfaces.
- Baking Soda: This mild abrasive helps to gently scrub away grime without scratching surfaces. It also acts as a deodorizer, neutralizing unpleasant bathroom odors. When combined with vinegar, it creates a fizzing reaction that helps lift dirt.
- Liquid Dish Soap: Dish soap is a surfactant, meaning it helps to cut through grease and oil, making it effective against body oils and greasy residues often found in bathrooms. It helps the solution cling to surfaces and enhances its cleaning power.
How to Make It
Making your own bathroom cleaner is quick and easy. Just follow these steps:
- Carefully pour the 2 cups of warm water into your empty spray bottle. A funnel can be very helpful here to prevent spills.
- Add the 1/2 cup of white vinegar to the bottle.
- Next, add the 1 tablespoon of liquid dish soap.
- Finally, slowly add the 1/4 cup of baking soda. Be prepared for a fizzing reaction when the baking soda mixes with the vinegar. This is normal and helps activate the cleaner.
- Securely attach the spray nozzle to the bottle and gently swirl or shake the bottle to mix the ingredients. Do not shake vigorously, especially right after adding baking soda, as the pressure can build up.
How to Use It
This cleaner is perfect for tubs, showers, tiles, and sinks. Here’s how to get the best results:
- Prepare the Area: If possible, remove any loose hair or debris from the surface you’re cleaning.
- Spray Generously: Spray the homemade cleaner directly onto the soap scum, water spots, or dirty areas. Ensure the surface is thoroughly saturated.
- Let It Sit: Allow the cleaner to sit on the surface for 5-10 minutes. For heavily soiled areas or stubborn stains, you might extend this to 15-20 minutes, or even longer if needed, but do not let it dry completely.
- Scrub: Using a brush, sponge, or microfiber cloth, scrub the treated areas. The fizzing action and ingredients should help lift the grime, making scrubbing easier.
- Rinse: Thoroughly rinse the surface with clean water to wash away the loosened dirt and cleaner residue.
- Wipe Dry: For a streak-free shine, wipe the surface dry with a clean, dry cloth or squeegee.
What to Expect
You can expect a noticeable reduction in soap scum, hard water stains, and general grime. For light to moderate buildup, you should see sparkling clean surfaces. For very old or extremely heavy buildup, you might need a second application or a bit more scrubbing effort. Consistent use of this cleaner can help prevent future buildup, making your cleaning routine easier over time. It may not instantly remove years of deep-set stains, but it’s a powerful and gentle alternative for regular maintenance.
Helpful Tips
- Use Warm Water: Warm water helps dissolve ingredients more easily and can boost cleaning effectiveness.
- Pre-Wet Surfaces: For very dry or caked-on soap scum, you might lightly pre-wet the surface with warm water before spraying the cleaner.
- Ventilation is Key: While natural, vinegar has a strong smell. Ensure good ventilation by opening windows or turning on a fan during and after cleaning.
- Regular Use: Incorporate this cleaner into your regular cleaning routine to prevent heavy buildup, which will save you time and effort in the long run.
Important Notes / Safety
- Do Not Mix with Bleach: Never mix vinegar with bleach, as this can create dangerous chlorine gas. This cleaner should always be used on its own.
- Ventilation: Always ensure adequate ventilation when cleaning, especially with vinegar-based solutions.
- Test in an Inconspicuous Area: Before applying to a large area, always test the cleaner on a small, hidden spot to ensure it doesn’t cause discoloration or damage, especially on older or delicate surfaces.
- Natural Stone: Avoid using vinegar on natural stone surfaces like marble, granite, or travertine, as its acidity can etch or damage the stone over time.
- Storage: Store the cleaner in a cool, dark place away from direct sunlight. The baking soda and vinegar react, so it’s best to use it within a few weeks for maximum fizzing power, though its cleaning ability will still be present.