Welcome, fellow garden enthusiasts! Have you ever marvelled at a fruit tree bearing multiple varieties, or wondered how some plants seem to defy diseases? The secret might just be in the ancient art of plant grafting! Grafting isn’t just for commercial growers; it’s a fascinating DIY technique that can empower home gardeners to create stronger, more resilient, and even more diverse plants.
Today, we’re diving into the wonderful world of plant grafting. Imagine giving your favourite rose a robust new root system, or coaxing a struggling fruit tree into vibrant new life. It’s an incredibly rewarding skill that opens up a whole new realm of possibilities in your garden.
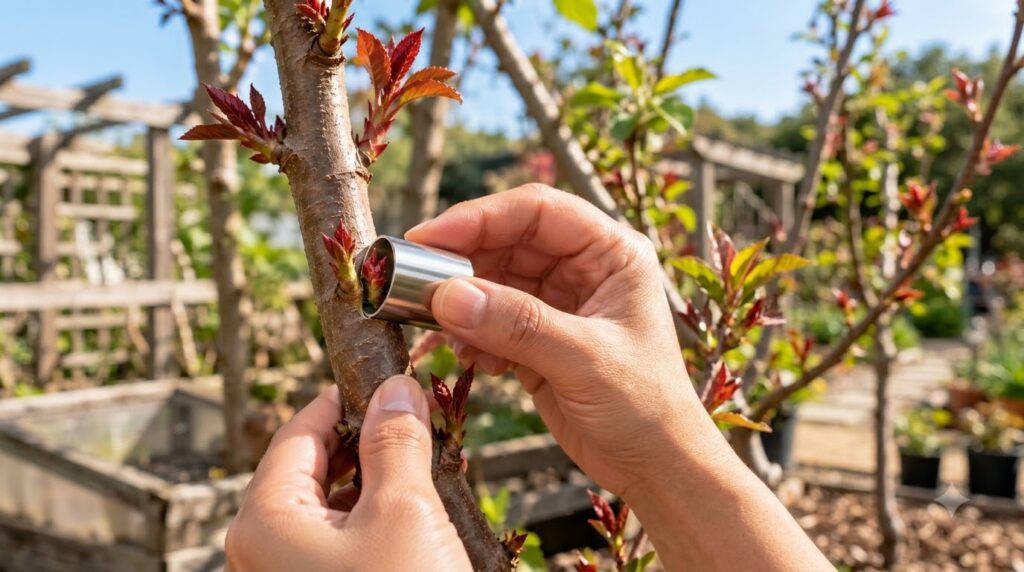
What Exactly is Plant Grafting?
At its heart, plant grafting is the art of joining two plants together so they grow as one. Typically, this involves connecting a ‘scion’ (a small piece of the desired plant, like a bud or a shoot) to a ‘rootstock’ (the lower part of another plant, including its root system). The goal is for the vascular tissues of both parts to merge, allowing water and nutrients to flow seamlessly between them.
Think of it as a natural surgery where you’re giving one plant the best qualities of another, whether it’s disease resistance from the rootstock or a unique fruit variety from the scion.
Why Should You Try DIY Plant Grafting?
Grafting offers a multitude of benefits for the home gardener, helping you overcome common challenges and achieve impressive results:
- Disease and Pest Resistance: Many rootstocks are naturally resistant to specific soil-borne diseases or pests. By grafting your desired plant onto such a rootstock, you can protect it from common ailments.
- Adapting to Soil Conditions: If your garden soil isn’t ideal, you can graft your favourite plants onto rootstocks that thrive in those specific conditions, like drought tolerance or different pH levels.
- Faster Fruiting and Enhanced Growth: Grafted plants often mature and produce fruit much faster than those grown from seed. Certain rootstocks can also enhance the vigour or dwarf the growth of the scion, allowing you to grow larger fruit on smaller trees.
- Creating Multi-Variety Trees: Imagine an apple tree bearing five different types of apples, or a rose bush with blooms of various colours! Grafting makes this possible, adding incredible diversity to your garden.
- Propagating Difficult Plants: Some plants are tricky to propagate from cuttings or seeds. Grafting provides a reliable method to multiply these cherished varieties.
- Repairing Damaged Plants: Bridge grafting can even be used to repair trees that have suffered damage to their trunks, creating a living ‘bridge’ to bypass the injury.
Getting Started: Essential Grafting Tools
Before you begin, gather these key tools to ensure a smooth and successful grafting process:
- Sharp Grafting Knife: A very sharp, clean knife is crucial for making precise cuts.
- Pruners: For preparing scions and rootstocks.
- Grafting Tape or Wax: To secure the graft and prevent moisture loss.
- Rubbing Alcohol or Bleach Solution: For sterilizing your tools.
- Gloves: To protect your hands and maintain hygiene.
A Simple Guide to Bud Grafting (Inspired by the Image)
The image shows a common technique called bud grafting, where a single bud (the scion) is joined to the rootstock. Here’s a simplified overview:
1. Prepare Your Rootstock and Scion
Choose a healthy, vigorous rootstock, usually a young branch or stem. For the scion, select a dormant bud from the plant you wish to propagate. Ensure both are compatible species.
2. Make the Cuts
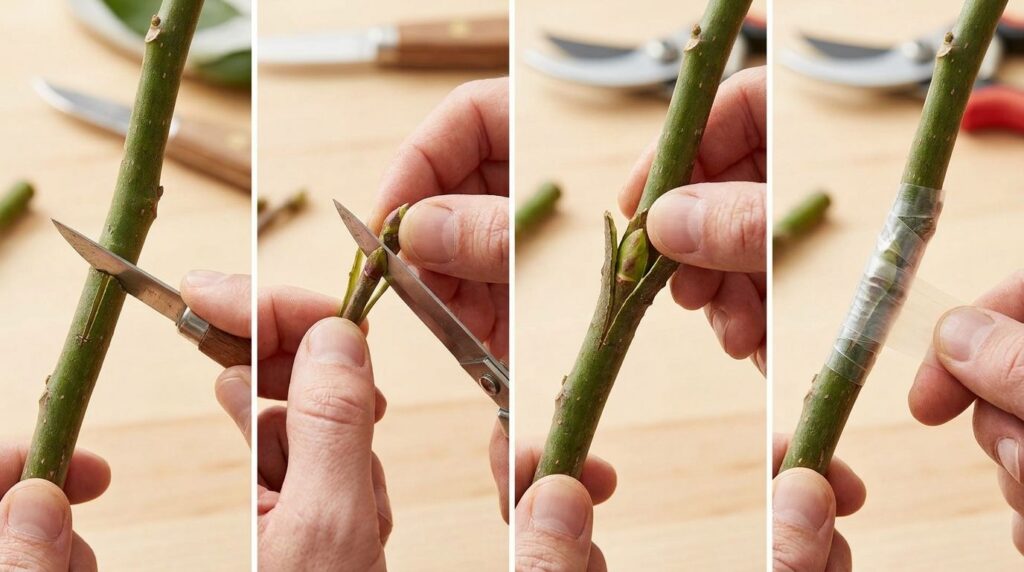
On the rootstock, make a T-shaped incision through the bark, about half an inch long vertically and horizontally. Carefully pry open the bark flaps.
For the scion, cut a shield-shaped piece of bark containing a single bud from your desired plant. The cut should be clean and smooth.
3. Insert the Bud
Gently slide the bud shield into the T-incision on the rootstock, ensuring the cambium layers (the green layer just under the bark) of both pieces align as closely as possible. The bud should fit snugly.
4. Secure the Graft
Wrap the entire area with grafting tape, starting from below the bud and moving upwards, covering the cuts completely but leaving the bud itself exposed. This secures the bud and prevents moisture loss.
5. Aftercare and Monitoring
Keep the grafted area protected from extreme weather. In a few weeks, if successful, the bud will swell and begin to grow. Once the new shoot is established, you can gradually remove the grafting tape.
Tips for Grafting Success
- Timing is Key: The best time for grafting often depends on the type of graft and plant, but late winter to early spring, when plants are dormant but about to awaken, is generally ideal for many methods. Bud grafting is often done in late summer.
- Cleanliness is Crucial: Always sterilize your tools before and after each graft to prevent the spread of diseases.
- Practice Makes Perfect: Don’t be discouraged if your first attempts aren’t perfect. Grafting requires a steady hand and a keen eye. Practice on less important branches first.
- Proper Alignment: Ensuring the cambium layers of the scion and rootstock are aligned is the most critical factor for a successful union.
- Keep it Moist: Prevent the graft from drying out by using grafting wax or tape that seals moisture in.
Embrace the Magic of Grafting!
Plant grafting might seem intimidating at first, but with a little practice and patience, you’ll be amazed at what you can achieve. It’s a truly empowering skill that connects you deeper with the natural world and allows you to cultivate a garden that’s uniquely yours. So, grab your tools, pick out your plants, and get ready to nurture new life in your garden!