There’s nothing quite like the joy of sinking your teeth into a perfectly cooked chicken strip: crispy on the outside, incredibly juicy and tender on the inside. Forget the drive-thru; homemade crispy chicken strips are a game-changer! And when you pair them with a fresh, zesty homemade creamy dill dip? Pure magic, I tell you!
This recipe brings that classic comfort food right into your kitchen with straightforward steps and simple ingredients. Whether it’s for a fun family dinner, a party appetizer, or a delicious snack, these crispy chicken strips are guaranteed to be a hit. The creamy dill dip adds a burst of fresh flavor that elevates every bite, making it an unforgettable meal that everyone will love.
It’s surprisingly easy to whip up, even for beginner cooks, and the result is so much more flavorful and satisfying than anything you’d buy pre-made. Get ready to impress your taste buds and your loved ones with this incredible pairing!
Why You’ll Love This Recipe
- Unbeatable Flavor: Juicy chicken with a crunchy coating and a zesty, creamy dip.
- Family Favorite: A crowd-pleaser that even picky eaters will adore.
- Easy to Make: Simple steps, perfect for cooks of all levels.
- Budget-Friendly: Made with common, affordable ingredients.
- Versatile: Great as a main dish, appetizer, or snack.
- Fresher Than Store-Bought: You control the quality and ingredients!
Ingredients
For the Crispy Chicken Strips:
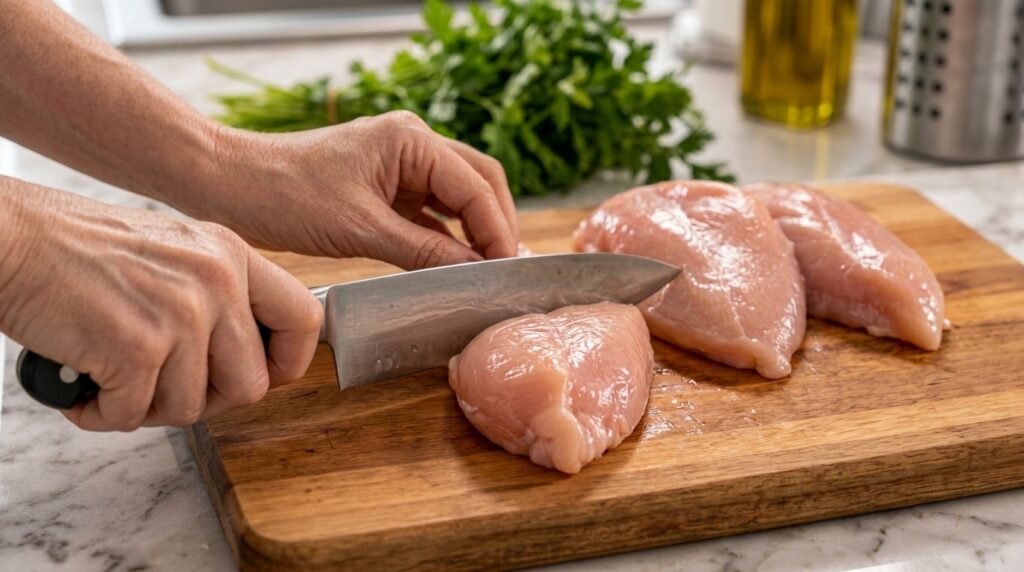
- 1.5 lbs boneless, skinless chicken breasts: Cut into 1/2-inch thick strips. Chicken thighs can also be used for a slightly richer flavor.
- 1 cup all-purpose flour: For the initial dredge. You can use a gluten-free all-purpose flour blend if needed.
- 1 tsp salt: Essential for seasoning the chicken and breading.
- 1 tsp black pepper: Adds a nice warmth to the seasoning.
- 1 tsp paprika: Gives a lovely color and subtle smoky flavor.
- 1/2 tsp garlic powder: Enhances the savory profile.
- 2 large eggs: Whisked well to help the breading stick.
- 1/4 cup milk: Added to the eggs for a smoother wash.
- 2 cups breadcrumbs: Panko breadcrumbs give the best crispy texture, but regular breadcrumbs work too.
- 2-3 cups vegetable oil: Or canola oil, for frying. Make sure to use an oil with a high smoke point.
For the Creamy Dill Dip:
- 1/2 cup mayonnaise: The creamy base for our dip.
- 1/4 cup sour cream: Adds a lovely tang and extra creaminess. Greek yogurt can be a lighter alternative.
- 2 tbsp fresh dill: Finely chopped. Fresh dill is key for the best flavor; dried dill can be used in a pinch, but use less (about 1 tsp).
- 1 tbsp fresh lemon juice: Brightens up the dip.
- 1 clove garlic: Minced.
- 1/4 tsp salt: To taste.
- Pinch black pepper: To taste.

Kitchen Equipment
- Large mixing bowls (3)
- Shallow dish or plate (for flour)
- Whisk
- Cutting board
- Sharp knife
- Large, heavy-bottomed skillet or Dutch oven
- Tongs
- Wire rack with paper towels underneath
- Measuring cups and spoons
Step-by-Step Instructions
Making the Creamy Dill Dip:
- In a small bowl, combine the mayonnaise, sour cream, finely chopped fresh dill, fresh lemon juice, minced garlic, salt, and pepper.
- Whisk everything together until smooth and well combined.
- Taste and adjust seasoning if necessary. For best flavor, cover and refrigerate for at least 30 minutes to allow the flavors to meld.
Preparing the Crispy Chicken Strips:
- Prepare the Chicken: Pat the chicken strips dry with paper towels. This helps the breading stick better.
- Set Up Breading Stations: Get three shallow bowls ready. In the first bowl, combine flour, salt, pepper, paprika, and garlic powder. In the second bowl, whisk eggs and milk together. In the third bowl, place your breadcrumbs.
- Dredge the Chicken: Take one chicken strip at a time. First, dredge it in the seasoned flour, ensuring it’s fully coated. Shake off any excess.
- Next, dip the floured chicken into the egg wash, letting any extra drip off.
- Finally, press the chicken into the breadcrumbs, making sure to coat all sides thoroughly. Place the breaded chicken on a clean plate or baking sheet. Repeat with all chicken strips.
- Heat the Oil: Pour vegetable oil into a large, heavy-bottomed skillet or Dutch oven until it reaches about 1-inch deep. Heat the oil over medium-high heat until it reaches 350-375°F (175-190°C). If you don’t have a thermometer, you can test it by dropping a tiny pinch of breadcrumbs in; they should sizzle immediately.
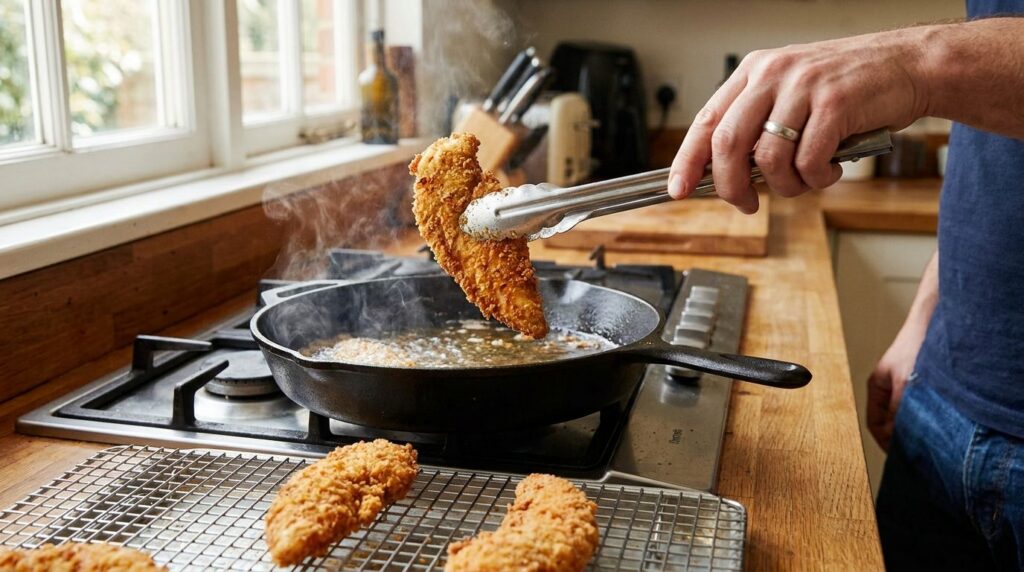
- Fry the Chicken: Carefully place a few breaded chicken strips into the hot oil, making sure not to overcrowd the pan. Cook for 3-5 minutes per side, or until they are golden brown and cooked through (internal temperature reaches 165°F or 74°C).
- Drain and Serve: Remove the cooked chicken strips with tongs and place them on a wire rack set over paper towels to drain any excess oil. Serve immediately with your chilled creamy dill dip!
Expert Tips
- Pat Chicken Dry: This is crucial! Excess moisture prevents the breading from sticking and getting truly crispy.
- Maintain Oil Temperature: Use a kitchen thermometer if possible. If the oil is too cold, the chicken will be greasy; too hot, and the outside will burn before the inside cooks.
- Don’t Overcrowd the Pan: Frying in batches ensures the oil temperature stays consistent and the chicken gets properly crispy, not steamed.
- Rest the Breading: After breading, let the chicken strips sit for 10-15 minutes before frying. This helps the breading adhere better.
- Make Dip Ahead: The dill dip tastes even better when made a few hours or even a day in advance, giving the flavors time to develop.
- Use Fresh Dill: While dried dill can be used, fresh dill makes a huge difference in the vibrancy and flavor of the dip.
Variations
- Spicy Chicken Strips: Add a pinch of cayenne pepper to the flour mixture or a dash of hot sauce to the egg wash for a kick.
- Air Fryer Version: For a lighter option, air fry breaded chicken strips at 375°F (190°C) for 10-15 minutes, flipping halfway, until golden and cooked through. Spritz lightly with oil before air frying.
- Herb Garden Strips: Experiment with other dried herbs like oregano or thyme in your flour seasoning.
- Different Dips: Not a fan of dill? Try a honey mustard, BBQ sauce, or a spicy sriracha mayo dip.
- Gluten-Free: Use a gluten-free all-purpose flour blend and gluten-free breadcrumbs.
- Kid-Friendly: Serve with ketchup or ranch dressing, or cut the chicken into fun shapes before breading.
What to Serve With
These crispy chicken strips are fantastic on their own, but they also shine with a variety of side dishes. Think classic comfort food pairings!
- Fries or Sweet Potato Fries: A natural match for any chicken strip.
- Coleslaw: A refreshing, creamy side that balances the fried chicken.
- Simple Green Salad: With a light vinaigrette for a fresh contrast.
- Corn on the Cob: Sweet and satisfying.
- Macaroni and Cheese: For the ultimate comfort food meal.
- Beverages: Iced tea, lemonade, or a cold soda.
Storage
These crispy chicken strips are best enjoyed fresh, but leftovers can be stored and reheated.
- Refrigerator: Store cooked chicken strips in an airtight container in the refrigerator for up to 3-4 days. The dill dip can be stored separately in an airtight container for up to 5 days.
- Freezer: Once cooled, place cooked chicken strips in a single layer on a baking sheet and freeze until solid. Transfer to a freezer-safe bag or container and freeze for up to 2-3 months.
- Reheating: For best results, reheat chicken strips in an oven or air fryer at 375°F (190°C) for 10-15 minutes, or until heated through and crispy again. Microwaving is not recommended as it can make them soggy.
Frequently Asked Questions
Q: Can I bake these chicken strips instead of frying?
A: Yes, you can! Place the breaded chicken strips on a lightly greased baking sheet and bake at 400°F (200°C) for 20-25 minutes, flipping halfway, until golden and cooked through. They won’t be quite as crispy as fried but will still be delicious.
Q: What’s the best oil for frying chicken?
A: Vegetable oil, canola oil, and peanut oil are great choices because they have high smoke points, meaning they can reach the necessary frying temperature without burning.
Q: How do I know when the chicken is fully cooked?
A: The chicken should be golden brown on the outside. For an accurate measure, use a meat thermometer inserted into the thickest part of the strip; it should read 165°F (74°C).
Q: Can I use dried dill for the dip?
A: While fresh dill is highly recommended for its vibrant flavor, you can substitute dried dill. Use about 1 teaspoon of dried dill for every tablespoon of fresh dill.
Q: Can I prepare the chicken strips ahead of time?
A: You can bread the chicken strips a few hours in advance and keep them covered in the refrigerator. Fry them just before serving for the crispiest results. The dip can definitely be made a day or two ahead.
Q: My breading isn’t sticking. What went wrong?
A: Make sure your chicken is very dry before dredging in flour. Also, ensure the egg wash fully coats the chicken, and press the breadcrumbs firmly onto all sides. Allowing them to rest for 10-15 minutes after breading can also help.
Nutrition
Approximate values per serving (4-5 chicken strips with dip):
- Calories: 450-550
- Protein: 35-45g
- Fat: 25-35g
- Carbs: 20-30g
- Fiber: 1-2g
- Sugar: 1-3g
- Sodium: 700-900mg
Nutritional information is an estimate and may vary.
Conclusion
There you have it! A truly satisfying recipe for crispy chicken strips paired with a bright, creamy dill dip that will bring smiles to everyone around your table. There’s something so rewarding about making a classic comfort food from scratch, and this recipe delivers on all fronts: flavor, texture, and pure homemade goodness.
So, roll up your sleeves, gather your ingredients, and get ready to create some culinary magic. Once you try these, you’ll never go back to store-bought! I’d love to hear how they turn out for you. Please leave a comment below and don’t forget to rate the recipe. And if you’re looking for more delicious and easy family-friendly meals, be sure to explore more recipes on our site!

