Do you ever notice your electric fan pushing less air, or worse, blowing around a dusty smell? That’s because over time, fans accumulate an incredible amount of dust, lint, and grime, often in places that aren’t immediately visible. This buildup can reduce your fan’s efficiency, contribute to indoor allergens, and even shorten its lifespan. Fortunately, giving your fan a thorough deep clean is a straightforward DIY project that can make a big difference in your home’s air quality and comfort. It’s a simple, cost-effective way to revitalize an essential household appliance.
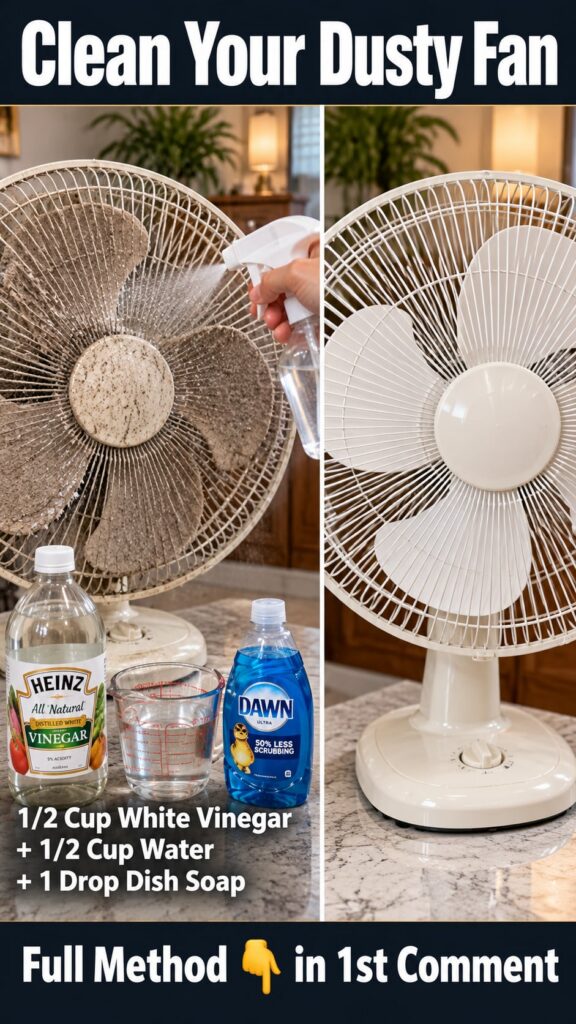
What You’ll Need
- Dish soap or an all-purpose household cleaner
- Warm water
- 2-3 clean microfiber cloths
- Small brush (an old toothbrush or a soft-bristled paint brush works well)
- Screwdriver (if your fan requires it for disassembly)
- Vacuum cleaner with a brush attachment (optional, for initial loose dust)
- Bucket or basin
Why This DIY Can Be Useful
Dust accumulation on fan blades and grilles creates resistance, making the motor work harder and consuming more energy. A thick layer of dust also prevents proper airflow, reducing the fan’s cooling power. More importantly, this collected dust can be blown back into your living space, circulating allergens, pet dander, and other irritants. A clean fan operates more efficiently, provides better air circulation, and helps maintain a healthier indoor environment. It’s a small task with significant benefits for your home and your health.
How to Clean It
- Unplug for Safety: Always start by unplugging your fan from the power outlet. This is crucial for preventing electrical shock.
- Remove Loose Dust: If your fan has a lot of loose dust, use a vacuum cleaner with a brush attachment to carefully suck away as much surface dust as possible from the grille and visible blades.
- Disassemble the Fan: Using a screwdriver if necessary, carefully remove the front grille of your fan. Some fans may have clips or latches instead. If possible, also remove the fan blade assembly.
- Prepare Cleaning Solution: Fill a bucket or basin with warm water and add a few drops of dish soap or a small amount of all-purpose cleaner. Mix until sudsy.
- Clean Removable Parts: Submerge the removed grille and fan blades in the soapy water. Use a microfiber cloth or a small brush to scrub away all the accumulated dust and grime. For stubborn spots, let them soak for a few minutes.
- Clean Non-Removable Parts: For the motor housing and any blades that cannot be removed, dampen a clean microfiber cloth with your soapy solution (wring out excess water well!). Carefully wipe down all surfaces. Use your small brush to reach into tight crevices. Be extremely cautious not to get any moisture into the motor or electrical components.
- Rinse and Wipe: Once all parts are clean, rinse the removable parts thoroughly under clean running water. For non-removable parts, wipe them down with a separate clean, damp microfiber cloth (again, wrung out well) to remove any soap residue.
- Dry Completely: Using a dry microfiber cloth, thoroughly dry all fan components. It’s vital that all parts are completely dry before reassembly to prevent rust or electrical issues. You can also let them air dry for several hours.
- Reassemble the Fan: Once everything is dry, carefully reassemble your fan, ensuring all screws, clips, and parts are securely in place.
What to Expect
After cleaning, you can expect your fan to look significantly cleaner and operate more effectively. You should notice improved airflow and potentially a reduction in any dusty odors. A clean fan can also run more quietly, as dust buildup can sometimes contribute to rattling or humming noises. While it won’t be brand new, it will certainly function much closer to its original efficiency.
Helpful Tips
- Regular Maintenance: To prevent heavy dust buildup, give your fan a quick wipe-down with a damp cloth weekly or bi-weekly, especially during peak usage seasons.
- Use Compressed Air: For hard-to-reach motor areas or very intricate grilles that can’t be easily disassembled, a can of compressed air can help dislodge stubborn dust.
- Clean in a Ventilated Area: Cleaning a very dusty fan can kick up a lot of particles, so consider doing it outdoors or in a well-ventilated space.
Important Notes / Safety
- Always Unplug: Never attempt to clean a fan while it is plugged in.
- Avoid Water on Electricals: Do not submerge the motor unit or any electrical components in water. Only use a damp cloth, ensuring it is well-wrung to avoid dripping.
- Ensure Dryness: Make absolutely sure all components are completely dry before reassembling the fan and plugging it back in. Moisture can cause short circuits or damage the motor.
- Patch Test Cleaners: If using a new cleaner, test it on an inconspicuous area of your fan’s plastic to ensure it doesn’t cause discoloration or damage.