Easy Homemade Boiled Buns: Soft & Chewy Bread Rolls
There&rsquos something truly magical about homemade bread, and these Homemade Boiled Buns take that magic to a whole new level. Forget everything you thought you knew about making buns; this unique boiling method results in a texture that’s delightfully soft and fluffy on the inside, with an irresistible slight chewiness on the outside. It’s like the best of a bagel and a dinner roll combined!
Whether you’re a seasoned baker or just starting your journey into homemade bread, this recipe for boiled buns is surprisingly simple and incredibly rewarding. They’re perfect for slathering with butter, building into delicious mini sandwiches, or serving alongside your favorite soup or stew. Get ready to impress your family and friends with these perfectly golden, tender rolls that are a healthy habit worth adopting daily!
Why You’ll Love This Homemade Boiled Buns Recipe
- Unique Texture: The boiling step creates an incredible soft interior with a satisfying chewy crust that’s hard to achieve with conventional baking.
- Surprisingly Easy: Don’t be intimidated by the boiling step; it’s quick and adds very little complexity to a standard yeast dough.
- Simple Ingredients: You likely have all the pantry staples needed for these delicious buns already on hand.
- Family-Friendly: Everyone loves a fresh-baked bun, and these are a guaranteed crowd-pleaser.
- Versatile: Enjoy them plain, as sliders, with butter, or alongside any meal.
- Healthier Option: Making bread at home allows you to control the ingredients, avoiding preservatives and excess sugars found in store-bought options.
Ingredients for Boiled Buns
For the Dough:
- 1 cup (240 ml) warm water (105-115°F / 40-46°C)
- 2 ¼ teaspoons (7 g) active dry yeast (one standard packet)
- 1 tablespoon (13 g) granulated sugar, plus a pinch
- 1 teaspoon (6 g) salt
- 2 tablespoons (30 ml) olive oil or melted unsalted butter
- 3 cups (360 g) all-purpose flour, plus more for dusting
For Boiling:
- 8 cups (1.9 liters) water
- 1 teaspoon (6 g) baking soda (optional, for a chewier crust)
For Finishing (Optional):
- 1 large egg, beaten (for egg wash)
- Sesame seeds or poppy seeds, for topping
Ingredient Notes
- Warm Water: The temperature is crucial for activating the yeast. It should feel like warm bathwater, not hot.
- Yeast: Ensure your active dry yeast is fresh. If it doesn’t foam after 5-10 minutes, it may be dead, and your dough won’t rise.
- Sugar: A small amount of sugar “feeds” the yeast, helping it activate and giving the buns a lovely golden color.
- Olive Oil/Melted Butter: Adds richness and helps keep the buns tender. Olive oil will result in a slightly chewier bun, while butter makes them a bit more tender.
- Baking Soda (for boiling): While optional, adding baking soda to the boiling water (like for pretzels or bagels) slightly increases the pH, promoting a deeper brown crust and a more pronounced chewy texture. For a softer, more traditional bun feel, you can omit it.
Equipment You’ll Need
- Large mixing bowl
- Measuring cups and spoons
- Whisk or fork
- Stand mixer with dough hook (optional, but recommended)
- Large pot (at least 6-quart/5.7-liter capacity)
- Slotted spoon or spider strainer
- Parchment paper
- Baking sheets
- Wire cooling rack
How to Make Homemade Boiled Buns
Making these delightful homemade boiled buns involves a few key steps that bring out their unique texture. Follow these instructions carefully for the best results!
Step 1: Activate the Yeast
In a large mixing bowl, combine the warm water, 1 tablespoon of granulated sugar, and active dry yeast. Stir gently and let it sit for 5-10 minutes. The mixture should become foamy and bubbly, indicating the yeast is active.
Step 2: Mix and Knead the Dough
Add the salt and olive oil (or melted butter) to the yeast mixture. Gradually add the all-purpose flour, about a cup at a time, mixing with a wooden spoon or a stand mixer with a dough hook until a shaggy dough forms. Once all the flour is incorporated, knead the dough on a lightly floured surface or with the stand mixer on medium-low speed for 8-10 minutes. The dough should become smooth, elastic, and slightly tacky to the touch. If using a stand mixer, the dough should clear the sides of the bowl.
Step 3: First Rise
Lightly grease a clean large bowl with a little olive oil. Place the dough in the bowl, turning it once to coat. Cover the bowl with plastic wrap or a clean kitchen towel and let it rise in a warm, draft-free place for 1 to 1.5 hours, or until it has doubled in size.
Step 4: Shape the Buns
Once the dough has risen, gently punch it down to release the air. Turn the dough out onto a lightly floured surface and divide it into 8-12 equal pieces, depending on your desired bun size. Shape each piece into a smooth, round ball. Place the shaped buns on a parchment-lined baking sheet, leaving some space between them. You can use a sharp knife or razor to create a shallow cross pattern on top of each bun if desired.
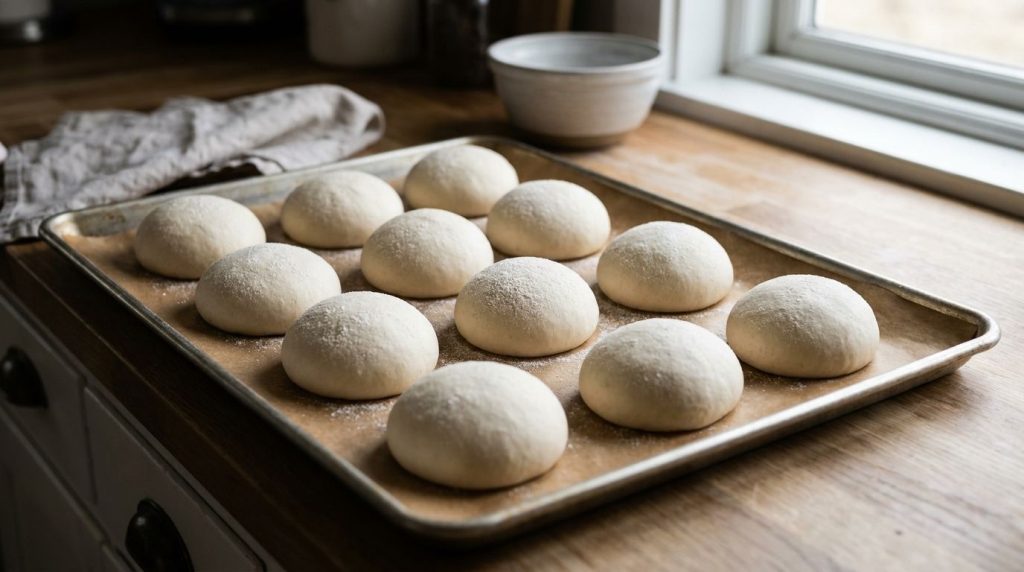
Step 5: Prepare for Boiling & Second Rise
Cover the baking sheet with a clean kitchen towel and let the buns rest for another 20-30 minutes for a short second rise while you prepare the boiling water. Preheat your oven to 375°F (190°C). Bring 8 cups of water to a rolling boil in a large pot. If using, add 1 teaspoon of baking soda to the boiling water.
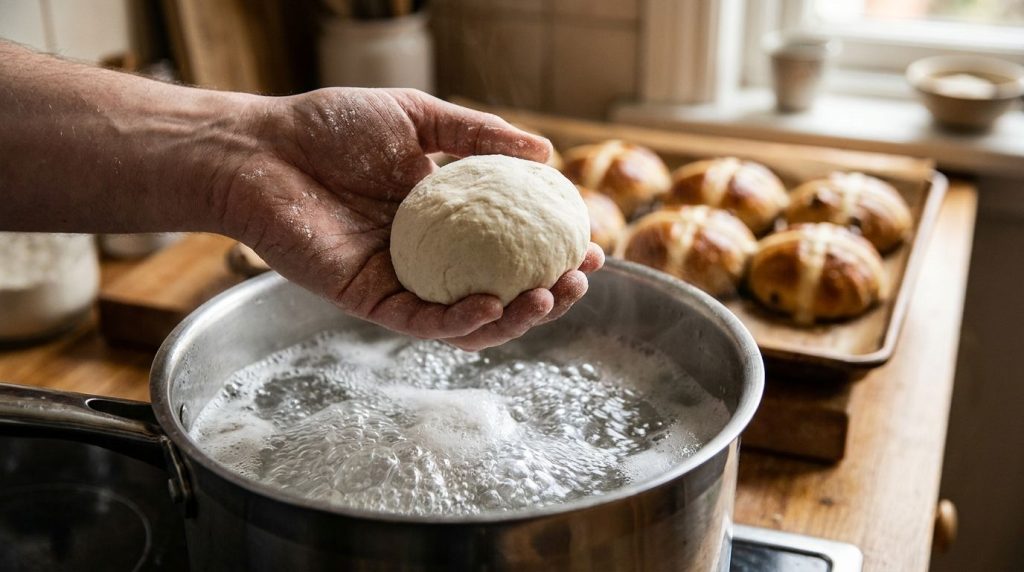
Step 6: Boil the Buns
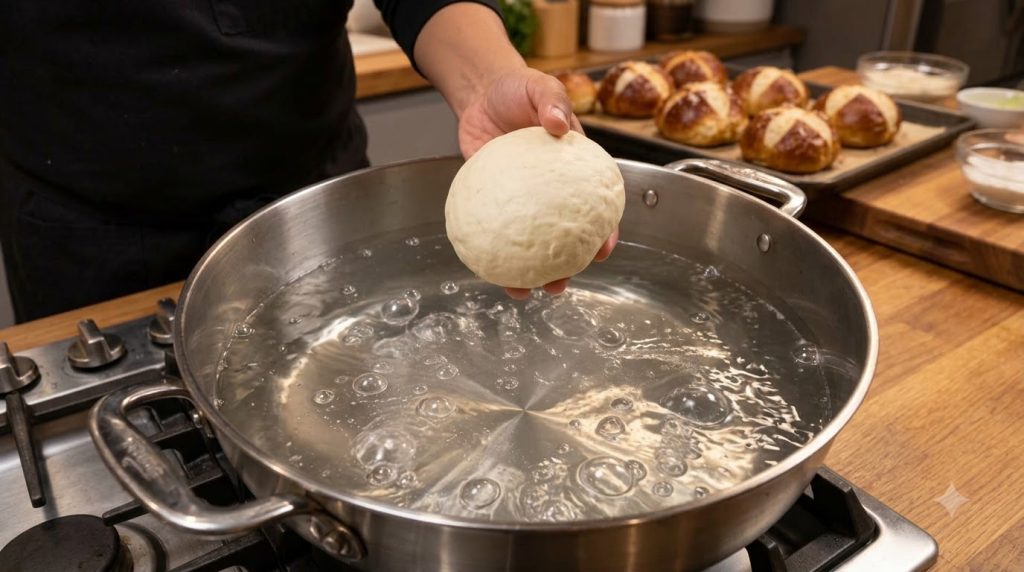
Carefully drop 2-3 buns into the boiling water at a time, making sure not to overcrowd the pot. Boil for 30-45 seconds on each side. They will puff up slightly. Using a slotted spoon or spider strainer, carefully remove the buns from the water, letting any excess water drain off. Place them back on the parchment-lined baking sheet.
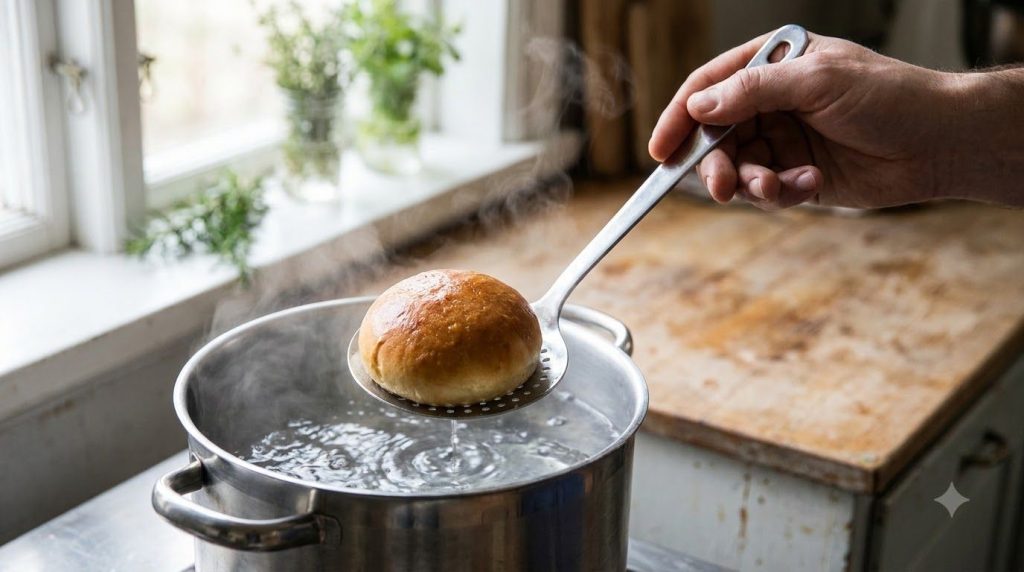
Step 7: Bake to Golden Perfection
If using, brush the boiled buns with the beaten egg wash and sprinkle with sesame or poppy seeds. Bake in the preheated oven for 15-20 minutes, or until the buns are beautifully golden brown and sound hollow when tapped on the bottom. Baking time may vary depending on your oven and bun size.
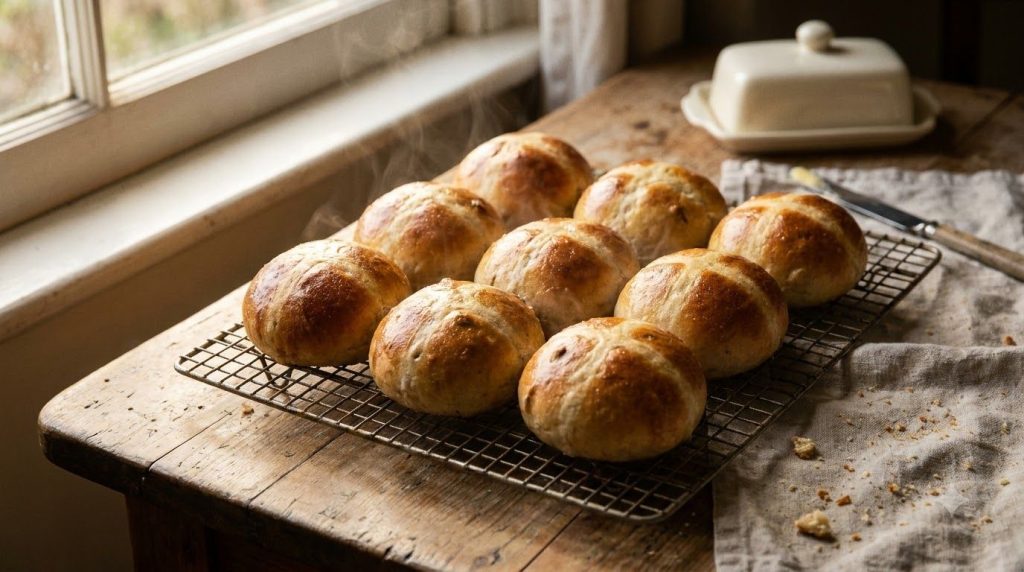
Step 8: Cool and Serve
Transfer the baked buns to a wire cooling rack to cool slightly before serving. While they are delicious warm, allowing them to cool completely helps set their texture. Enjoy your soft, chewy homemade boiled buns!
Pro Tips for the Best Results
- Check Your Yeast: Always “proof” your yeast first to ensure it’s active. Dead yeast means no rise!
- Don’t Over-Flour: Add flour gradually. Too much flour makes the dough stiff and the buns dry. The dough should be slightly tacky but not sticky.
- Proper Kneading: Kneading develops the gluten, which is essential for the buns’ structure and chewiness. Knead until the dough is smooth and elastic.
- Warm Rising Environment: A warm, draft-free spot is ideal for dough rising. You can also turn your oven on for a minute, then turn it off and let the dough rise inside.
- Don’t Overcrowd the Pot: Boil only 2-3 buns at a time to maintain water temperature and ensure even cooking.
- Gentle Handling: After boiling, handle the buns gently as they are tender. A slotted spoon or spider works best.
- Customize Your Toppings: Experiment with different toppings like “Everything Bagel” seasoning, dried herbs, or coarse sea salt for extra flavor.
Common Mistakes to Avoid
- Using Water That’s Too Hot or Cold: Water that’s too hot will kill the yeast; too cold, and it won’t activate. Aim for bathwater temperature (105-115°F / 40-46°C).
- Not Letting the Dough Rise Enough: Underrisen dough will result in dense, heavy buns. Be patient and allow the dough to double in size for a light and airy texture.
- Over-Boiling the Buns: Boiling for too long can make the buns tough. A quick 30-45 seconds per side is plenty to create the desired outer texture.
- Under-Baking: Ensure the buns are golden brown and sound hollow when tapped. Pale buns might be doughy inside.
Variations & Substitutions
- Sweet Boiled Buns: Increase the sugar to ¼ cup and add 1 teaspoon of cinnamon to the dough. These are great for breakfast!
- Whole Wheat Boiled Buns: Substitute up to half of the all-purpose flour with whole wheat flour for a nuttier flavor and added fiber. You might need a little extra water.
- Garlic Herb Buns: Add 1-2 cloves of minced garlic and 1 tablespoon of dried Italian herbs to the dough during the mixing stage.
- Cheese Buns: Mix ½ cup of shredded cheddar or mozzarella cheese into the dough during the last minute of kneading, or sprinkle on top before baking.
- Vegan Option: Ensure you use olive oil instead of butter for the dough. For the egg wash, you can use plant-based milk or a flax egg wash (1 tbsp ground flaxseed + 3 tbsp water, let sit for 5 mins).
Serving Suggestions
These homemade boiled buns are incredibly versatile and can be enjoyed in many ways:
- Classic & Simple: Serve warm with a generous smear of butter or jam.
- Mini Sandwiches: Their size and texture make them perfect for slider buns with pulled pork, grilled chicken, or veggie patties.
- Soup & Stew Companion: Ideal for soaking up hearty stews, chilis, or creamy soups.
- Breakfast Treat: Delicious with eggs and bacon, or as a base for a breakfast sandwich.
- Garlic Bread Style: Slice in half, spread with garlic butter, and broil briefly for a chewy garlic bread.
Storage & Reheating
- Refrigerator Storage: Store cooled boiled buns in an airtight container or a resealable plastic bag at room temperature for up to 2-3 days.
- Freezer Suitability: These buns freeze beautifully! Once completely cooled, place them in a freezer-safe bag or container. They will keep well for up to 2-3 months.
- Reheating Method:
- From Room Temperature: Briefly microwave for 15-20 seconds for a soft bun, or toast lightly in a toaster oven.
- From Frozen: Thaw at room temperature for a couple of hours, then reheat as above. For best results, you can also bake frozen buns (without thawing) in a preheated oven at 300°F (150°C) for 8-10 minutes, or until warmed through.
- Maintain Best Texture: To prevent drying out, wrap individual buns in foil before reheating in the oven.
FAQ
Can I make the dough ahead of time?
Yes, you can prepare the dough and let it have its first rise in the refrigerator overnight (8-12 hours). Punch it down, bring it to room temperature for about 30 minutes, then proceed with shaping, a short second rise, boiling, and baking.
What makes these buns chewy?
The boiling step is key! It cooks the outer layer of the dough, creating a gelatinized surface that contributes to the signature chewy crust, similar to bagels or pretzels.
Why didn’t my buns rise?
This is usually due to inactive yeast. Ensure your water temperature is correct (105-115°F / 40-46°C) and that your yeast is fresh. If the yeast doesn’t foam after mixing with warm water and sugar, it’s likely dead.
Can I use bread flour instead of all-purpose flour?
Yes, bread flour has a higher protein content, which will result in an even chewier bun. You might need to add a tiny bit more liquid if the dough feels too stiff.
How do I know when the buns are done baking?
The buns should be a deep golden brown on top and bottom. When you tap the bottom of a bun, it should sound hollow. An internal temperature of around 200-210°F (93-99°C) is also a good indicator.
Can I skip the boiling step?
While you could bake the buns without boiling, they wouldn’t be “boiled buns” and would lack their characteristic chewy exterior and unique texture. The boiling step is what makes this recipe special!
Do I have to use baking soda in the boiling water?
No, it’s optional. Using baking soda will give the buns a more pronounced chewy crust and a slightly darker finish, similar to a bagel. If you prefer a softer bun that’s less chewy, you can omit it.
Recipe Card
Recipe Name: Homemade Boiled Buns
Short Description: Delightfully soft on the inside with an irresistible chewy crust, these homemade boiled buns are a unique and easy way to enjoy fresh bread.
Prep Time: 25 minutes
Cook Time: 15-20 minutes (plus 1-2 minutes boiling)
Total Time: Approximately 2 hours 15 minutes (including rise times)
Servings: 8-12 buns
Course: Bread, Side Dish
Cuisine: American
Cooking Method: Boiling, Baking
Ingredients:
- 1 cup (240 ml) warm water (105-115°F / 40-46°C)
- 2 ¼ teaspoons (7 g) active dry yeast
- 1 tablespoon (13 g) granulated sugar, plus a pinch
- 1 teaspoon (6 g) salt
- 2 tablespoons (30 ml) olive oil or melted unsalted butter
- 3 cups (360 g) all-purpose flour, plus more for dusting
- 8 cups (1.9 liters) water (for boiling)
- 1 teaspoon (6 g) baking soda (optional, for boiling)
- 1 large egg, beaten (for egg wash, optional)
- Sesame seeds or poppy seeds (for topping, optional)
Instructions:
- Activate Yeast: In a large bowl, combine warm water, 1 tbsp sugar, and yeast. Stir and let sit 5-10 minutes until foamy.
- Mix Dough: Add salt and olive oil to the yeast mixture. Gradually add flour, mixing until a shaggy dough forms.
- Knead Dough: Knead on a lightly floured surface (or with a stand mixer) for 8-10 minutes until smooth and elastic.
- First Rise: Lightly grease a bowl, place dough in it (turning once to coat), cover, and let rise in a warm place for 1 to 1.5 hours, or until doubled in size.
- Shape Buns: Gently punch down dough, turn onto a floured surface, and divide into 8-12 pieces. Shape each into a smooth ball. Place on a parchment-lined baking sheet. Score tops with a cross if desired.
- Second Rise & Preheat: Cover buns and let rest for 20-30 minutes. Preheat oven to 375°F (190°C).
- Prepare Boiling Water: Bring 8 cups of water to a rolling boil in a large pot. Add baking soda if using.
- Boil Buns: Carefully drop 2-3 buns into the boiling water at a time. Boil for 30-45 seconds per side. Remove with a slotted spoon and return to the baking sheet.
- Bake: (Optional) Brush with egg wash and sprinkle with seeds. Bake for 15-20 minutes, or until golden brown and hollow-sounding.
- Cool & Serve: Transfer to a wire rack to cool slightly before serving.
Notes:
For a chewier crust, add baking soda to the boiling water. For a softer bun, omit it. Ensure your yeast is active for proper rising. Do not overcrowd the pot when boiling.
Storage:
Store cooled buns in an airtight container at room temperature for 2-3 days, or freeze for up to 2-3 months. Reheat gently in the microwave or oven.
Nutrition:
Nutrition information is an estimate and may vary depending on the ingredients and brands used.