Deep Clean Your Mattress: The Ultimate Baking Soda & Detergent Guide
Is your mattress looking a bit worse for wear? Years of use can lead to unsightly stains, embedded dirt, and unpleasant odors, turning your sleep sanctuary into something less than pristine. Before you consider replacing it, know that a deep clean can often restore its freshness and extend its life. The good news? You don’t need harsh chemicals or expensive equipment. With a few common household items like baking soda and liquid laundry detergent, you can refresh your mattress and bring back that clean feel!
This comprehensive guide will walk you through a simple yet effective method to tackle everyday stains, brown marks, and dull-looking fabric without soaking the mattress, ensuring a dry, clean, and comfortable sleep space.
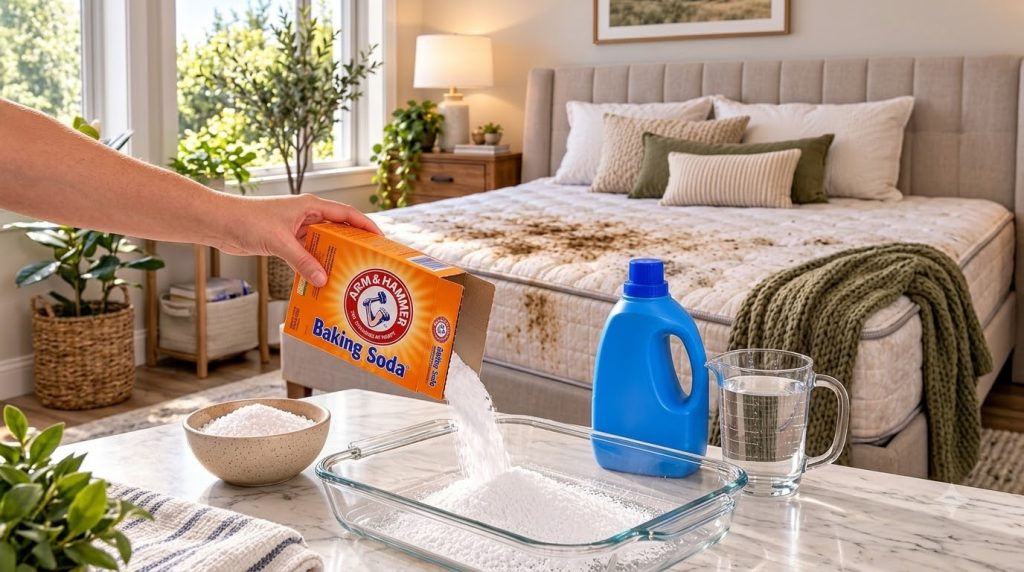
Why This Method Works Wonders
This cleaning approach combines the power of three household heroes:
- Baking Soda: A natural deodorizer and mild abrasive. It excels at absorbing moisture and neutralizing odors by altering the pH of acidic substances.
- Liquid Laundry Detergent: Contains surfactants that lift dirt and stains from fabric fibers. It’s designed to break down oils, grime, and various organic stains effectively.
- Warm Water: Helps to dissolve the baking soda and detergent, activating the cleaning agents and allowing them to penetrate and break down stains more efficiently.
Together, they form a gentle yet potent solution for surface cleaning your mattress.
What You’ll Need
Before you begin, gather these essential items:
- 4 tablespoons baking soda
- 2 tablespoons liquid laundry detergent (ensure it’s suitable for fabric)
- 1 cup warm water
- 1 microfiber cloth
- 1 large glass or plastic mixing container
- 1 clean dry towel
- Vacuum cleaner with upholstery attachment
- Optional: Cleaning gloves (to protect your hands)
- Optional: Spray bottle (for applying the solution)
Step-by-Step Guide to a Refreshed Mattress
Follow these steps carefully to deep clean your mattress and restore its freshness.
Step 1: Vacuum the Mattress First
Before introducing any liquid, it’s crucial to remove all loose dirt, dust mites, dead skin cells, and debris from the mattress surface. This prevents any loose particles from turning into muddy residue when they come into contact with the cleaning solution.
- Remove all bedding, including sheets, mattress protectors, and pillows.
- Using your vacuum cleaner’s upholstery attachment, thoroughly vacuum the entire mattress surface.
- Pay extra attention to seams, tufted areas, edges, and corners where dust and debris tend to accumulate.
- Work in overlapping sections to ensure no area is missed.
Step 2: Make the Cleaning Solution
Now it’s time to prepare your gentle yet effective cleaning concoction.
- Pour 1 cup of warm water into your large mixing container.
- Add 2 tablespoons of liquid laundry detergent to the warm water.
- Then, add 4 tablespoons of baking soda.
- Stir gently until all ingredients are well combined. You don’t need a huge amount of foam; a light mix is sufficient. The goal is a consistent liquid solution.
Step 3: Prepare Your Cleaning Cloth
The key to preventing over-wetting the mattress is to use a properly dampened cloth, not a soaking one.
- Dip a corner of your microfiber cloth into the cleaning solution.
- Wring out the cloth thoroughly until it is just damp, not dripping wet. You want just enough moisture to work on the stains without saturating the mattress layers.
Step 4: Tackle Stains and Dull Areas
Work methodically on any visible marks.
- Gently dab or blot the stained areas with your damp microfiber cloth. Avoid aggressive scrubbing, which can push the stain deeper into the fabric or spread it.
- For more stubborn brown marks or dull-looking sections, you can gently rub in small, circular motions, but always with a light hand.
- If using a spray bottle (optional), lightly mist the solution onto the stain, then blot with the microfiber cloth.
- Repeat this process, re-dampening and wringing your cloth as needed, until the stains begin to lift and the fabric brightens.
- Work in small sections across the entire mattress surface to ensure an even clean.
Step 5: Blot and Rinse
After treating the stains, it’s important to remove as much of the cleaning solution as possible.
- Take your clean, dry towel and press it firmly onto the treated areas to absorb excess moisture and any remaining cleaning solution.
- You can also lightly dampen a *separate* clean microfiber cloth with plain water, wring it out almost dry, and use it to blot the cleaned areas. This acts as a gentle rinse, removing detergent residue.
- Repeat blotting with the dry towel until no more moisture or residue transfers to the towel.
Step 6: Allow for Complete Drying
This step is critical to prevent mold or mildew growth within your mattress.
- Ensure the mattress is in a well-ventilated area. Open windows, use a fan, or even a dehumidifier to speed up the drying process.
- Allow the mattress to air dry completely, ideally for several hours, or even a full day. The mattress must be bone dry before you put your sheets back on.
- To help with even drying, you might flip the mattress (if possible and applicable) or prop it up against a wall to allow air circulation on both sides.
Step 7: Final Vacuum (Optional but Recommended)
Once the mattress is completely dry, a final vacuum can help.
- Lightly vacuum the entire surface one more time. This helps to remove any dried baking soda residue and leaves the mattress feeling even fresher.
Important Tips for Success
- Patch Test: Always test the cleaning solution on an inconspicuous area of your mattress first to ensure no discoloration or damage occurs.
- Avoid Over-Wetting: This is the golden rule. Excess moisture can lead to mold, mildew, and damage to the mattress’s internal components. Always use a damp, wrung-out cloth.
- Ventilation is Key: Good airflow is essential during and after cleaning to ensure quick and complete drying.
- Be Patient: Allow ample drying time. Rushing this step can negate all your hard work and create new problems.
Maintenance for a Long-Lasting Mattress
Beyond deep cleaning, regular maintenance can keep your mattress fresh:
- Use a Mattress Protector: A good quality, washable mattress protector is your first line of defense against spills, sweat, and allergens.
- Rotate/Flip Regularly: Follow your manufacturer’s recommendations for rotating or flipping your mattress to ensure even wear.
- Vacuum Monthly: A quick vacuum of your mattress once a month can keep dust mites and allergens at bay.
- Air Out Your Mattress: Occasionally remove all bedding and let your mattress breathe for a few hours.
Transform Your Sleep Today!
Say goodbye to mattress woes and hello to a cleaner, fresher sleep experience. This simple, natural, and budget-friendly method can transform your mattress, making your bedroom feel like a true sleep sanctuary once again. Give it a try, and enjoy the satisfaction of a beautifully clean bed!