Tired of a cabinet full of expensive, chemical-laden cleaning products? What if we told you that some of the most powerful cleaning solutions are likely already in your pantry? Homeowners across the US, CA, UK, and AU are discovering the magic of simple, everyday ingredients to tackle tough grime, lingering odors, and stubborn stains. Today, we’re diving into a DIY all-purpose cleaner recipe that will revolutionize your cleaning routine – using warm water, blue dish soap, white vinegar, and baking soda!
Precision is indeed key when mixing ingredients, and this powerful blend is no exception. It’s a fantastic, budget-friendly solution that cuts through grease, neutralizes odors, and leaves surfaces sparkling without harsh fumes. Ready to create your own home rescue daily formula?
The Powerhouse Ingredients & Why They Work
Each component in this DIY cleaner plays a crucial role, working together to deliver a powerful punch against household dirt and grime.
- Warm Water: The foundation of our cleaner, warm water helps to dissolve the baking soda more effectively and activates the cleaning agents in the dish soap, making them more efficient at breaking down dirt and grease.
- Blue Dish Soap: As a surfactant, dish soap is a grease-fighting champion. It lowers the surface tension of water, allowing it to penetrate and lift oily residues, food spills, and general grime from various surfaces. The ‘blue’ part is merely aesthetic; any standard dish soap will work wonders.
- White Vinegar: This acidic powerhouse is your go-to for dissolving mineral deposits (like hard water stains), cutting through tough grease, and providing mild disinfecting properties. Its acidity also helps to neutralize alkaline odors, leaving your home smelling fresh.
- Baking Soda (Sodium Bicarbonate): A true multi-tasker, baking soda acts as a gentle abrasive that helps scrub away stuck-on dirt without scratching surfaces. It’s also an incredible deodorizer, absorbing and neutralizing odors rather than just masking them. When combined with vinegar, it creates a fizzing reaction that helps lift stubborn messes.
Your All-Purpose DIY Cleaning Solution Recipe
Let’s get mixing! Follow these simple steps to create your powerful, homemade cleaning spray.
What You’ll Need:
- 2 cups warm water
- 1/2 cup white vinegar
- 1 tablespoon blue dish soap
- 2 tablespoons baking soda
- A large mixing bowl (to accommodate fizzing)
- An empty spray bottle
- Funnel (optional, but recommended for bottling)
Step-by-Step Mixing Guide:
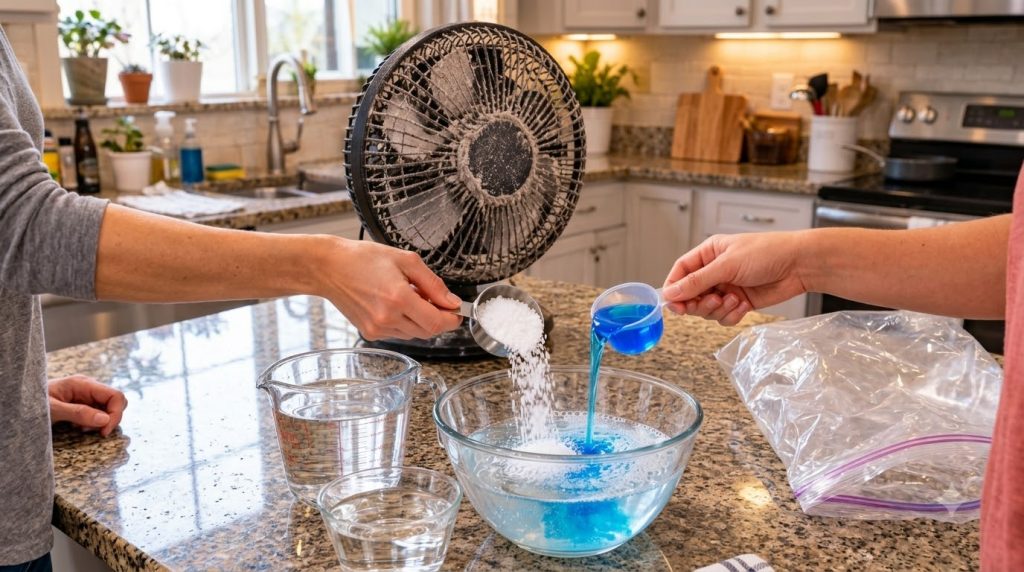
- Start with Water: Pour the 2 cups of warm water into your large mixing bowl.
- Add the Soap: Add 1 tablespoon of blue dish soap to the warm water and stir gently to combine.
- Introduce Baking Soda: Sprinkle 2 tablespoons of baking soda into the mixture. Stir well until the baking soda largely dissolves. Don’t worry if a little remains undissolved; it will still work its magic.
- Slowly Add Vinegar: Now for the fun part! Slowly pour in the 1/2 cup of white vinegar. Be prepared for a significant fizzing reaction as the vinegar reacts with the baking soda. This effervescence is part of its cleaning power! Allow the fizzing to subside.
- Bottle It Up: Once the fizzing has settled, carefully pour your freshly made all-purpose cleaner into an empty spray bottle. A funnel can make this step much easier and prevent spills.
How to Use Your DIY Cleaner for Best Results
This versatile cleaner can be used on a multitude of surfaces. Always do a patch test on an inconspicuous area first, especially on delicate or porous materials.
Kitchen Surfaces:
- Countertops: Spray directly onto granite, laminate, or tile countertops. Let it sit for a minute, then wipe with a damp cloth.
- Sinks & Faucets: Spray, scrub with a brush or sponge, and rinse thoroughly to remove soap scum and water stains.
- Stovetops: Tackle grease and food splatters by spraying and letting it sit for a few minutes before wiping clean.
Bathroom Fixtures:
- Sinks, Tubs, & Showers: Excellent for removing soap scum and hard water residue. Spray, let sit for 5-10 minutes, scrub, and rinse.
- Tiles: Use on ceramic or porcelain tiles for a sparkling finish.
General Grime & Odor Control:
- Garbage Cans: Spray and wipe down the inside to neutralize odors and clean residue.
- Light Switches & Doorknobs: Lightly spray onto a cloth and wipe these high-touch areas.
- Floors: For spot cleaning or diluted in a mop bucket for a deeper clean on sealed floors (avoid on unsealed wood or porous stone).
Safety First! Important Considerations
- Ventilation: While natural, vinegar can have a strong smell. Ensure good ventilation when cleaning.
- Label Your Bottle: Always label your DIY cleaning solutions clearly to avoid confusion.
- Storage: Store your cleaner in a cool, dark place. While these ingredients are stable, the cleaning power might diminish slightly over a few weeks.
- Avoid Certain Surfaces: Do not use vinegar on natural stone surfaces (like marble or travertine) as its acidity can etch them. Also, avoid using it on unsealed grout or cast iron.
Embrace the power of simple ingredients and make your home sparkle with this effective and economical DIY all-purpose cleaner. It’s a testament to how practical home hacks can deliver fantastic results. Happy cleaning!