Homemade Bathroom Sink Cleaner: Easy DIY Recipe for a Sparkling Basin
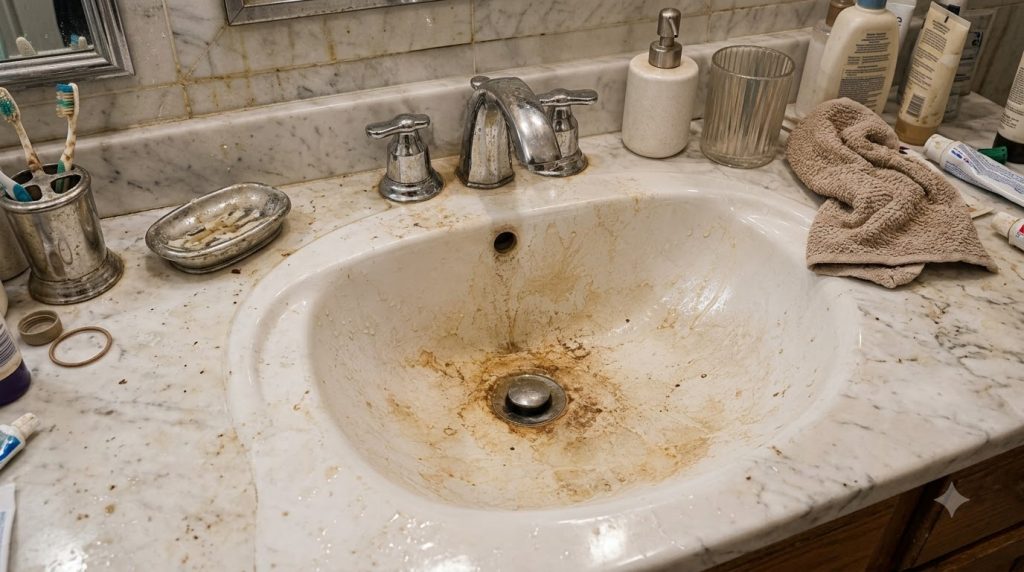
Are you tired of staring at a dull, grimy bathroom sink, covered in hard water stains, soap scum, and general everyday grime? It’s a common problem in nearly every home, and battling these stubborn messes can feel like an endless chore. But what if we told you there’s an easy, effective, and eco-friendly way to bring back that sparkling shine?
Many commercial cleaners contain harsh chemicals that can be irritating to your skin and respiratory system, not to mention their impact on the environment. This guide offers a refreshing alternative: a homemade bathroom sink cleaner made with simple, natural ingredients you likely already have in your pantry. It’s a powerful solution that cuts through dirt without the nasty fumes.
This DIY cleaning solution is perfect for anyone looking to maintain a clean bathroom without relying on store-bought products. Whether you’re a seasoned DIY enthusiast or just starting your journey into natural home care, you’ll find these instructions straightforward and rewarding. Say goodbye to the unsung battle against grime and hello to a gleaming bathroom!
In this comprehensive guide, you’ll learn how to mix up an effective cleaner, apply it safely, and maintain your sink’s sparkle with minimal effort. Get ready to transform your bathroom sink from grimy to gleaming, all while using ingredients that are kind to your home and the planet.
Quick Summary
- Preparation Time: 5 minutes
- Application Time: 15-30 minutes (includes dwell time)
- Difficulty Level: Easy
- Best Uses: Removing soap scum, hard water stains, light rust, and general grime from bathroom sinks.
- Suitable Surfaces: Ceramic, porcelain, stainless steel, acrylic, fiberglass.
- Storage Time: Up to 2 weeks for the liquid solution.
Why You’ll Love This DIY Solution
- Easy to Make: Requires just a few minutes of mixing.
- Budget-Friendly: Uses common, inexpensive household ingredients.
- Eco-Friendly: Free from harsh chemicals and synthetic fragrances.
- Effective: Cuts through tough soap scum and mineral deposits.
- Versatile: Can be used on various bathroom surfaces beyond just the sink.
- Beginner-Friendly: Simple steps anyone can follow.
- Fresh Scent: Optional essential oils leave a pleasant, natural aroma.
Ingredients / Materials
- 1/2 cup baking soda
- 1/4 cup liquid dish soap (mild, unscented is best)
- 1/2 cup white vinegar
- 10-15 drops lemon or tea tree essential oil (optional, for scent and antimicrobial properties)
- 1/2 cup warm water (optional, if making a spray solution)
Equipment Needed
- Small mixing bowl
- Spoon or whisk for mixing
- Non-abrasive sponge or microfiber cloth
- Old toothbrush or small brush (for scrubbing tight spots)
- Empty spray bottle (if making a spray solution)
- Measuring cups and spoons
- Rubber gloves (optional, for sensitive skin)
Step-by-Step Instructions
- Clear the Sink (2 minutes)
Remove all items from your bathroom sink area, including soap dishes, toothbrushes, and any decorative items. Give the sink a quick rinse with warm water to remove loose debris.
Expected result: A clear, damp sink ready for cleaning. - Create the Baking Soda Paste (2 minutes)
In your small mixing bowl, combine 1/2 cup of baking soda with 1/4 cup of liquid dish soap. Stir well with a spoon or whisk until you form a thick, smooth paste. If you desire a pleasant scent or extra antimicrobial boost, add 10-15 drops of lemon or tea tree essential oil to the paste and mix thoroughly.
Helpful tip: The consistency should be similar to a thick frosting. Adjust dish soap slightly if needed.
Expected result: A thick, fragrant cleaning paste. - Apply the Paste (3 minutes)
Using your non-abrasive sponge or microfiber cloth, generously apply the baking soda paste all over the interior of the sink, including the basin, faucet base, and drain area. Make sure to get into all the nooks and crannies.
Helpful tip: For stubborn grout lines or around the faucet, use an old toothbrush to work the paste in.
Expected result: The sink fully coated with the cleaning paste. - Let it Dwell (10-15 minutes)
Allow the paste to sit and work its magic for 10 to 15 minutes. This dwell time is crucial for the baking soda and dish soap to break down soap scum, hard water stains, and grime. For very tough stains, you can let it sit for up to 30 minutes.
Expected result: The paste starts to lift and loosen grime. - Introduce the Vinegar (1 minute)
After the dwell time, slowly pour 1/2 cup of white vinegar directly over the applied paste in the sink. You’ll observe a fizzing reaction as the vinegar interacts with the baking soda. This effervescence helps to further loosen and lift stubborn deposits.
Helpful tip: The fizzing indicates the ingredients are actively working together.
Expected result: Visible fizzing and a further loosening of dirt. - Scrub and Rinse (5 minutes)
Once the fizzing subsides (or after a minute or two), use your non-abrasive sponge or brush to thoroughly scrub the entire sink. Focus on areas with persistent stains. Rinse the sink completely with warm water, ensuring all paste and loosened grime are washed away.
Helpful tip: Use a spray bottle filled with plain water to rinse hard-to-reach areas if necessary.
Expected result: A clean, sparkling, and residue-free sink. - Polish for Shine (1 minute)
For an extra streak-free shine, wipe down the entire sink and faucet with a clean, dry microfiber cloth. This step helps remove any remaining water spots and leaves your sink gleaming.
Expected result: A perfectly dry, polished, and sparkling sink.
Best Uses
- Bathroom Sinks: Ideal for daily cleaning or tackling built-up grime, soap scum, and water spots.
- Faucets and Handles: Effectively removes watermarks and tarnish from chrome and stainless steel fixtures.
- Bathtubs and Showers: Can be applied to ceramic, porcelain, acrylic, and fiberglass tubs and shower walls to combat soap scum.
- Tiled Surfaces: Use on bathroom tiles and grout to brighten and remove mild mildew (test in an inconspicuous area first).
Surface Limitations: Avoid using vinegar solutions on natural stone surfaces like marble or granite, as the acid can etch the stone. Always test in an inconspicuous area if you’re unsure about a surface’s compatibility.
Safety Notes
- Ventilation: While this solution uses natural ingredients, ensure good ventilation by opening a window or turning on the bathroom fan.
- Skin Sensitivity: If you have sensitive skin, consider wearing rubber gloves to protect your hands, especially when handling vinegar.
- Eye Contact: Avoid direct contact with eyes. If contact occurs, rinse thoroughly with water.
- Keep Away from Children and Pets: Store all ingredients and the cleaning solution out of reach of children and pets.
- Never Mix with Bleach: Although this recipe doesn’t use bleach, it’s a critical safety rule: Never mix vinegar or any acidic cleaner with bleach, as it can create dangerous chlorine gas.
Expert Tips
- Consistency is Key: For heavily soiled sinks, apply a thicker paste and let it sit for up to 30 minutes before adding vinegar.
- Boost the Power: For extra tough hard water stains, you can pre-treat the area with plain white vinegar, letting it soak for 10 minutes before applying the paste.
- Regular Maintenance: To prevent heavy build-up, use this cleaner weekly or bi-weekly. A quick daily wipe-down with a damp cloth can also keep your sink looking fresh.
- Essential Oil Choices: Beyond lemon and tea tree, peppermint or eucalyptus essential oils can also provide a fresh scent and some cleaning benefits.
- Use a Spray Bottle for Convenience: For an all-purpose bathroom spray, mix 1/2 cup white vinegar, 1/2 cup warm water, a tablespoon of dish soap, and 10-15 drops of essential oil in a spray bottle. Shake before each use.
- Avoid Abrasives: Always use a non-abrasive sponge or cloth to prevent scratching your sink’s surface.
- Spot Clean: If you notice a fresh toothpaste splatter or water spot, a quick dab of baking soda on a damp cloth can tackle it instantly.
Storage Instructions
For the concentrated paste mixture (baking soda, dish soap, essential oil), it’s best to prepare it fresh for each use. However, if you mix a larger batch of the spray solution (vinegar, water, dish soap, essential oil), it can be stored in a clean, airtight spray bottle in a cool, dark place for up to 2 weeks.
Signs the solution should be discarded include separation that won’t reintegrate with shaking, an off-odor, or visible mold growth. Always label your homemade cleaning solutions clearly with their contents and date of preparation.
Frequently Asked Questions
Can I store the baking soda paste?
It’s best to make the baking soda paste fresh for each cleaning session for optimal effectiveness. The dry baking soda reacts best when combined just before use.
How long does the spray solution last?
If you create the spray solution with vinegar, water, and dish soap, it can last for up to two weeks when stored in a sealed spray bottle in a cool, dark place.
Can I use this cleaner on marble or granite sinks?
No, it is not recommended to use vinegar-based cleaners on natural stone surfaces like marble or granite. The acid in vinegar can etch and dull the stone, causing permanent damage. Use a pH-neutral cleaner specifically designed for stone surfaces instead.
What if I don’t have essential oils?
Essential oils are optional. The cleaner will work just as effectively without them. They primarily add a pleasant scent and some minor antimicrobial benefits.
Is this solution safe around pets?
While the ingredients are natural, it’s always best to keep pets (and children) away from cleaning areas during and immediately after cleaning until surfaces are dry. Ensure good ventilation to dissipate any strong odors from the vinegar.
My sink is heavily stained. Will this still work?
Yes, for heavily stained sinks, you might need to apply a thicker paste and let it sit for a longer dwell time (up to 30 minutes). You can also pre-treat with straight white vinegar on hard water stains before applying the paste.
Can I use different types of vinegar?
White vinegar is recommended due to its clear color and consistent acidity. Other vinegars might leave a slight tint or have a stronger, less desirable odor.
What if the fizzing reaction isn’t strong?
The strength of the fizzing can depend on the freshness of your baking soda and the amount of residue in the sink. Even a subtle reaction is still helping to lift grime. As long as you see some bubbling, it’s working.
Conclusion
Transforming your bathroom sink from dull and grimy to sparkling clean doesn’t have to be a daunting task filled with harsh chemicals. With this easy-to-follow DIY homemade cleaner, you can tackle stubborn soap scum, hard water stains, and everyday dirt using simple, natural ingredients you already have at home. Not only will your sink gleam, but you’ll also enjoy the peace of mind that comes with using an eco-friendly and budget-conscious solution.
Remember to always prioritize safety, test on inconspicuous areas when unsure, and keep your homemade solutions out of reach of children and pets. Give this DIY bathroom sink cleaner a try and experience the satisfaction of a beautifully clean bathroom, naturally. Happy cleaning!