Unlock Youthful Skin: Your Secret Anti-Aging Gel Revealed!
Hey, beauty besties! Are you dreaming of that fresh, youthful glow without breaking the bank or navigating a confusing aisle of expensive products? We hear you! Today, we’re sharing a simple yet powerful DIY beauty secret that’s been gaining buzz for its ability to help your skin look and feel amazing. Get ready to discover the magic of a homemade anti-aging gel using two everyday heroes: Vaseline and Vitamin E oil!
Many of us are searching for easy, affordable ways to keep our skin looking its best. Fine lines, dullness, and dryness are common concerns, but guess what? Nature and your medicine cabinet often hold the keys to a radiant complexion. This DIY gel is designed to nourish, protect, and rejuvenate your skin, helping you achieve that coveted youthful appearance with minimal fuss.
Why Vaseline and Vitamin E Are Your Skin’s New Best Friends
Before we dive into the recipe, let’s chat about why these two ingredients are superstars for your skin:
Vaseline (Petroleum Jelly)
- Moisture Lock: Vaseline is an occlusive, meaning it creates a protective barrier on your skin’s surface. This barrier effectively seals in moisture, preventing water loss and keeping your skin incredibly hydrated and soft. Hydrated skin is happy skin, and it’s also less prone to showing fine lines!
- Skin Barrier Support: By protecting your skin’s natural barrier, Vaseline helps it heal and recover from environmental stressors. Think of it as a comforting blanket for your skin.
- Non-Comedogenic: Despite common misconceptions, pure petroleum jelly is non-comedogenic, meaning it won’t clog your pores, making it suitable for most skin types.
Vitamin E Oil
- Powerful Antioxidant: Vitamin E is renowned for its antioxidant properties. It helps fight off free radicals – those pesky molecules that can damage skin cells and contribute to premature aging.
- Nourishing & Healing: This vitamin is fantastic for skin repair. It supports cell regeneration and can help soothe and reduce the appearance of scars, dark spots, and hyperpigmentation over time.
- Moisturizing Boost: When combined with Vaseline, Vitamin E adds an extra layer of nourishment, helping to keep your skin supple and smooth.
Your DIY Anti-Aging Gel Recipe
Ready to whip up your own batch of youthful magic? Here’s how!
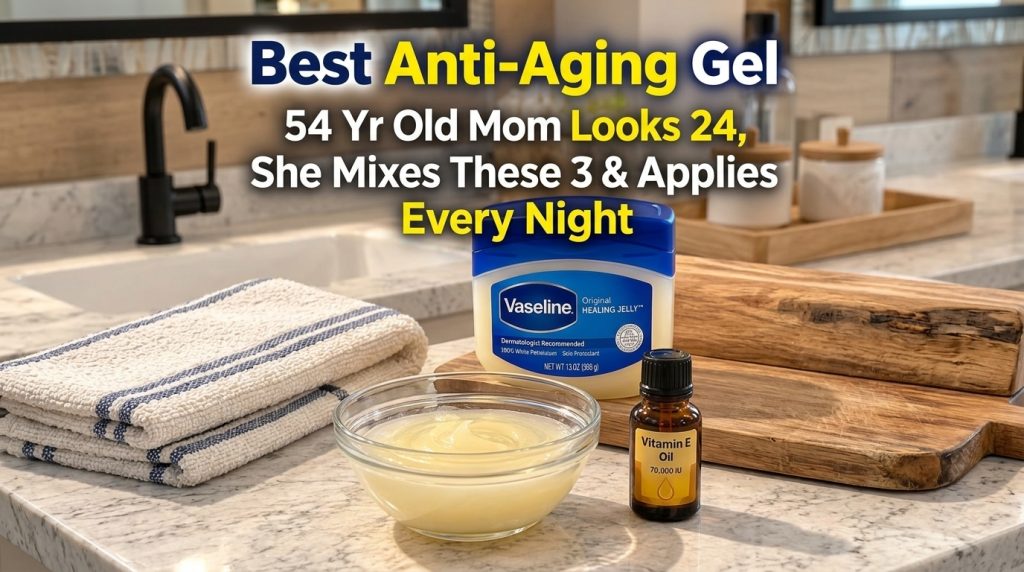
What You’ll Need:
- 2 tablespoons of Vaseline (Original Healing Jelly works perfectly!)
- 1 teaspoon of pure Vitamin E oil (you can often find this in capsules or small bottles)
- A small, clean, airtight container (like a small jar or travel pot)
- A small spoon or spatula for mixing
Step-by-Step Instructions:
- Scoop the Vaseline: Take your 2 tablespoons of Vaseline and place them into a clean, microwave-safe bowl.
- Melt Gently: Heat the Vaseline in the microwave for about 10-15 seconds. You want it to be melted just enough to become a liquid, but not boiling hot. Alternatively, you can use a double boiler method for a gentler melt.
- Add Vitamin E Oil: Once the Vaseline is melted, add the 1 teaspoon of Vitamin E oil to the bowl.
- Mix Well: Stir the mixture thoroughly with your spoon or spatula until both ingredients are completely combined and form a smooth, uniform liquid.
- Pour into Container: Carefully pour the liquid mixture into your clean, airtight container.
- Let It Set: Allow the mixture to cool down completely and solidify. You can place it in the refrigerator for about 30 minutes to speed up the process. Once it’s solid, it will have a gel-like consistency.
How to Use Your Homemade Anti-Aging Gel
Once your gel has set, it’s ready to become a superstar in your skincare routine!
- Nighttime Ritual: The best time to use this gel is as the final step in your evening skincare routine. After cleansing, toning, and applying any serums or lighter moisturizers, take a small pea-sized amount of the gel.
- Gentle Application: Warm the gel slightly between your fingertips and gently pat or smooth it onto your face, neck, and décolletage. Focus on areas where you notice fine lines or dryness.
- Targeted Treatment: You can also use it as a targeted treatment around your eyes (be very gentle!), on your lips, or on any particularly dry patches.
- Less is More: A little goes a long way with this gel! Start with a tiny amount and add more if needed. You want your skin to feel nourished, not greasy.
Important Tips & Considerations
- Patch Test First: Always, always do a patch test on a small, inconspicuous area of your skin (like behind your ear or on your inner arm) before applying it to your entire face. Wait 24 hours to ensure you don’t have any adverse reactions.
- Consistency is Key: For best results, incorporate this gel into your routine consistently. Visible improvements in skin texture and radiance often take time.
- Storage: Store your homemade gel in a cool, dark place away from direct sunlight. It should last for several months, similar to the shelf life of its individual ingredients.
- Cleanliness: Always ensure your hands and all your tools and containers are clean to prevent bacterial growth in your DIY product.
Embrace Your Natural Glow!
This homemade Vaseline and Vitamin E anti-aging gel is a wonderful way to pamper your skin with simple, effective ingredients. It’s about embracing natural remedies and giving your skin the loving care it deserves without overcomplicating things. You’ll love how soft, hydrated, and radiant your skin feels.
Give this easy recipe a try and share your glowing results with us! What are your favorite simple anti-aging hacks? Let us know in the comments below!