Master Your Meals with These 10 Homemade Sauces!
Imagine transforming an ordinary weeknight meal into something extraordinary with just a spoonful of a delicious, homemade sauce. That’s the magic of creating your own condiments! This guide isn’t just about one recipe; it’s about unlocking a world of flavor by mastering a collection of 10 homemade sauces that can elevate virtually any dish you prepare.
From vibrant vinaigrettes to creamy dips, spicy drizzles, and savory glazes, a repertoire of homemade sauces puts you in control of your plate. You get to decide on the freshest ingredients, the perfect balance of flavors, and the quality that store-bought options just can’t match. Get ready to boost your culinary game and discover which of these incredible homemade sauces you’ll try first!

Why You’ll Love Making Homemade Sauces
- Unbeatable Freshness & Flavor: Control every ingredient, ensuring the freshest, most vibrant tastes without artificial additives.
- Customization at Your Fingertips: Easily adjust spices, sweetness, or tanginess to perfectly suit your preferences and dietary needs.
- Versatility for Any Meal: A collection of 10 homemade sauces means you’ll always have the perfect accompaniment for grilled meats, roasted vegetables, pasta, salads, and more.
- Simple & Rewarding: Many sauces come together quickly with minimal effort, offering a huge payoff in taste and satisfaction.
- Healthier Options: Reduce sodium, sugar, and unhealthy fats by making your sauces from scratch.
- Impress Your Guests: Homemade touches make any meal feel special and thoughtfully prepared.
Essential Ingredients for Versatile Sauces
While specific ingredients will vary widely depending on the particular sauce you’re crafting, having a well-stocked pantry and fresh produce on hand is key to whipping up a variety of delicious homemade sauces. Think in categories to ensure you’re always prepared:
Pantry Staples:
- Oils: Olive oil, vegetable oil, sesame oil, coconut oil.
- Vinegars: Apple cider vinegar, white vinegar, red wine vinegar, balsamic vinegar, rice vinegar.
- Sweeteners: Honey, maple syrup, brown sugar, granulated sugar.
- Savory Bases: Soy sauce, Worcestershire sauce, dijon mustard, tomato paste, peanut butter.
- Spices & Seasonings: Salt, black pepper, garlic powder, onion powder, paprika, chili flakes, cumin, dried herbs (oregano, basil, thyme).
- Thickeners: Cornstarch, all-purpose flour, arrowroot powder.
- Dairy/Cream: Heavy cream, sour cream, yogurt, milk (for creamy sauces).
Fresh Produce & Aromatics:
- Aromatics: Garlic, onions, ginger, shallots.
- Herbs: Parsley, cilantro, basil, mint, dill, chives, rosemary, thyme.
- Citrus: Lemons, limes, oranges.
- Vegetables: Tomatoes, bell peppers, chilies (jalapeños, serranos), avocados.
Ingredient Notes
- Quality Matters: Since sauces often highlight specific flavors, using high-quality ingredients can make a noticeable difference. Opt for fresh herbs over dried when possible, and good quality oils and vinegars.
- Taste as You Go: Sauces are all about balance. Always taste and adjust seasonings, acidity, and sweetness throughout the process.
- Fresh vs. Dried Herbs: If substituting dried herbs for fresh, remember that dried herbs are typically more concentrated. Use about 1/3 the amount of dried herbs compared to fresh.
- Spice Level: For spicy sauces, start with a smaller amount of chili and add more to taste, especially when using fresh chilies which can vary greatly in heat.
Equipment You’ll Need
- Small saucepans
- Whisks (various sizes)
- Mixing bowls
- Measuring cups and spoons
- Cutting board and sharp knife
- Citrus juicer
- Blender or immersion blender (for smooth sauces)
- Grater (for garlic, ginger, cheese)
- Airtight containers or jars for storage
How to Make Versatile Homemade Sauces
Since this guide covers the concept of 10 diverse sauces, specific instructions will naturally vary. However, many sauces follow general principles:
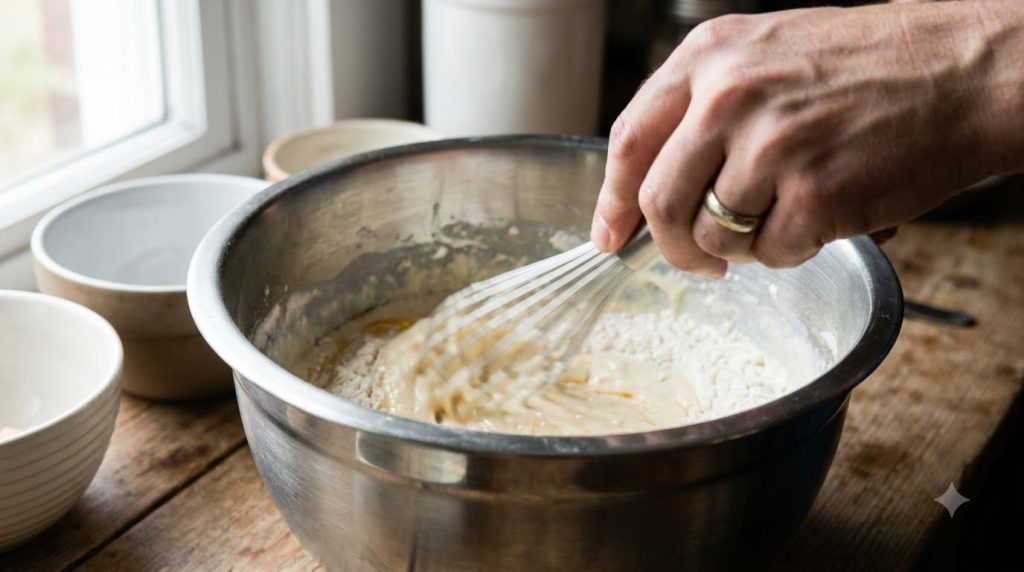
1. Prepare Your Ingredients:
Before you begin, gather all your ingredients. Chop any aromatics (garlic, onions), mince herbs, and measure out liquids. This mise en place ensures a smooth cooking process.
2. Combine & Mix (for uncooked sauces like vinaigrettes or fresh salsas):
For oil-based sauces or fresh relishes, simply combine your chosen ingredients in a bowl. Whisk vigorously until well-emulsified (for vinaigrettes) or stir until evenly distributed (for chunky salsas). Allow flavors to meld for at least 15-30 minutes for best results.
3. Cook & Simmer (for cooked sauces like marinara or gravies):
For sauces requiring heat, start by sautéing aromatics in a saucepan over medium heat until fragrant and softened, typically 2-5 minutes. Add other base ingredients like tomatoes or broth, then bring to a simmer. Cook, stirring occasionally, until the sauce has thickened to your desired consistency and flavors have deepened, which could range from 10 minutes to over an hour depending on the sauce.
4. Blend & Puree (for smooth sauces like pestos or creamy dressings):
If your sauce needs to be smooth, transfer cooked or uncooked ingredients to a blender or food processor. Blend until silky, adding liquids (like water, broth, or oil) as needed to reach the desired consistency. For immersion blenders, blend directly in the pot.
5. Season & Adjust:
This is arguably the most crucial step. Taste your sauce often! Adjust salt, pepper, acidity (lemon juice, vinegar), or sweetness as needed. Don’t be afraid to add a pinch more of an herb or spice to bring out the best flavor.
6. Finish & Serve:
Once your sauce has reached peak flavor and texture, it’s ready to use. Some sauces benefit from a final swirl of fresh herbs or a drizzle of good quality olive oil just before serving.
Pro Tips for the Best Results
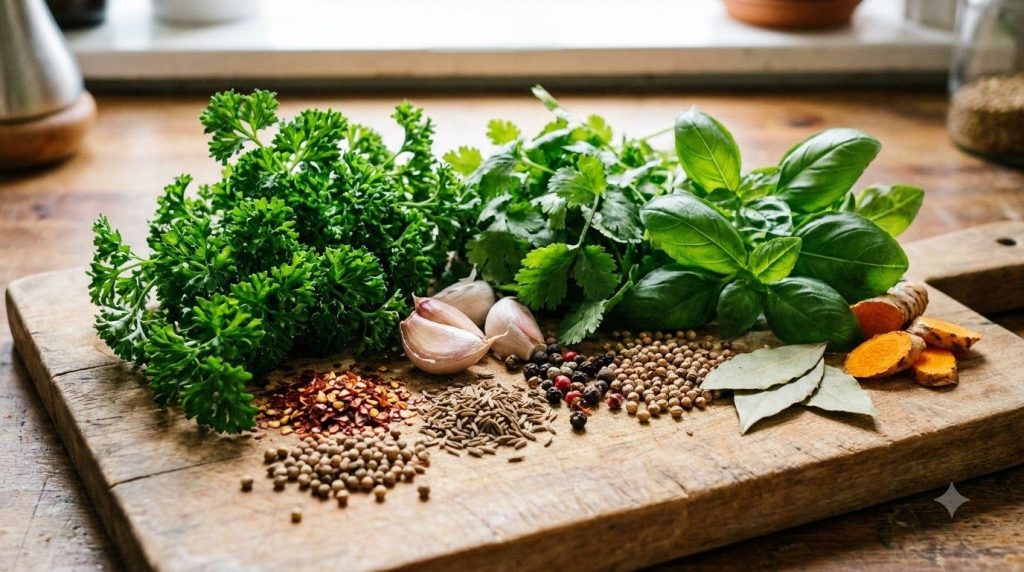
- Balance Flavors: Think about sweet, sour, salty, bitter, and umami. A great sauce often hits multiple notes. A squeeze of lemon can brighten a rich sauce; a pinch of sugar can mellow acidity.
- Emulsify Properly: For creamy or oil-based sauces, slowly drizzle oil into other ingredients while continuously whisking or blending. This creates a stable, smooth consistency.
- Don’t Rush Simmering: For cooked sauces, allow them to simmer gently. This gives flavors time to meld and deepen, and for the sauce to thicken naturally.
- Adjust Consistency: If a sauce is too thick, thin it with a little water, broth, or milk. If too thin, simmer longer to reduce, or thicken with a cornstarch slurry (1 tsp cornstarch mixed with 1 tsp cold water) added to the simmering sauce.
- Taste, Taste, Taste: Seasoning is not a one-time event. Taste at every stage and adjust as needed, especially at the end.
- Chill for Flavor Development: Many uncooked sauces, like pestos or dressings, taste even better after chilling for a few hours (or overnight) as the flavors have more time to meld.
- Clean as You Go: Making multiple sauces can get messy. Clean small tools as you finish with them to keep your workspace tidy.
- Know Your Heat: For spicy sauces, remember that heat can intensify slightly over time. Err on the side of caution and add more heat later if desired.
Common Mistakes to Avoid
- Over-Salting: It’s easier to add salt than to remove it. Start with a small amount and build up to taste.
- Breaking an Emulsion: Adding oil too quickly or not whisking vigorously enough can cause oil-based sauces to separate. If it happens, try whisking in a teaspoon of hot water or mustard.
- Under-Seasoning: Bland sauces are disappointing. Don’t be shy with herbs, spices, and a final flourish of salt and pepper.
- Over-Thickening: A sauce that’s too thick can be gluey. Always add thickeners gradually and allow time for the sauce to cook and thicken before adding more.
- Rushing the Simmer: For cooked sauces, cutting the simmering time short can result in a raw, un-melded flavor. Patience is key for depth.
Variations & Substitutions
The beauty of homemade sauces is their adaptability. Here are general ideas for how you can experiment:
- Herb Swaps: If a recipe calls for basil, try cilantro or parsley for a different flavor profile.
- Spice Adjustments: Dial up or down the heat with different chilies or chili powders. Add smoked paprika for depth or a pinch of cinnamon for warmth in savory sauces.
- Acidity Levels: Experiment with different vinegars (apple cider, red wine, balsamic) or citrus juices (lemon, lime, orange) to alter the tang.
- Sweeteners: Substitute honey for maple syrup, or vice versa, based on what you have and prefer.
- Dairy Alternatives: For creamy sauces, swap out heavy cream for coconut milk (for a dairy-free option) or Greek yogurt for a lighter tang.
- Nut/Seed Butters: Experiment with almond butter or cashew butter instead of peanut butter for different flavor notes in savory sauces.
Serving Suggestions
With a diverse collection of 10 homemade sauces, your serving possibilities are endless! Here are some general ideas:
- Grilled & Roasted Dishes: Drizzle savory sauces over grilled chicken, steak, fish, or roasted vegetables.
- Pasta & Grains: Toss with your favorite pasta, rice, or quinoa for a quick and flavorful meal.
- Salads & Bowls: Use lighter vinaigrettes or creamy dressings for fresh salads, grain bowls, or Buddha bowls.
- Dipping & Spreading: Serve thicker sauces and dips with crudités, pita bread, crackers, or as a spread on sandwiches and wraps.
- Tacos & Wraps: Add a zesty or spicy sauce to elevate your favorite tacos, burritos, or lettuce wraps.
- Breakfast & Brunch: Think fruit-based sauces for pancakes, waffles, or yogurt parfaits.
Storage & Reheating
Proper storage is essential to enjoy your homemade sauces safely and deliciously.
- Refrigerator Storage: Most homemade sauces, especially those with fresh ingredients or dairy, should be stored in airtight containers or jars in the refrigerator.
- Duration: Generally, oil-based vinaigrettes can last 1-2 weeks. Cooked, vegetable-based sauces (like tomato sauce) can last 5-7 days. Dairy or egg-based sauces might last 3-5 days. Always use your best judgment – if it smells or looks off, discard it.
- Freezer Suitability: Many cooked sauces (like marinara, pesto without cheese, or some gravies) freeze well. Store in freezer-safe containers, leaving some headspace for expansion. Freeze for up to 3 months. Oil-based vinaigrettes and fresh creamy sauces typically do not freeze well as they may separate.
- Reheating: Reheat cooked sauces gently on the stovetop over low heat, stirring frequently. Add a splash of water or broth if it has thickened too much. Cold sauces and dressings should be brought to room temperature for about 15-20 minutes before serving for optimal flavor and texture. Whisk well before serving.
FAQ
Here are some common questions about making and using homemade sauces:
Q: How long do homemade sauces typically last?
A: The shelf life varies greatly depending on the ingredients. Oil-based vinaigrettes can last 1-2 weeks, while cooked sauces (like tomato-based) are generally good for 5-7 days in the refrigerator. Dairy or fresh herb-heavy sauces might only last 3-5 days. Always check for any off smells or discoloration before consuming.
Q: Can I freeze all homemade sauces?
A: No. Cooked, broth-based, or tomato-based sauces often freeze well. However, sauces with a high dairy, mayonnaise, or fresh herb content (like creamy dressings or fresh pesto with cheese) tend to separate or change texture upon thawing and are best consumed fresh.
Q: Why did my vinaigrette separate?
A: Vinaigrettes are an emulsion of oil and vinegar. Separation is natural over time. It can also happen if you add the oil too quickly or don’t whisk vigorously enough. Simply give it a good shake or whisk before serving to re-emulsify.
Q: My cooked sauce is too thin, how can I thicken it?
A: You can simmer it longer to reduce the liquid, or create a slurry by mixing equal parts cornstarch (or arrowroot powder) with cold water. Whisk the slurry into your simmering sauce and cook for another minute or two until thickened. A roux (butter and flour mixture) is also an option for some savory sauces.
Q: Can I make these sauces ahead of time?
A: Absolutely! Many sauces benefit from being made ahead, especially uncooked ones, as it allows flavors to meld and deepen. Just be mindful of the storage durations mentioned above.
Q: What’s the best way to balance a sauce that tastes too acidic?
A: If your sauce is too acidic, you can balance it by adding a small pinch of sugar, honey, or a creamy element like a swirl of butter, cream, or even a dollop of plain yogurt (depending on the sauce type). These help to round out and mellow the acidity.
Recipe Card: Master Your Meals with These 10 Homemade Sauces!
Recipe Name: 10 Homemade Sauces Guide
Short Description: A versatile collection of homemade sauces to elevate everyday meals, offering fresh flavors and endless customization.
Prep Time: Varies by sauce (e.g., 5-15 minutes for quick sauces)
Cook Time: Varies by sauce (e.g., 0-60 minutes for cooked sauces)
Total Time: Varies by sauce
Servings: Varies by sauce (typically 4-8 servings per individual sauce recipe)
Course: Condiment, Sauce, Dressing
Cuisine: International
Cooking Method: Varies (Whisking, Blending, Simmering, No-Cook)
Ingredients:
The specific ingredients will depend on which of the 10 homemade sauces you choose to prepare. This guide focuses on the *types* of ingredients commonly found in versatile sauces:
- Bases: Olive oil, vegetable oil, vinegars (apple cider, white, red wine, balsamic, rice), soy sauce, broth (vegetable, chicken), coconut milk, dairy (cream, yogurt).
- Aromatics: Garlic, onions, ginger, shallots.
- Fresh Herbs: Parsley, cilantro, basil, mint, dill, chives.
- Citrus: Lemons, limes, oranges.
- Flavor Boosters: Dijon mustard, honey, maple syrup, tomato paste, peanut butter, Worcestershire sauce.
- Spices & Seasonings: Salt, black pepper, chili flakes, paprika, cumin, dried oregano, dried thyme.
- Thickeners: Cornstarch, all-purpose flour.
Instructions:
This guide provides general steps for creating a variety of sauces. The exact process will depend on the specific sauce chosen.
- Gather & Prepare: Collect all necessary ingredients. Chop, mince, or measure according to the specific sauce recipe.
- Combine Uncooked Ingredients: For vinaigrettes or fresh salsas, simply combine all ingredients in a bowl and whisk or stir until well mixed. Allow to sit for 15-30 minutes for flavors to meld.
- Cook Base Ingredients (for cooked sauces): In a saucepan, sauté aromatics (like garlic and onion) in oil over medium heat until fragrant and softened (2-5 minutes).
- Add Liquids & Simmer: Incorporate other liquid ingredients (broth, tomatoes, cream) and bring to a gentle simmer. Cook, stirring occasionally, until the desired thickness and flavor depth are achieved. This can take 10 minutes to over an hour.
- Blend for Smoothness (optional): For silky smooth sauces, transfer ingredients to a blender (or use an immersion blender) and process until uniform. Add extra liquid as needed for desired consistency.
- Season to Taste: Crucially, taste the sauce and adjust seasonings (salt, pepper, acidity, sweetness) as necessary to achieve a balanced flavor profile.
- Serve or Store: Enjoy your freshly made sauce immediately or store it properly for later use.
Notes:
Always prioritize fresh, high-quality ingredients for the best flavor. Taste and adjust seasonings throughout the process. Allow cooked sauces to cool completely before storing. Whisk or shake cold sauces before serving.
Storage:
Store most homemade sauces in airtight containers in the refrigerator. Oil-based sauces last 1-2 weeks, cooked sauces 5-7 days, and dairy/fresh herb sauces 3-5 days. Some cooked sauces can be frozen for up to 3 months.
Nutrition:
Nutrition information is an estimate and may vary depending on the ingredients and brands used.