Most people enjoy lavender for its beauty and scent, but few realize the incredible potential hidden within a single plant. Imagine having an endless supply of aromatic lavender for soothing teas, calming balms, and fragrant sachets, all from just one healthy mother plant. The secret isn’t complicated; it’s a simple, time-honored technique called propagation through cuttings. This method bypasses the uncertainty of seeds and gives you vigorous new plants that are genetically identical to your favorite lavender.
What is Lavender Propagation by Cuttings?
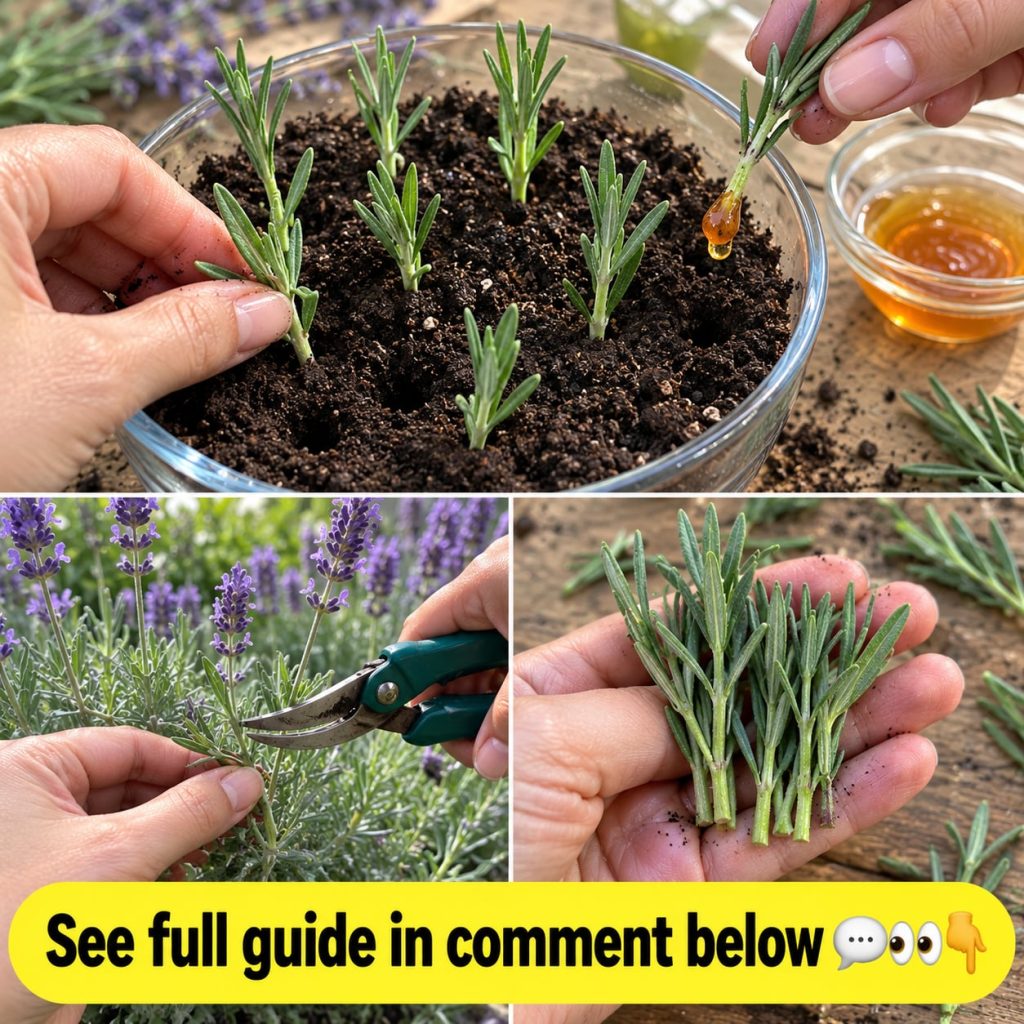
Lavender propagation by cuttings is essentially taking small sections from an existing, healthy lavender plant and encouraging them to grow roots. Instead of waiting for seeds to germinate, which can be slow and unpredictable, cuttings allow you to create exact replicas of your parent plant. This means if you have a lavender plant with an exceptional fragrance or a particularly beautiful color, your new plants will share those exact same desirable traits. It’s a quick and efficient way to multiply your favorite varieties and ensure a continuous supply for all your homemade remedies and garden needs.
Ingredients for Success
While we often think of ‘ingredients’ for a recipe, successful lavender propagation also requires a few key components:
- Healthy Parent Lavender Plant: Choose a mature, vigorous plant free from pests or diseases.
- Clean, Sharp Pruning Shears or Knife: Essential for making clean cuts that heal quickly and prevent damage to the parent plant and cuttings.
- Well-Draining Potting Mix: A mix specifically designed for succulents or herbs, or a blend of peat moss, perlite, and sand, works well. Avoid heavy garden soil.
- Small Pots or Seed Trays: Individual pots (3-4 inches) or trays with cells are ideal.
- Rooting Hormone (Optional, but Recommended): Available in powder or gel form, this can significantly increase rooting success and speed.
- Water: For initial watering and ongoing moisture.
Approximate Measurements & Best Practices
There aren’t exact ‘measurements’ in the traditional sense, but guidelines are crucial for effective propagation:
- Cutting Length: Aim for cuttings 4-6 inches long.
- Leaf Removal: Remove leaves from the bottom 1-2 inches of the cutting to expose nodes for rooting.
- Potting Depth: Plant cuttings deep enough so the leafless portion is buried in the soil, usually 1-2 inches.
Did You Know?
The best time to take lavender cuttings is in late spring or early summer, after the plant has flowered but before the hottest part of the season. This is when the plant is actively growing, and the stems are still somewhat pliable but not too soft.
The Lavender Propagation Formula / Recipe
- Select healthy, non-flowering stems from your parent plant.
- Prepare your cuttings by removing lower leaves.
- Dip the cut end in rooting hormone (if using).
- Plant the cutting into prepared potting mix.
- Water gently and place in a suitable environment.
Step-by-Step Method: Your Guide to More Lavender
-
Prepare Your Tools and Potting Mix
Ensure your pruning shears or knife are clean and sharp. You can sterilize them with rubbing alcohol to prevent disease transfer. Fill your small pots or trays with a well-draining potting mix. Lightly moisten the soil so it’s damp but not waterlogged.
-
Select and Take Cuttings
Choose healthy, non-flowering stems from your parent lavender plant. Look for stems that are about 4-6 inches long and have a slightly woody base but are still flexible at the tip (known as semi-hardwood cuttings). Make a clean cut just below a leaf node (the point where a leaf meets the stem). Aim for several cuttings to increase your chances of success.
-
Prepare the Cuttings
Remove all leaves from the bottom 1-2 inches of each cutting. This exposes the nodes where roots will emerge and prevents leaves from rotting once buried in the soil. You can also lightly scrape a small strip of bark from the very bottom of the stem to further expose the cambium layer, which aids rooting.
-
Apply Rooting Hormone (Optional)
If using rooting hormone, lightly dip the cut end of each prepared cutting into the powder or gel. Tap off any excess. This step isn’t strictly necessary but can significantly improve rooting success, especially for beginners.
-
Plant the Cuttings
Using a pencil or a stick, make small holes in the prepared potting mix, about 1-2 inches deep. Gently insert a cutting into each hole, ensuring the leafless portion is buried. Lightly firm the soil around the base of each cutting to ensure good contact. Plant one cutting per small pot, or space them a few inches apart in a tray.
-
Water and Provide the Right Environment
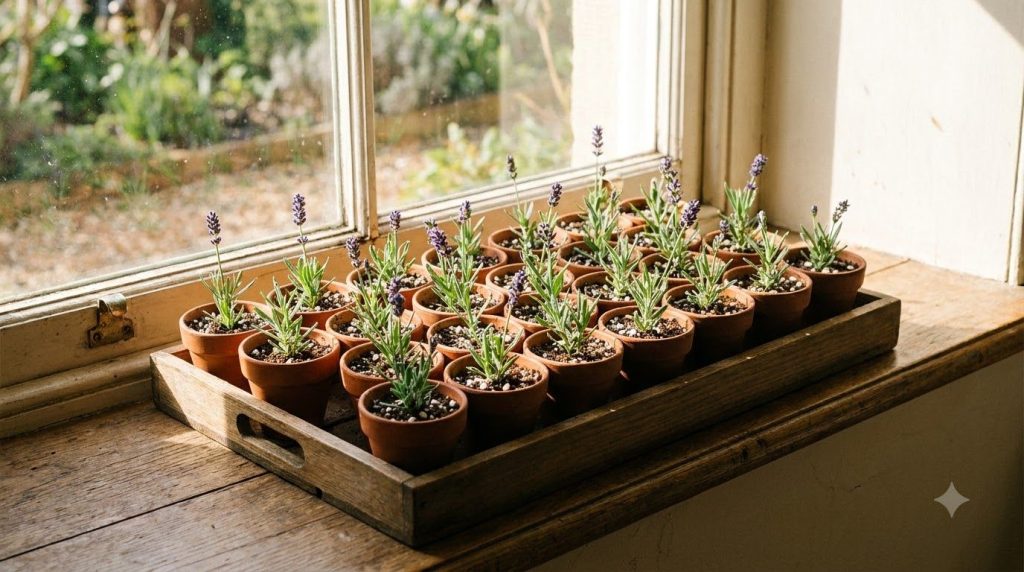
Gently water the newly planted cuttings. Place the pots in a location with bright, indirect light – a windowsill with dappled sun is often perfect. Avoid direct, intense sunlight initially. Maintain consistent moisture in the soil, but do not let it become soggy. High humidity can be beneficial; consider covering the tray with a clear plastic dome or plastic wrap, propped up to allow some airflow.
How to Use Your Newly Propagated Lavender
Once your lavender cuttings have rooted and grown into established plants (usually 6-12 weeks), they’re ready to provide you with endless possibilities. Harvest the flowers and leaves to make:
- Calming Teas: Dry the flowers for a soothing, aromatic herbal tea.
- Aromatic Sachets: Fill small cloth bags with dried lavender buds to freshen drawers and closets.
- Homemade Essential Oils/Infused Oils: Use fresh or dried flowers to infuse carrier oils for massage or skincare.
- Culinary Delights: A pinch of dried lavender can add a unique floral note to baked goods or savory dishes.
- Natural Home Fresheners: Create lavender water sprays or add fresh sprigs to vases for natural fragrance.
How Often to Propagate and Harvest
You can propagate lavender cuttings multiple times a year, ideally in spring and early summer for best results. As for harvesting, once your new plants are mature (typically after their first year), you can harvest lavender flowers as they begin to open. For continuous blooms and a healthy plant, deadhead spent flowers and prune lightly after the main flush of bloom.
How to Choose Ingredients and a Parent Plant
The success of your propagation hinges on the quality of your parent plant. Always choose a healthy, disease-free, and pest-free lavender plant. If buying a new plant to propagate from, inspect it thoroughly for any signs of stress or damage. For potting mix, opt for a sterile, lightweight, well-draining mix to prevent fungal issues and promote aeration for root development.
Storage for Cuttings and Harvested Lavender
Fresh cuttings should be planted as soon as possible after taking them. If you must delay, wrap the cut ends in a damp paper towel and place them in a plastic bag in the refrigerator for a day or two. Once your lavender plants are mature and you’ve harvested the flowers, proper storage is key to preserving their fragrance and potency. Dry lavender thoroughly by hanging bundles upside down in a cool, dark, well-ventilated area. Once dry, store the buds in airtight containers away from direct sunlight and humidity. They can retain their aroma for up to a year.
Quick Tip: Best Time to Use Your Propagated Lavender
Allow your newly rooted lavender plants to establish robust root systems for at least 3-4 months before attempting any significant harvesting. This ensures the plant has enough energy to recover and thrive.
Practical Tips for Thriving Lavender Cuttings
- Consistent Moisture: Keep the soil consistently moist but never soggy. Overwatering is a common killer of new cuttings.
- Good Airflow: If using a humidity dome, lift it daily for 15-30 minutes to allow for air circulation and prevent fungal growth.
- Warmth: Lavender roots best in temperatures between 65-75°F (18-24°C). A heating mat can be helpful in cooler environments.
- Patience: Rooting can take anywhere from 3 to 12 weeks. Gently tugging on a cutting after a few weeks can tell you if roots have formed – if there’s resistance, it’s likely rooting.
- Transplanting: Once roots are well-established and new growth appears, gradually acclimate your cuttings to outdoor conditions (hardening off) before transplanting them to larger pots or the garden.
Common Mistakes to Avoid
- Using the Wrong Type of Cutting: Softwood (too tender) or hardwood (too rigid) cuttings are less successful than semi-hardwood.
- Overwatering: Leads to root rot. Let the top inch of soil dry out slightly between waterings.
- Poor Drainage: Pots without drainage holes or heavy soil will drown roots.
- Not Enough Light: Cuttings need bright, indirect light, but direct hot sun can scorch tender new growth.
- Skipping Sterilization: Dirty tools can introduce pathogens to your cuttings.
- Harvesting Too Soon: Giving new plants ample time to establish roots is critical for their long-term health.
Comparison: Cuttings vs. Seeds for Propagation
| Feature | Cuttings | Seeds |
|---|---|---|
| Genetic Identity | Identical to parent plant | Variable, may not be true to parent |
| Rooting Time | 3-12 weeks | Weeks to months for germination |
| Maturity for Harvest | Often within 6-12 months | 1-2 years or more |
| Ease of Process | Relatively easy with good technique | Can be challenging; requires stratification |
| Success Rate | High with proper care | Lower, more variable |
Cautions / Who Should Avoid It
While propagating lavender is generally safe, always handle sharp tools with care. If you have severe allergies to plants or plant sap, wear gloves, though lavender is not commonly associated with strong skin irritations from its sap. Ensure any rooting hormone is used according to manufacturer instructions and kept out of reach of children and pets. This guide is for growing plants, not for immediate consumption or medicinal use without further research or consultation.
Quick Summary: Your Lavender Expansion at a Glance
- Best Preparation: Semi-hardwood cuttings from a healthy parent plant.
- Best Use-Case: Multiplying favorite lavender varieties for an abundant supply of fresh or dried material.
- Storage: Cuttings planted immediately; dried lavender in airtight containers.
- When to Use: Late spring/early summer for propagation; harvest mature plants after first year’s establishment.
- What to Avoid: Overwatering, poor drainage, dirty tools, harvesting new plants too soon.
FAQ: Common Questions About Lavender Propagation
- Can I use fresh or dried cuttings? You must use fresh, live cuttings for propagation. Dried lavender is for remedies, not for growing new plants.
- How long does it take for lavender cuttings to root? It typically takes 3 to 12 weeks for roots to form, depending on conditions and the cutting itself.
- How often should I water new cuttings? Keep the soil consistently moist but never waterlogged. Check daily and water when the top inch of soil feels slightly dry.
- When should I transplant my rooted cuttings? Once roots are well-established (you’ll see new leaf growth) and the plant shows resistance when gently tugged, they’re ready for hardening off and transplanting into larger pots or the garden.
- Can I propagate lavender in water? While some plants root in water, lavender generally performs much better and forms stronger roots when propagated directly in a well-draining soil mix.
- What part of the plant is best for cuttings? Semi-hardwood stems, which are slightly woody at the base but still pliable at the tip, are ideal.
- Why are my lavender cuttings rotting? This is usually due to overwatering or poor drainage. Ensure your potting mix is well-draining and you’re not keeping the soil soggy.
You may also like: Our Full Guide to DIY Lavender Essential Oil.
Conclusion
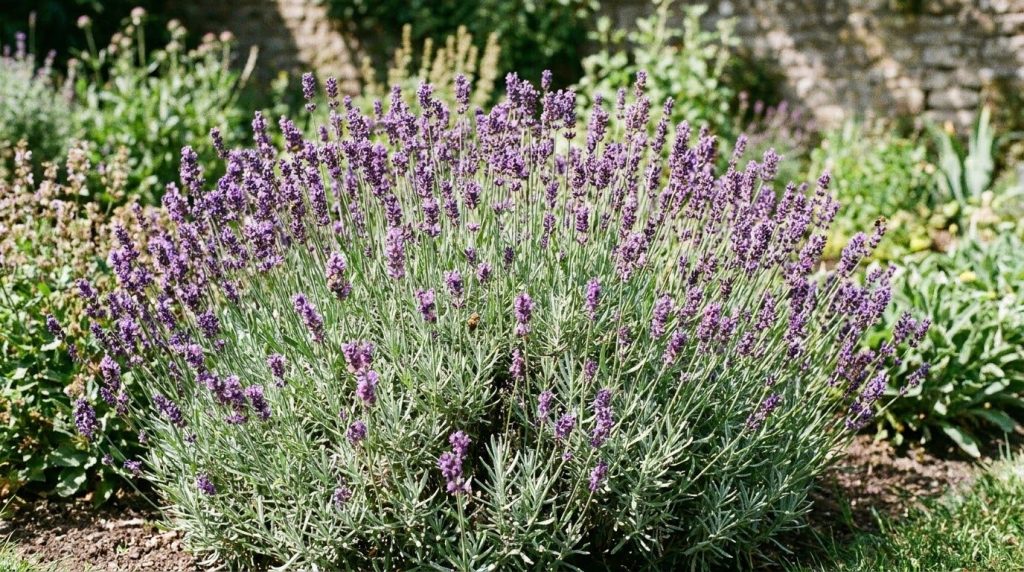
Transforming one lavender plant into a flourishing patch is a rewarding endeavor that connects you more deeply with nature’s bounty. By mastering the simple trick of propagation through cuttings, you ensure a continuous supply of this fragrant herb, ready to enrich your home and well-being. The process is straightforward, requiring only a few basic tools and a bit of patience. So, gather your shears, choose your favorite lavender, and embark on your journey to endless aromatic remedies. Happy propagating!
Read more: Herbal Tea Recipes for Relaxation.