Tired of scrubbing endlessly and still not getting that sparkling clean bathroom you dream of? Do harsh chemical fumes make cleaning a chore rather than a satisfying task? You’re not alone! Many homeowners struggle with finding effective yet safe cleaning solutions for their busiest spaces.
This guide is for anyone looking to simplify their cleaning routine, save money on expensive store-bought products, and create a healthier home environment. Whether you’re a seasoned DIY enthusiast or just starting your journey into homemade solutions, you’ll find this recipe incredibly easy and effective.
In this comprehensive guide, we’ll walk you through crafting your very own homemade all-purpose bathroom cleaner using common household ingredients. You’ll learn how to mix it, where to use it, and get expert tips to maximize its cleaning power. Get ready to transform your bathroom cleaning experience!
Quick Summary
- Preparation Time: 5 minutes
- Application Time: Varies by task (e.g., 10-30 minutes for a standard bathroom)
- Difficulty Level: Easy
- Best Uses: Daily cleaning, light grime, deodorizing, shining surfaces
- Suitable Surfaces: Ceramic tiles, porcelain, fiberglass, stainless steel, chrome fixtures, sealed grout, glass, most non-porous bathroom surfaces
- Storage Time: Up to 1 month
Why You’ll Love This DIY Solution
- Easy to Make: Requires only a few simple steps.
- Budget-Friendly: Uses affordable ingredients you likely already have.
- Uses Common Household Ingredients: No need for specialized supplies.
- Beginner-Friendly: Perfect for those new to DIY cleaning.
- Multipurpose: Effective on various bathroom surfaces.
- Eco-Friendly: Reduces reliance on harsh chemicals and plastic waste.
- Fresh Scent: Naturally deodorizes and leaves a clean aroma.
- Gentle Yet Effective: Cleans without harsh abrasives or toxic fumes.
Ingredients / Materials
- 1 cup white vinegar
- 1 cup warm water (distilled or filtered water is best for longer storage, but tap water works fine for immediate use)
- 1 tablespoon liquid dish soap (any brand, preferably unscented or a natural variety)
- 10-15 drops lemon or tea tree essential oil (optional, for scent and added antibacterial properties)
- 1/4 cup baking soda (for extra scrubbing power on tough stains, used separately)
Equipment Needed
- Spray bottle (16-24 oz, clean and empty)
- Measuring cups and spoons
- Funnel (optional, but helpful for pouring into the spray bottle)
- Mixing bowl or large jar (for initial mixing)
- Microfiber cloths or clean rags
- Rubber gloves (optional, for sensitive skin)
Step-by-Step Instructions
Follow these simple steps to create your powerful homemade bathroom cleaner:
-
Step 1: Gather Your Ingredients and Equipment (1 minute)
Lay out all your ingredients (white vinegar, warm water, dish soap, essential oil) and your equipment (spray bottle, measuring cups, funnel, mixing bowl). Ensure your spray bottle is clean and ready for mixing.
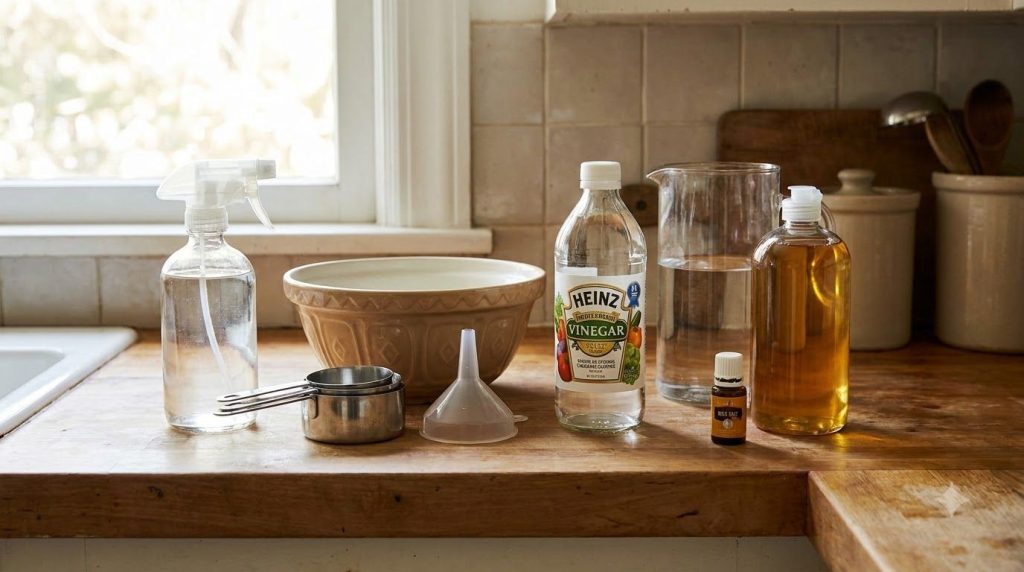
A quick setup makes the mixing process smooth and easy. -
Step 2: Combine Wet Ingredients (2 minutes)
In your mixing bowl or large jar, combine 1 cup of white vinegar with 1 cup of warm water. Stir gently to mix them thoroughly. The warm water helps the ingredients blend better and can slightly enhance cleaning.
-
Step 3: Add Dish Soap (1 minute)
Carefully add 1 tablespoon of liquid dish soap to the vinegar and water mixture. Stir slowly to avoid creating too many suds. The dish soap acts as a surfactant, helping to lift dirt and grime.
-
Step 4: Incorporate Essential Oils (Optional, 30 seconds)
If you’re using essential oils, add 10-15 drops to the mixture now. Lemon essential oil is great for a fresh scent and degreasing, while tea tree oil offers natural antibacterial properties. Stir one last time to distribute the oils.
-
Step 5: Transfer to Spray Bottle (1 minute)
Using a funnel, carefully pour the prepared cleaning solution into your clean spray bottle. Secure the spray top tightly. Give the bottle a gentle shake before each use.
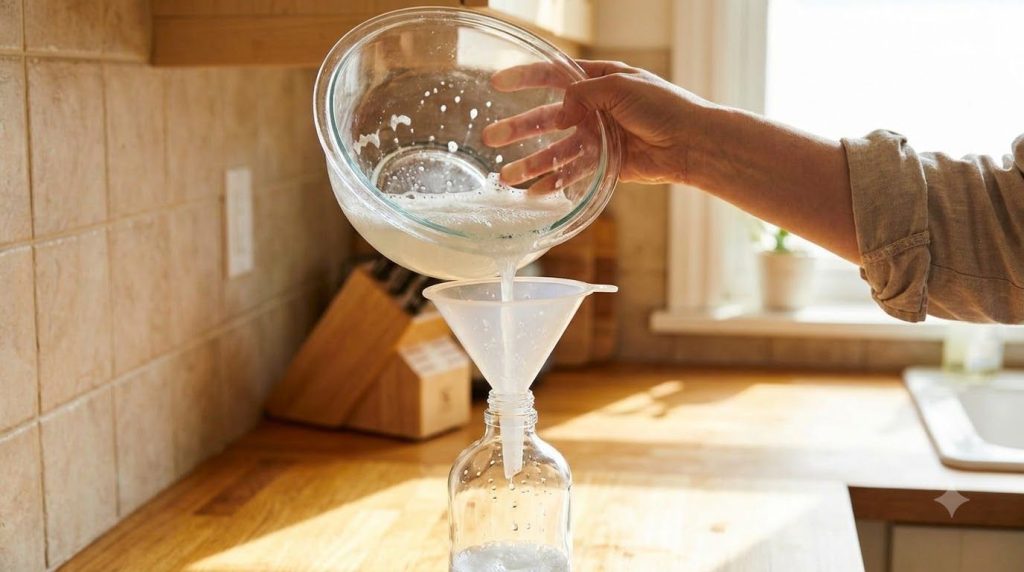
A funnel ensures a mess-free transfer into your handy spray bottle. -
Step 6: Use Baking Soda for Tough Spots (As Needed)
For tougher stains, soap scum, or grout cleaning, sprinkle a small amount of baking soda directly onto the wet surface. Spray your homemade cleaner over the baking soda to create a paste. Let it sit for a few minutes, then scrub with a brush or sponge and rinse thoroughly.
Best Uses
This versatile homemade cleaner is perfect for tackling various surfaces and cleaning tasks:
- Bathroom Sinks and Faucets: Spray, wipe, and rinse for a sparkling shine.
- Shower Walls and Doors: Helps cut through soap scum and water spots.
- Toilets: Spray the bowl and exterior, let sit for a few minutes, then scrub and flush.
- Bathtubs: Ideal for daily wiping down or light cleaning.
- Countertops: Great for ceramic, laminate, and solid surface countertops.
- Glass and Mirrors: Spray lightly and wipe with a clean microfiber cloth for streak-free results.
- Tile and Grout: Excellent for everyday cleaning; use with baking soda for deeper grout cleaning.
- Stainless Steel Fixtures: Polishes chrome and stainless steel without harsh chemicals.
Surface Limitations:
While powerful, this cleaner is not suitable for all surfaces. Avoid using vinegar-based cleaners on:
- Natural Stone: Such as marble, granite, or travertine, as the acidity can etch the surface over time.
- Unsealed Grout: Vinegar can break down unsealed grout. Always ensure grout is sealed before use.
- Cast Iron: Can strip away seasoning or protective coatings.
- Wood: Especially unsealed or waxed wood surfaces.
Safety Notes
Your safety is paramount when cleaning, even with natural solutions. Always keep these points in mind:
- Test in an Inconspicuous Area: Before applying to a large surface, always test the cleaner on a small, hidden spot to ensure no discoloration or damage occurs.
- Wear Gloves: If you have sensitive skin, wearing rubber gloves is recommended to protect your hands from prolonged exposure to vinegar.
- Ventilate Well: Although natural, vinegar has a strong smell. Ensure good airflow by opening windows or using a fan during cleaning.
- Keep Away from Children and Pets: Store all cleaning solutions, homemade or otherwise, out of reach of children and pets.
- Never Mix with Bleach: This is crucial. Never mix vinegar with bleach or products containing bleach, as it can create dangerous chlorine gas.
- Avoid Eye Contact: In case of accidental eye contact, rinse thoroughly with water for several minutes.
Expert Tips
Elevate your cleaning game with these handy expert tips:
- Warm Water Boost: Using warm (not hot) water for mixing helps the ingredients combine better and can slightly enhance the cleaner’s effectiveness on grease and grime.
- Shake Before Each Use: Ingredients can separate over time. A quick shake before spraying ensures an even distribution of the cleaning power.
- Let It Dwell: For tougher spots or soap scum, spray the cleaner and let it sit for 5-10 minutes before wiping. This gives the solution time to break down the grime.
- Microfiber Magic: Always use high-quality microfiber cloths for wiping. They are excellent at trapping dirt and grime and leaving surfaces streak-free.
- Use Baking Soda for Extra Scrub: Keep a shaker of baking soda handy for a non-abrasive scrub. Sprinkle it on, spray your solution, and scrub with a brush for extra power on grout or baked-on grime.
- Don’t Forget the Faucet Aerator: Unscrew and soak faucet aerators in a small cup of pure white vinegar for an hour to dissolve mineral buildup.
- Essential Oil Variety: Experiment with different essential oils like lavender, eucalyptus, or peppermint for varied scents and properties.
- Weekly Wipe-Down: Incorporate a quick spray and wipe with this cleaner into your weekly routine to prevent heavy buildup and keep surfaces sparkling.
Storage Instructions
Proper storage ensures your homemade cleaner remains effective and safe to use.
- Shelf Life: This cleaner can be stored for up to 1 month. While vinegar itself has a long shelf life, the addition of water and dish soap can reduce the stability of the mixture over time. Essential oils can also degrade.
- Best Storage Container: Store your solution in a clean, opaque spray bottle. Opaque bottles help protect essential oils from light degradation, maintaining their efficacy and scent longer. If using a clear bottle, store it in a dark cabinet.
- Storage Location: Keep the cleaner in a cool, dark place away from direct sunlight or extreme temperatures. A bathroom cabinet or under the sink is ideal.
- Signs the Solution Should Be Discarded: Discard the solution if you notice any changes in color, separation that doesn’t resolve with shaking, or an off-odor. If it loses its effectiveness, it’s also time to make a fresh batch.
Frequently Asked Questions
Here are some common questions about homemade bathroom cleaners:
Can I store this solution?
Yes, you can store this homemade all-purpose bathroom cleaner in a sealed spray bottle for up to one month.
How long does it last?
The cleaner is best used within one month for optimal effectiveness and scent retention.
Can I use it on marble?
No, this cleaner contains vinegar, which is acidic and can etch or damage natural stone surfaces like marble, granite, or travertine. Always avoid using it on such materials.
Can I replace an ingredient?
You can substitute the specific essential oil with another of your choice, or omit it entirely if you prefer an unscented cleaner. However, we do not recommend replacing the white vinegar or dish soap, as they are key to its cleaning power.
Is it safe around pets?
While made with natural ingredients, it’s always best to keep cleaning solutions out of reach of pets. Ensure surfaces are dry before allowing pets to access the area to prevent accidental ingestion.
Will it leave streaks on glass?
If used correctly with a clean microfiber cloth, this cleaner should leave glass and mirrors streak-free. Use a light spray and wipe quickly for best results.
Can I use this cleaner in my kitchen?
Yes, this cleaner is also effective on many kitchen surfaces like countertops (excluding natural stone), sinks, and stainless steel appliances. It’s a great all-purpose solution!
Why is warm water recommended?
Warm water helps the dish soap and essential oils mix more thoroughly with the vinegar, creating a more homogenous and effective solution. It also aids in dissolving light grease and grime.
What if my bathroom is extremely dirty?
For very heavy soap scum or mildew, you may need a more intensive treatment. You can use this cleaner in conjunction with baking soda for extra scrubbing power, or for stubborn mildew, a paste of baking soda and hydrogen peroxide (used carefully and separately, never mixed with vinegar).
Does the vinegar smell linger?
The strong vinegar smell typically dissipates quickly as it dries. Adding essential oils can also help mask the scent, leaving behind a fresh aroma.
Conclusion
Say goodbye to chemical-laden cleaners and hello to a sparkling, fresh, and healthier home with your very own homemade all-purpose bathroom cleaner! This simple, effective, and budget-friendly recipe is a game-changer for anyone looking to make cleaning a less daunting task.
By following our easy step-by-step instructions and incorporating the expert tips, you’ll be able to tackle grime and leave your bathroom gleaming with confidence. Remember to always prioritize safety, test new surfaces, and enjoy the satisfaction of a clean home, made better by your own hands. Happy cleaning!