Say goodbye to chapped lips, bestie! We all know that feeling of dry, flaky lips that just won’t cooperate. But what if we told you that super soft, smooth pout you’re dreaming of is just minutes away, using ingredients you probably already have in your kitchen?
That’s right! Today, we’re diving into the easiest and most effective DIY lip scrub recipe that will transform your lips from parched to perfectly plump. Get ready to give your lips the pampering they deserve and unveil a radiant, healthy smile!
Why Your Lips Crave a Good Scrub
Just like the rest of our skin, our lips accumulate dead skin cells that can make them look dull, dry, and uneven. Exfoliating regularly helps to gently remove these cells, revealing the fresh, soft skin underneath. This not only makes your lips feel amazing but also helps your lip balm and lipstick glide on smoother and last longer!
Plus, a good scrub can boost circulation, giving your lips a natural, healthy flush. Who doesn’t want that?
The Power Trio: Simple Ingredients, Big Results
The beauty of this DIY lip scrub lies in its simplicity and the powerful benefits of its three star ingredients:
1. Sugar: The Gentle Exfoliator
- What it does: Sugar crystals are perfect for gently buffing away dead skin without being too abrasive.
- Beauty Bestie Tip: Use fine-grain sugar (like caster sugar) for sensitive lips, or regular granulated sugar for a slightly more intense scrub.
2. Vaseline (Petroleum Jelly): The Moisture Lock
- What it does: Vaseline is a fantastic occlusive, meaning it creates a protective barrier on your lips, locking in moisture and shielding them from environmental aggressors like wind and cold.
- Beauty Bestie Tip: It helps the scrub glide smoothly and leaves your lips feeling incredibly soft and protected.
3. Olive Oil: The Nourishing Elixir
- What it does: Rich in antioxidants and vitamins, olive oil provides deep hydration and nourishment, helping to repair and soothe dry, damaged lips.
- Beauty Bestie Tip: It adds a lovely slip to the scrub and leaves your lips feeling supple and healthy.
Your Easy DIY Lip Scrub Recipe
Ready to whip up your own batch? It’s super quick!
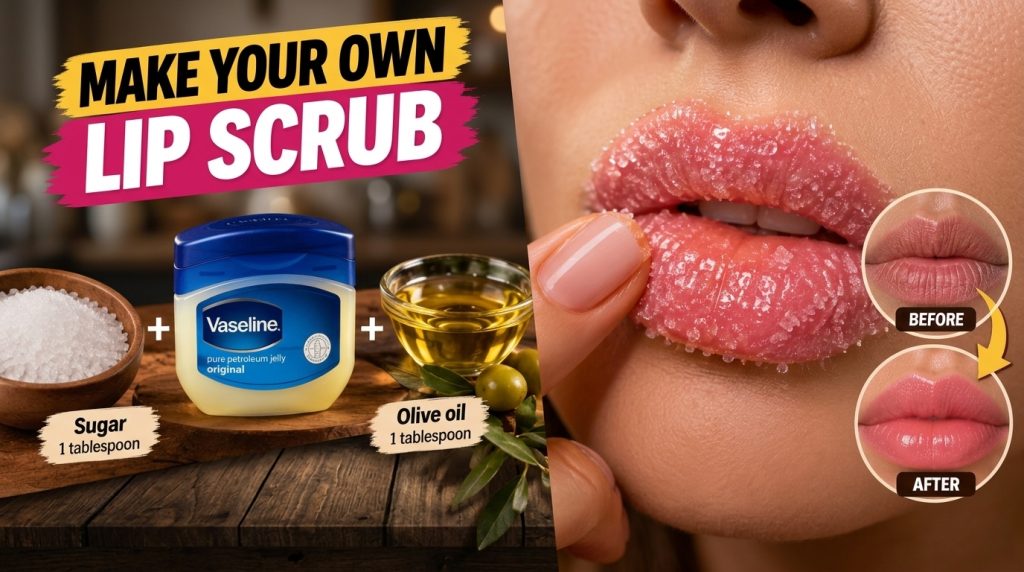
What You’ll Need:
- 1 teaspoon granulated sugar (or fine-grain sugar)
- 1 teaspoon Vaseline petroleum jelly
- ½ teaspoon olive oil (extra virgin is great!)
- Small, clean container for storage
Step-by-Step Instructions:
- Combine: In a small bowl, add the sugar, Vaseline, and olive oil.
- Mix: Using a clean spoon or your finger, mix all the ingredients thoroughly until you get a consistent paste. It should be thick enough to stay on your lips but still spreadable.
- Store: Transfer your homemade lip scrub into a small, airtight container. A small empty balm jar or a clean sample pot works perfectly!
How to Use Your Lip Scrub for Best Results
Now for the fun part – pampering your pout!
- Prep Your Lips: Make sure your lips are clean and dry.
- Apply: Take a small pea-sized amount of the scrub on your fingertip.
- Gently Exfoliate: Using light, circular motions, gently massage the scrub over your lips for about 30-60 seconds. Don’t press too hard – let the sugar do the work!
- Rinse Off: Rinse your lips with lukewarm water or gently wipe away the scrub with a damp, soft cloth.
- Moisturize: Immediately follow up with your favorite hydrating lip balm or a touch more Vaseline to lock in that newfound softness.
Extra Tips for the Softest Lips Ever!
- Frequency: Use this scrub 1-2 times a week. Over-exfoliating can irritate your lips.
- Night Routine: Applying the scrub before bed and following with a thick layer of lip balm or Vaseline as an overnight mask can work wonders!
- Hydration from Within: Remember to drink plenty of water throughout the day. Hydrated body = hydrated lips!
- Sun Protection: Don’t forget an SPF lip balm during the day, even on cloudy days.
- Storage: Store your DIY scrub in a cool, dry place. It should last for a couple of weeks. If you notice any changes in smell or texture, it’s best to make a fresh batch.
Ready for Your Smoothest Lips Yet?
There you have it, gorgeous! A super simple, incredibly effective, and affordable way to say goodbye to chapped lips and hello to a soft, radiant pout. This DIY lip scrub is a game-changer for anyone wanting to boost their lip care routine without breaking the bank.
Give this recipe a try and let us know how much you love your newly smooth lips! What’s your go-to natural beauty secret? Share it with your beauty besties in the comments below!