Ever wanted to add that professional chef’s touch to your desserts? Look no further! These delicate coral tuiles are surprisingly simple to make and instantly elevate any dish. They’re light, crispy, and create an amazing visual impact that will impress your guests. But why stop there? We’ve gathered five more elegant, crispy decorations to transform your homemade desserts into culinary masterpieces. Dive into these easy-to-follow recipes and get ready to garnish like a pro!
Quick Overview
- Main topic: Creating elegant, crispy dessert garnishes
- Best for: Home bakers, dessert enthusiasts, special occasions
- Number of recipes: 6
- Prep style: Pan-fried and baked, decorative
- Reader benefit: Learn simple techniques to elevate dessert presentation
Recipe 1: Crispy Coral Tuiles
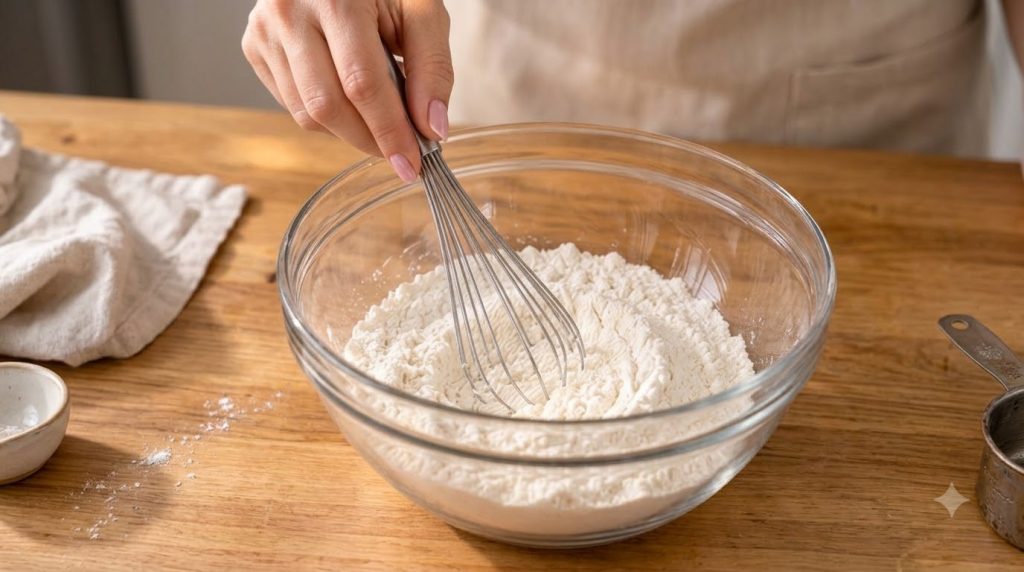
These beautiful, airy tuiles resemble delicate coral, adding a sophisticated and professional finish to your sweet creations. They are incredibly easy to make with just a few pantry staples.
Servings: Makes about 10-12 tuiles
Prep time: 10 minutes
Cook / chill / rest time: 15-20 minutes (active cooking)
Ingredients:
- 2 tablespoons all-purpose flour
- 1/4 cup water
- 2 tablespoons neutral oil (like vegetable or grapeseed)
- Pinch of salt
Instructions:
- In a small bowl, whisk together the flour, water, oil, and salt until smooth and no lumps remain. Ensure the batter is very thin and pourable.
- Heat a non-stick pan over medium heat. Do not grease the pan.
- Pour a small amount of batter (about 1-2 tablespoons) into the hot pan, swirling it quickly to create a thin, lacy pattern across the bottom.
- Cook for 2-3 minutes, or until the water evaporates, the tuile becomes crispy, and the edges turn golden brown.
- Carefully remove the hot tuile from the pan with a thin, flexible spatula.
- Immediately place the hot tuile over a rolling pin, a curved bowl, or a small bottle to shape it as it cools and hardens.
- Repeat with the remaining batter, ensuring the pan is at the correct temperature for each tuile.
Storage / Serving / Usage Note: Store cooled tuiles in an airtight container at room temperature for up to 3 days. They are best used soon after making for maximum crispness. Garnish plated desserts just before serving.
Recipe 2: Cocoa Tuiles
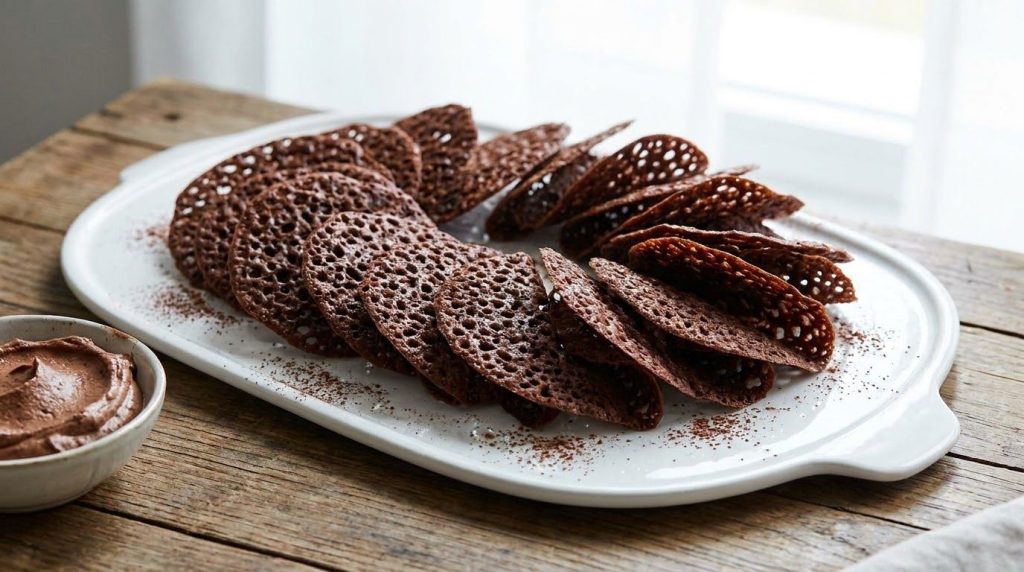
For the chocolate lovers, these cocoa tuiles offer a rich flavor and beautiful dark lace pattern, perfect for accompanying chocolate mousses, cakes, or fruit tarts.
Servings: Makes about 10-12 tuiles
Prep time: 10 minutes
Cook / chill / rest time: 15-20 minutes (active cooking)
Ingredients:
- 2 tablespoons all-purpose flour
- 1 tablespoon unsweetened cocoa powder
- 1/4 cup water
- 2 tablespoons neutral oil
- 1 tablespoon granulated sugar
- Pinch of salt
Instructions:
- In a small bowl, whisk together the flour, cocoa powder, water, oil, sugar, and salt until smooth and lump-free.
- Heat a non-stick pan over medium heat.
- Pour 1-2 tablespoons of batter into the pan, swirling to create a thin, even layer.
- Cook for 2-3 minutes, or until edges are crispy and the tuile holds its shape.
- Carefully remove with a spatula and immediately shape over a curved surface as it cools.
- Repeat with remaining batter.
Storage / Serving / Usage Note: Store in an airtight container for up to 3 days. These are excellent with creamy desserts or a scoop of vanilla ice cream.
Recipe 3: Vanilla Bean Tuiles
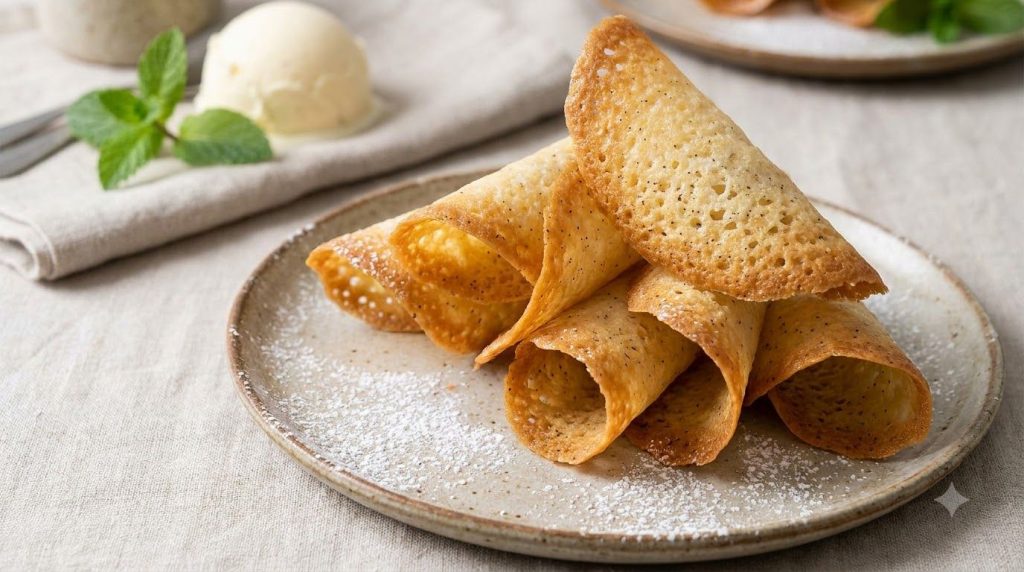
Infused with the classic fragrance of vanilla, these tuiles are versatile and complement almost any dessert, from fruit salads to crème brûlée, with their delicate crispness.
Servings: Makes about 10-12 tuiles
Prep time: 10 minutes
Cook / chill / rest time: 15-20 minutes (active cooking)
Ingredients:
- 2 tablespoons all-purpose flour
- 1/4 cup water
- 2 tablespoons neutral oil
- 1 tablespoon granulated sugar
- 1/2 teaspoon vanilla extract or 1/4 teaspoon vanilla bean paste
- Pinch of salt
Instructions:
- Combine flour, water, oil, sugar, vanilla extract/paste, and salt in a small bowl. Whisk until perfectly smooth.
- Heat a non-stick pan over medium heat.
- Pour 1-2 tablespoons of batter into the pan, swirling to create a thin, even layer.
- Cook for 2-3 minutes until golden brown and crispy.
- Remove from pan and immediately drape over a curved object to shape while warm.
- Continue with the rest of the batter.
Storage / Serving / Usage Note: Store in an airtight container. The subtle vanilla flavor makes these ideal for lighter desserts or those with delicate fruit components.
Recipe 4: Sesame Lace Wafers
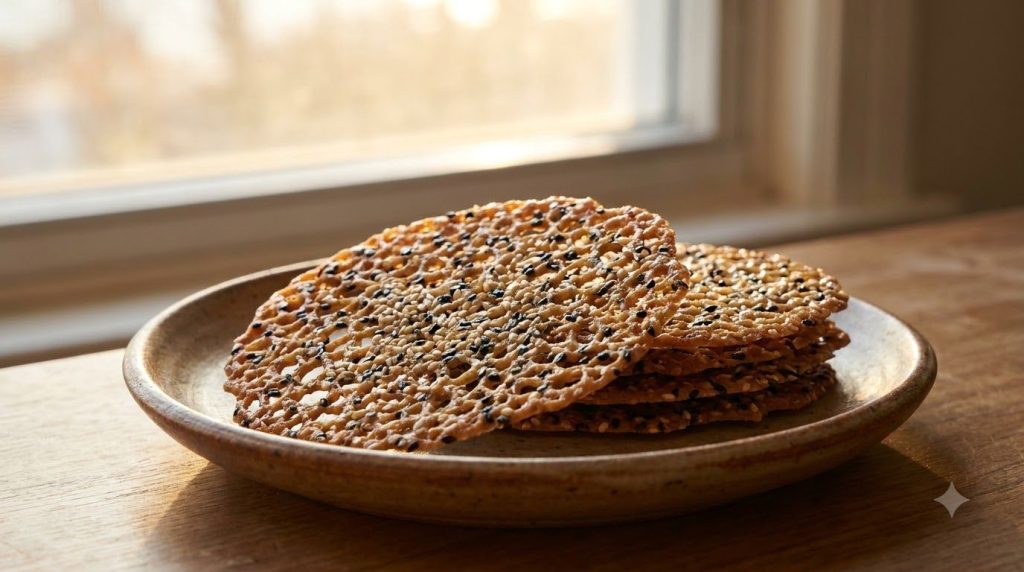
These delicate wafers incorporate toasted sesame seeds for a unique nutty flavor and added texture, creating an intriguing garnish for Asian-inspired desserts, panna cotta, or fruit compotes.
Servings: Makes about 12-15 wafers
Prep time: 15 minutes
Cook / chill / rest time: 10-15 minutes (active cooking)
Ingredients:
- 2 tablespoons all-purpose flour
- 1/4 cup water
- 2 tablespoons neutral oil
- 1 tablespoon granulated sugar
- 1 tablespoon toasted sesame seeds
- Pinch of salt
Instructions:
- In a bowl, whisk together flour, water, oil, sugar, sesame seeds, and salt until smooth.
- Heat a non-stick pan over medium heat.
- Pour 1-2 tablespoons of batter into the pan, swirling quickly to form a thin circle.
- Cook for about 2 minutes, until the wafer is golden and crisp.
- Carefully lift and place on a wire rack to cool flat, or shape over a rolling pin for a curved effect.
- Repeat until all batter is used.
Storage / Serving / Usage Note: Keep in an airtight container for up to 3 days. Their nutty flavor pairs wonderfully with green tea ice cream or mango sticky rice.
Recipe 5: Coconut Crisps
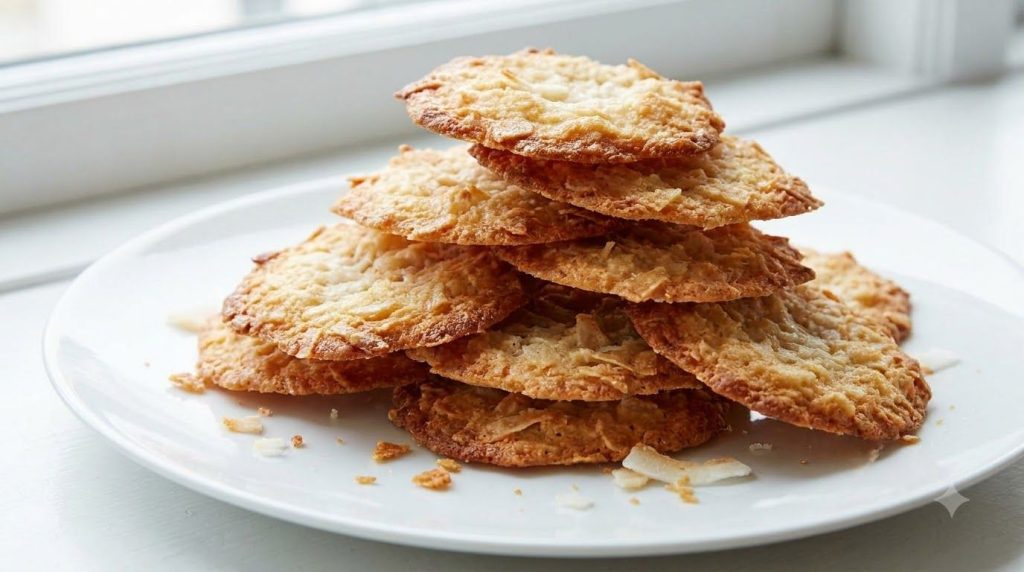
These simple coconut crisps are baked to a golden perfection, offering a delightful texture and tropical flavor. They are a fantastic gluten-free option for garnishing fruit tarts, puddings, or even as a snack on their own.
Servings: Makes about 12-15 crisps
Prep time: 10 minutes
Cook / chill / rest time: 15-20 minutes
Ingredients:
- 1 cup unsweetened shredded coconut
- 2 tablespoons granulated sugar
- 1 large egg white
- Pinch of salt
Instructions:
- Preheat oven to 300°F (150°C). Line a baking sheet with parchment paper.
- In a medium bowl, gently mix shredded coconut, sugar, egg white, and salt until well combined.
- Drop small spoonfuls (about 1 teaspoon) of the mixture onto the prepared baking sheet, spacing them apart.
- Flatten each spoonful very thinly with the back of a spoon or your fingers. The thinner they are, the crispier they will be.
- Bake for 15-20 minutes, or until golden brown and crispy. Keep a close eye on them as they can burn quickly.
- Remove from oven and let cool completely on the baking sheet before handling. They will crisp up further as they cool.
Storage / Serving / Usage Note: Store in an airtight container for up to 5 days. Excellent sprinkled over tropical fruit salads, yogurt parfaits, or ice cream.
Recipe 6: Brandy Snaps
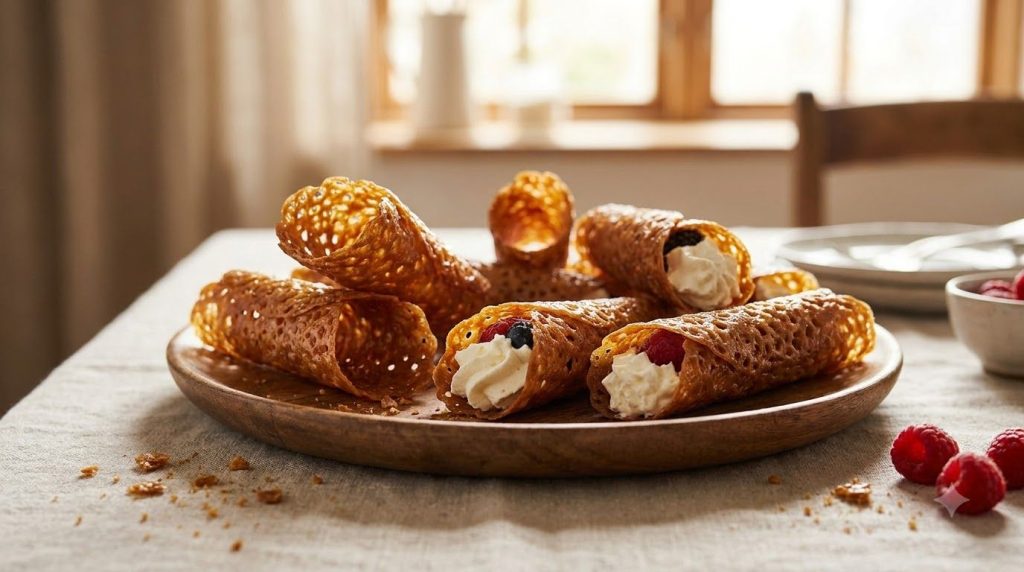
These traditional British treats are thin, crispy, and infused with a hint of brandy. Often shaped into cylinders or cones and filled with cream, they are a showstopper for any occasion.
Servings: Makes about 10-12 snaps
Prep time: 15 minutes
Cook / chill / rest time: 15 minutes (active cooking)
Ingredients:
- 2 tablespoons unsalted butter
- 2 tablespoons granulated sugar
- 2 tablespoons golden syrup (or corn syrup)
- 2 tablespoons all-purpose flour
- 1/2 teaspoon ground ginger
- 1 tablespoon brandy (optional)
Instructions:
- Preheat oven to 325°F (160°C). Line a baking sheet with parchment paper.
- In a small saucepan, melt the butter, sugar, and golden syrup over low heat until the sugar is dissolved. Remove from heat.
- Stir in the flour and ground ginger until smooth. If using, stir in the brandy.
- Drop small spoonfuls (about 1 teaspoon) of the mixture onto the prepared baking sheet, leaving plenty of space between each as they spread significantly. Bake only 2-3 at a time.
- Bake for 5-7 minutes, or until deep golden brown and bubbly.
- Working quickly, remove one snap at a time from the oven. Using a thin spatula, carefully lift the warm, pliable snap and roll it around the handle of a wooden spoon or a greased cone mold to shape.
- Let cool on the mold for a minute or two until hardened, then gently slide off. Repeat with remaining mixture, ensuring the baking sheet cools slightly between batches.
Storage / Serving / Usage Note: Store in an airtight container. Fill with whipped cream, custard, or ice cream just before serving for a truly decadent experience.
Simple Tips for Best Results
- Thin Batter is Key: For all tuile-like recipes, a very thin, runny batter is crucial for achieving that delicate, lacy, crispy texture.
- Non-Stick Pan is Essential: A good quality non-stick pan will make removing the delicate tuiles much easier without breakage.
- Work Quickly While Hot: Tuiles and brandy snaps harden rapidly once removed from the heat. Have your shaping tools (rolling pin, small bowls, etc.) ready before you start cooking.
- Bake in Batches: Especially for brandy snaps, bake only a few at a time to ensure you have enough time to shape them before they cool and become brittle.
- Experiment with Flavors: Once you master the basic technique, try adding citrus zest, spices like cinnamon, or a tiny amount of food coloring to your tuile batters for endless variations.
FAQ
Can I make these tuiles in advance?
Yes, most crispy garnishes like tuiles, lace wafers, and crisps can be made 2-3 days in advance and stored in an airtight container at room temperature. Humidity can make them lose their crispness, so avoid refrigerating.
What desserts pair well with these garnishes?
These garnishes are incredibly versatile. Coral and vanilla tuiles are great with fruit tarts, panna cotta, or mousses. Cocoa tuiles shine with chocolate desserts. Sesame wafers add a unique touch to Asian-inspired treats, while coconut crisps are perfect for tropical flavors. Brandy snaps are classic with whipped cream or ice cream.
What if my tuiles aren’t crispy?
If your tuiles aren’t crispy, they likely didn’t cook long enough, or the batter was too thick. Ensure your batter is thin, your pan is adequately hot, and you cook them until the water evaporates and the edges are golden brown. Cooling completely on a wire rack also helps.
Final Thoughts
Elevating your desserts doesn’t require complex techniques or expensive ingredients. With these easy recipes, you can transform simple dishes into elegant, gourmet experiences. The crispy coral tuiles and their delightful companions are sure to impress, proving that a little creativity in presentation goes a long way. Happy decorating!