Most people plant spring bulbs one type at a time, often leading to a short burst of color that quickly fades. What if you could extend that breathtaking display from early spring all the way into summer? The secret lies in a clever technique known as ‘lasagna planting,’ a method that ensures a continuous succession of blooms, transforming your garden into a vibrant masterpiece for months. It’s not just for expert gardeners; this simple layering approach makes a spectacular spring garden achievable for anyone.
What is Lasagna Planting?
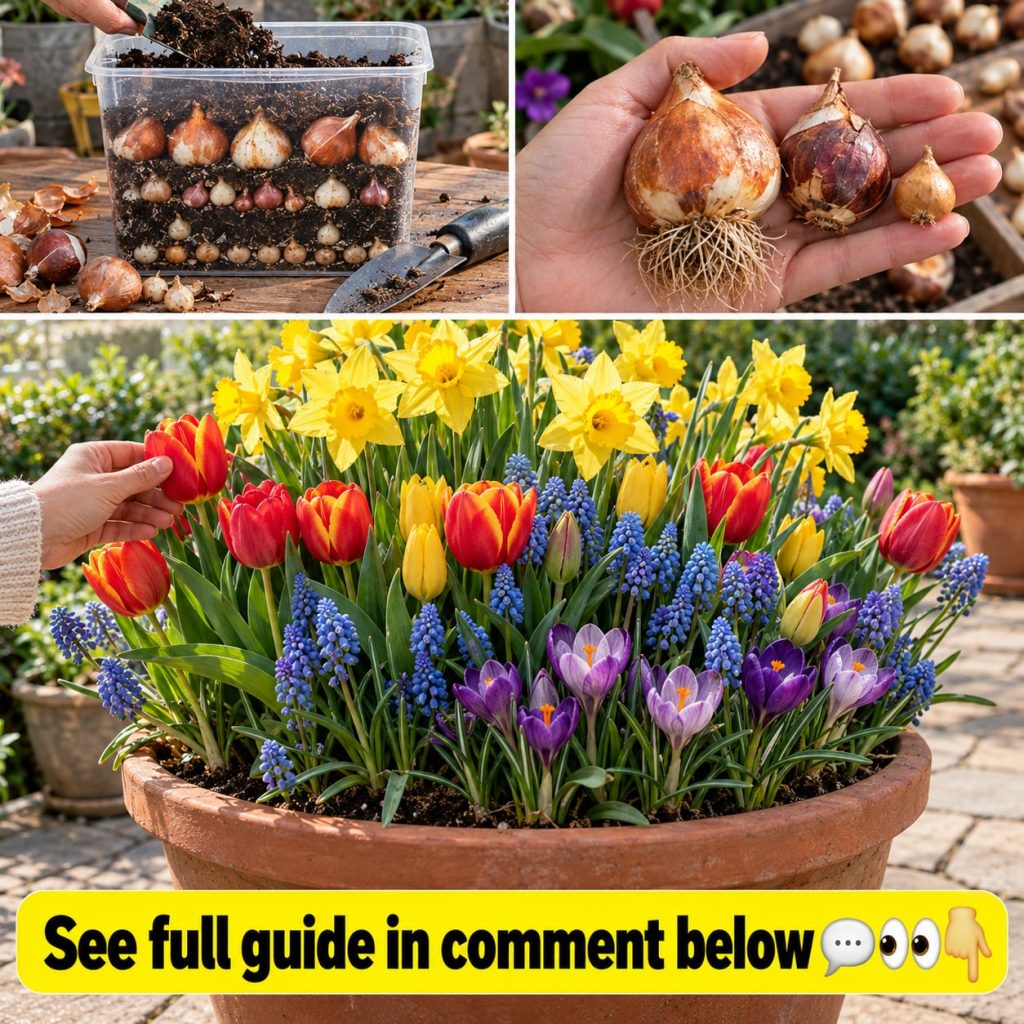
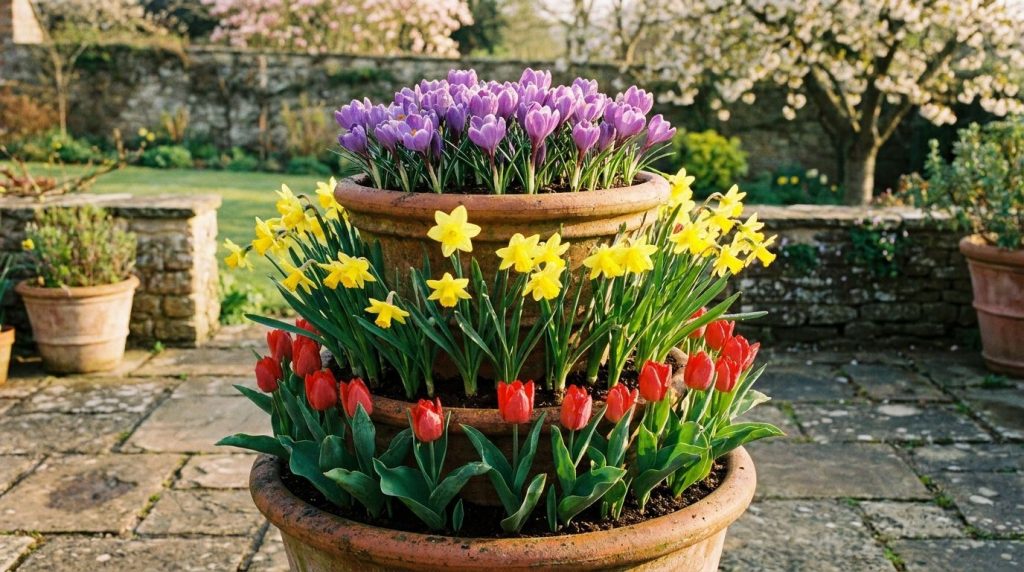
Lasagna planting is a bulb layering technique where different types of flower bulbs, chosen for their varied bloom times, are planted in vertical layers within a single container or garden bed. Just like a culinary lasagna, you stack components – in this case, bulbs – one on top of the other. The deepest layer contains late-blooming bulbs, followed by mid-season bloomers, and finally, early spring flowers closest to the surface. This strategic arrangement allows each bulb to sprout and flower in its turn, creating a dynamic, ever-changing display of color.
Choosing Your Ingredients: The Best Bulbs for Layering
The key to a successful lasagna planting lies in selecting bulbs with staggered bloom times. You’ll need a mix of early, mid, and late spring varieties to ensure a continuous show. Always opt for healthy, firm bulbs free from soft spots or mold.
- Bottom Layer (Late Spring/Early Summer Bloomers): Tulips (late varieties), Alliums, Hyacinths. These are planted deepest.
- Middle Layer (Mid-Spring Bloomers): Daffodils, Tulips (mid varieties), Anemones.
- Top Layer (Early Spring Bloomers): Crocus, Snowdrops, Muscari, Grape Hyacinths, Scilla, Chionodoxa. These go closest to the surface.
Approximate Measurements and Formula
While exact measurements can vary based on container size, the general rule is to provide enough space for each layer to grow. A container at least 18-24 inches deep is ideal for three layers. If planting in a garden bed, aim for similar depth.
Lasagna Planting Formula:
- Drainage Layer: 2-3 inches of gravel or broken pot pieces at the bottom of the container (optional for beds).
- Base Soil Layer: 4-6 inches of good quality potting mix.
- Deepest Bulbs: Plant late-blooming bulbs 6-8 inches deep (from the soil surface to the top of the bulb).
- Middle Soil Layer: Add 2-3 inches of potting mix.
- Mid-Level Bulbs: Plant mid-season bulbs 4-6 inches deep.
- Top Soil Layer: Add 2-3 inches of potting mix.
- Shallowest Bulbs: Plant early-blooming bulbs 2-4 inches deep.
- Final Soil Layer: Cover with 2-3 inches of soil, filling the container to about 1 inch below the rim.
Step-by-Step Method: Bringing Your Layers to Life
This process is best done in autumn, before the ground freezes, allowing the bulbs to establish roots over winter for a spectacular spring show.
- Choose Your Container or Spot: Select a large pot with drainage holes or an area in your garden bed that receives at least 6 hours of direct sunlight.
- Prepare the Base: For containers, add a 2-3 inch layer of gravel or broken pottery for drainage. Then, add 4-6 inches of fresh potting mix. For garden beds, simply prepare the soil by loosening it and adding compost.
- Plant the Bottom Layer: Place your largest, latest-blooming bulbs (e.g., alliums, late tulips) on the soil, spacing them a few inches apart. Don’t let them touch each other or the container sides.
- Add Soil: Cover the first layer of bulbs with 2-3 inches of potting mix, gently patting it down.
- Plant the Middle Layer: Stagger the mid-season bloomers (e.g., daffodils, mid-season tulips) on top of the soil, ensuring they are not directly above the bulbs below.
- Add More Soil: Cover the second layer with another 2-3 inches of potting mix.
- Plant the Top Layer: Arrange your smallest, earliest-blooming bulbs (e.g., crocus, muscari) on top of this soil layer.
- Final Cover: Fill the rest of the container or bed with soil, leaving about an inch of space from the rim for watering. Water thoroughly after planting.
How to Use and How Often to Use
Lasagna planted containers can be placed on patios, balconies, or near entryways for maximum impact. In garden beds, choose prominent locations where the continuous bloom will be appreciated. This method should be implemented annually in the autumn to ensure a fresh display each spring. Most bulbs used in lasagna planting are treated as annuals in containers, providing their best show in the first year.
Quick Tip: Hydration is Key
After planting, water your lasagna layers thoroughly. This helps settle the soil and encourages the bulbs to begin establishing roots before winter. Keep the soil consistently moist, especially during dry spells in autumn and early spring.
How to Buy and Choose Ingredients
When purchasing bulbs, look for those that are firm and heavy for their size. Avoid any that feel soft, mushy, or show signs of mold or damage. Larger bulbs generally produce larger, more vigorous blooms. Buy from reputable nurseries or garden centers to ensure quality. It’s best to plant bulbs as soon as possible after purchase.
Storage
If you cannot plant your bulbs immediately, store them in a cool, dark, and dry place with good air circulation. A mesh bag or open box in a basement or garage works well. Avoid storing them in plastic bags, which can trap moisture and lead to rot. Aim to plant all bulbs before the first hard frost in your region.
Practical Tips for Success
- Sunlight: Ensure your planting location receives at least 6 hours of direct sunlight per day during the blooming season.
- Drainage: Good drainage is crucial. Bulbs will rot in waterlogged soil.
- Pest Protection: If squirrels or other rodents are an issue, consider laying a piece of chicken wire or hardware cloth over the top layer of bulbs before adding the final soil, or use a container with a protective lid.
- Fertilization: Mix a slow-release granular fertilizer formulated for bulbs into the soil layers as you plant.
- Labeling: If you’re doing multiple containers, labeling them can help you remember what you planted where.
Common Mistakes to Avoid
Even with a straightforward method, a few common errors can hinder your spring spectacle:
- Poor Drainage: Using a container without drainage holes or heavy clay soil can lead to rot.
- Planting Upside Down: While some bulbs are forgiving, most have a clear top (pointy side) and bottom (flat, root-forming side). Plant with the pointy side up.
- Planting Too Late: Bulbs need a period of cold to establish roots. Planting after the ground has frozen solid won’t give them enough time.
- Forgetting to Water: Bulbs need moisture after planting to signal root growth.
- Overcrowding: While layered, bulbs still need some space to thrive. Don’t pack them in too tightly.
Did You Know?
The cold period bulbs experience during winter is called ‘vernalization.’ Without this crucial chilling period, many spring-flowering bulbs will not bloom properly.
Cautions: Who Should Avoid It?
Lasagna planting is generally safe and suitable for most gardeners. The only real caution is for those with severe allergies to certain flower pollens. Always handle bulbs with gloves if you have sensitive skin, as some can cause mild irritation. Ensure any fertilizers or pest deterrents are used according to package directions and kept away from children and pets.
Quick Summary
Lasagna planting is an ingenious way to create a continuous burst of spring color. Plant large, late-blooming bulbs deepest, followed by mid-season varieties, and finally, small, early bloomers at the top. Ensure good drainage, plant in autumn, and water thoroughly for a spectacular display. This method is best for containers and prominent garden spots, providing maximum visual impact.
FAQ
- Can I use any container? Yes, as long as it has good drainage and is deep enough (at least 18-24 inches for three layers).
- When is the best time to plant? Autumn, ideally 6-8 weeks before the first hard frost, to allow roots to establish.
- How long does the display last? With proper layering, you can achieve continuous blooms for 6-8 weeks, sometimes longer.
- Do I need to replant every year? In containers, it’s generally best to replant with fresh bulbs annually for the most impressive display. In garden beds, many bulbs will naturalize and return for several years.
- What if I live in a warm climate? Some warmer zones might need to pre-chill bulbs in the refrigerator for 6-12 weeks before planting to simulate winter.
- Can I mix different types of tulips? Absolutely! Mixing early, mid, and late varieties of tulips is an excellent way to extend their presence in your display.
- How much sun do they need? Most spring bulbs prefer at least 6 hours of direct sunlight per day once they emerge.
You may also like: How to Grow Herbs in Containers
Related remedy: Natural Pest Control for Your Garden
Blooming Beyond Expectations
The ‘lasagna planting’ method takes the guesswork out of achieving a long-lasting, vibrant spring garden. By thoughtfully layering your bulbs, you’re not just planting flowers; you’re orchestrating a seasonal spectacle that unfolds in beautiful, successive acts. It’s a simple, rewarding technique that transforms containers and garden beds alike into focal points of continuous color. Embrace this layered approach this autumn, and prepare to enjoy a spring flower explosion that truly stands apart.