There’s nothing quite as satisfying as watching a tiny seed sprout into a thriving plant, especially when you’ve nurtured it from the very beginning. Starting seeds indoors not only gives you a head start on the growing season but also allows you to cultivate a wider variety of plants that might not be available as seedlings at your local nursery. Plus, it’s incredibly rewarding! If you’ve ever felt intimidated by seed starting, fear not! This ultimate guide will walk you through every step, ensuring your journey from seed to sprout is a successful one.
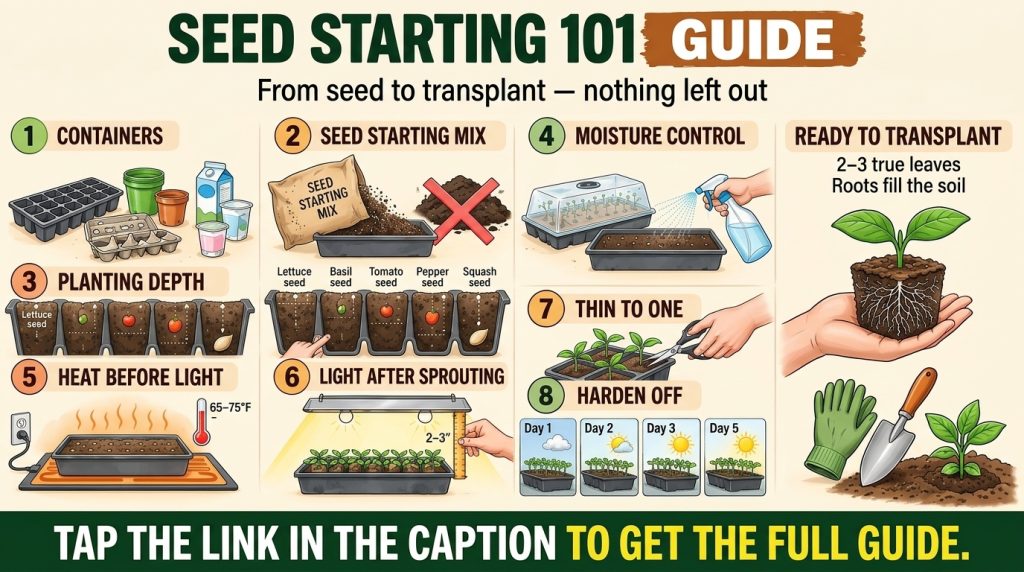 Master the art of indoor seed starting with our easy-to-follow guide!
1. Choose Your Containers Wisely
The first step to successful seed starting is selecting the right containers. You don’t need anything fancy; many everyday items can be repurposed!
What to Look For:
- Drainage: Essential! Whatever you choose, it must have drainage holes to prevent waterlogging, which can lead to damping-off disease.
- Size: Most seeds only need small containers (like cell packs or small pots) to start. As they grow, they’ll need more space.
- Material: Plastic cell trays are common and reusable. Peat pots or newspaper pots are biodegradable and can be planted directly into the garden, reducing transplant shock.
Popular Options:
- Plastic seed starting trays with individual cells
- Repurposed yogurt cups or milk cartons (with drainage holes added)
- Peat pots or coir pots
- Egg cartons (for very tiny seeds, but remember they dry out quickly)
2. Prepare Your Seed Starting Mix
Don’t use garden soil! It’s too heavy, can harbor diseases, and compacts easily, hindering delicate root growth.
The Ideal Mix:
- Lightweight and well-draining: A good seed starting mix is sterile, fine-textured, and provides excellent aeration.
- Nutrient-poor: Seeds contain enough energy for germination; a mix too rich in nutrients can actually harm young sprouts.
Look for commercial seed starting mixes, often composed of peat moss or coir, vermiculite, and perlite. Moisten the mix thoroughly before filling your containers. It should feel like a damp sponge – not soaking wet, not dusty dry.
3. Planting Depth & Spacing
This is where precision pays off! Each seed has specific requirements for planting depth.
General Rules:
- Small seeds: Often just barely covered with a thin layer of soil mix or simply pressed onto the surface.
- Larger seeds: Typically planted at a depth of 2-3 times their width.
- Check seed packets: Always refer to the seed packet for specific instructions on depth and spacing. Too deep, and the seedling might not have enough energy to emerge; too shallow, and it might dry out.
- Spacing: Give seeds a little room to breathe. Planting too many in one small cell leads to crowded, weak seedlings that are hard to separate later.
4. Watering Wisdom
Consistent moisture is key for germination, but overwatering is a common killer of young seedlings.
Tips for Success:
- Bottom watering: Place your seed trays in a larger tray filled with an inch or two of water. The soil mix will wick up the moisture from below. This prevents disturbing delicate seeds and reduces the risk of damping-off.
- Misting: For surface-sown seeds, a gentle misting bottle can keep the top layer moist without washing them away.
- Keep consistently moist: Never let your seed starting mix dry out completely, but also don’t let it sit in standing water.
- Covering: Use a clear plastic dome or plastic wrap over your trays to create a mini-greenhouse effect, maintaining humidity until seeds germinate. Remove it once seedlings appear.
5. The Warmth Factor (Heating)
Many seeds need warmth to germinate successfully, mimicking spring soil temperatures.
Provide Gentle Heat:
- Heating mats: Seedling heat mats are invaluable for providing consistent bottom heat, significantly improving germination rates and speed for many plant varieties.
- Warm location: If you don’t have a heat mat, find a warm spot in your home, like on top of a refrigerator or near a gentle heat source (but avoid direct, intense heat).
Once seeds have sprouted, most no longer need the heat mat; in fact, too much heat can cause them to grow leggy.
6. Light It Up (Grow Lights)
Once your seeds sprout, light becomes crucial. Natural light from a windowsill is often insufficient and can lead to leggy, weak seedlings stretching for light.
Invest in Grow Lights:
- Fluorescent or LED grow lights: These are ideal for providing the intense, consistent light seedlings need.
- Placement: Position lights just a few inches above the tops of your seedlings (adjusting as they grow) for 12-16 hours a day.
- Timers: Use a timer to ensure consistent light schedules.
Adequate light helps seedlings develop strong stems and healthy foliage, preparing them for the outdoors.
7. Tender Loving Care (Ongoing Maintenance)
Once your seedlings are up, they still need attention to thrive.
Thinning:
If you have multiple seedlings in one cell, thin them by snipping the weakest ones at the soil line with small scissors. This leaves the strongest seedling to grow unhindered.
Fertilizing:
Once seedlings have developed their first set of true leaves (the second set of leaves after the initial cotyledons), you can start feeding them with a diluted liquid fertilizer (quarter strength). Do this weekly or bi-weekly.
Air Circulation:
Good air circulation prevents fungal diseases like damping-off. A small fan set on low to gently blow across your seedlings for a few hours a day can work wonders, and it also helps strengthen their stems!
