Are you ready to elevate your cooking with a secret ingredient that’s not-so-secret anymore? Say hello to delicious, creamy homemade sour cream! Forget those store-bought tubs with their long ingredient lists. This simple recipe, made with just two ingredients, delivers a rich, tangy, and incredibly fresh sour cream that will make your taste buds sing.
It’s surprisingly easy to prepare, requiring minimal effort and just a little patience. In about 24 hours, you’ll have a velvety smooth sour cream that’s perfect for dolloping on tacos, enriching baked goods, or serving as a base for your favorite dips. The texture is divine – thick enough to hold its shape but wonderfully smooth on the tongue. Once you try this homemade version, you’ll wonder why you ever bought it from the store!
Your family will absolutely love the difference this fresh, homemade sour cream makes in all your meals. It’s a fantastic way to add a touch of gourmet to everyday dishes without any fuss. Give this homemade sour cream a try, and get ready for rave reviews!
Why You’ll Love This Homemade Sour Cream Recipe
- Ready in 24 Hours: Mostly hands-off time!
- Just Two Ingredients: Simple and pure.
- Budget-Friendly: Often cheaper than store-bought.
- Superior Flavor & Texture: Rich, tangy, and wonderfully creamy.
- No Preservatives: Enjoy fresh, natural goodness.
- Beginner-Friendly: No special skills required!
Ingredients You’ll Need
- 1 cup heavy cream: Look for full-fat, pasteurized (not ultra-pasteurized) heavy cream for the best results. The higher the fat content, the thicker and richer your sour cream will be.
- 2 tablespoons buttermilk: This is your starter! The live cultures in the buttermilk are what transform the heavy cream into sour cream. Make sure it contains live active cultures.
Kitchen Equipment
- A clean glass jar (pint-sized works well) with a lid
- Measuring cups and spoons
- Whisk or spoon
Step-by-Step Instructions
- Combine Ingredients: In your clean glass jar, pour in the heavy cream. Add the buttermilk to the cream.
- Gently Mix: Using a whisk or a spoon, gently stir the cream and buttermilk together until they are well combined. Don’t overmix, just ensure the buttermilk is evenly distributed.
- Cover and Rest: Secure the lid tightly on the jar. Place the jar at room temperature (ideally between 68-75°F or 20-24°C) for 12 to 24 hours. A warm spot in your kitchen, away from direct sunlight, is perfect.
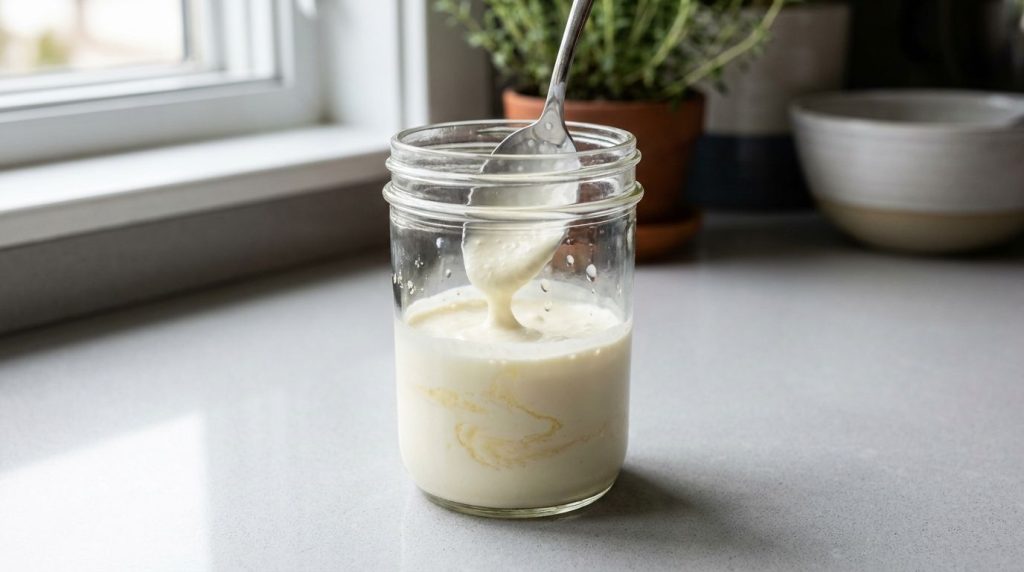
- Check Consistency: After 12 hours, check the sour cream. It should have thickened considerably, much like yogurt or a very thick milkshake. It will smell pleasantly tangy, like sour cream. If it’s not thick enough, let it sit for a few more hours, checking periodically.
- Chill and Enjoy: Once it reaches your desired consistency, give it a good stir. Transfer the jar to the refrigerator. Chilling it for at least 4 hours will further thicken it and enhance its flavor.
Expert Tips for the Best Homemade Sour Cream
- Use Good Quality Cream: The quality of your heavy cream really matters here. Avoid ultra-pasteurized cream if possible, as it can sometimes prevent proper thickening.
- Room Temperature is Key: Ensure your kitchen isn’t too cold, as this will slow down the fermentation process. If it’s too warm, it might ferment too quickly and develop off-flavors.
- Don’t Over-Ferment: Keep an eye on it! Once it reaches a good, thick consistency, move it to the fridge. Leaving it out too long can make it overly sour or even cause separation.
- Stir Before Using: If you notice a little liquid on top (whey separation), don’t worry! This is normal. Just give it a good stir, and it will reincorporate.
- Experiment with Time: The 12-24 hour window is a guideline. Some prefer a milder sour cream at 12 hours, while others love a tangier version at 24 hours. Taste it as it goes to find your perfect balance!
Variations
Once you master the basic recipe, the possibilities are endless!
- Herb Sour Cream: Stir in a tablespoon or two of finely chopped fresh herbs like chives, dill, or parsley after chilling for a delicious dip or topping.
- Spicy Sour Cream: Mix in a pinch of cayenne pepper, a dash of hot sauce, or some finely minced jalapeño for a kick.
- Garlic & Onion Sour Cream: Add a teaspoon of garlic powder and onion powder (or a tiny bit of fresh minced garlic and onion) for a savory dip.
- Sweet Sour Cream: A touch of honey or maple syrup and a hint of vanilla extract can transform it into a lovely topping for fruit or desserts.
What to Serve With Your Homemade Sour Cream
This versatile sour cream can enhance so many dishes!
- Main Dishes: Dollop it on baked potatoes, tacos, chili, perogies, or hearty stews.
- Dips: It’s the perfect base for onion dip, ranch dip, or any savory dip you love.
- Desserts: A spoonful can be surprisingly delicious with fresh berries, apple pie, or even certain cheesecakes.
- Baking: Use it in recipes for moist cakes, muffins, or biscuits.
- Drinks: A swirl in a creamy smoothie can add a nice tang.
Storage
- Refrigerator: Your homemade sour cream will last for about 1 to 2 weeks in an airtight container in the refrigerator. Always use a clean spoon each time you scoop it out.
- Freezer: Freezing homemade sour cream is not recommended as it tends to separate and become grainy upon thawing, affecting its creamy texture.
- Reheating: Sour cream is typically used cold or at room temperature. If using in a hot dish, add it at the very end to prevent curdling.
Frequently Asked Questions
Can I use low-fat milk or half-and-half?
For the best, creamiest results, full-fat heavy cream is highly recommended. Low-fat options may not thicken properly and will result in a much thinner consistency.
What if my sour cream doesn’t thicken?
Several factors could be at play: your heavy cream might be ultra-pasteurized, your buttermilk might not have active cultures, or your room temperature might be too cold. Give it more time, or try a different brand of ingredients.
How do I know when it’s ready?
It should be noticeably thick and spoonable, similar to store-bought sour cream, and have a pleasant, tangy aroma. Taste a small amount to check if the tanginess is to your liking.
Is homemade sour cream safe to eat?
Yes, when made with fresh, quality ingredients and proper sanitation, homemade sour cream is perfectly safe. The acidity created by the cultures inhibits the growth of harmful bacteria.
Can I use a different starter instead of buttermilk?
You can use a small amount of store-bought sour cream with live active cultures as a starter, similar to how you would use buttermilk. Just make sure it lists live cultures.
My sour cream separated, what do I do?
If you see a clear liquid (whey) on top, it’s normal. Just stir it back in. If it’s chunky or smells off, it might have gone bad, and it’s best to discard it.
Nutrition
Please note that nutritional information is an estimate and may vary significantly based on ingredients and preparation. This estimate is for a typical serving of homemade sour cream (about 2 tablespoons).
- Calories: Approximately 60-80 kcal
- Protein: Approximately 1 g
- Fat: Approximately 6-8 g
- Carbs: Approximately 1 g
- Fiber: 0 g
- Sugar: Approximately 1 g
- Sodium: Approximately 10-15 mg
Nutritional information is an estimate and may vary.
Conclusion
There you have it! Making your own creamy, tangy homemade sour cream is not only incredibly simple but also deeply satisfying. It’s a fantastic way to control the ingredients you use and enjoy a fresher, more flavorful product than anything you can buy in a store. I truly hope you give this easy recipe a try.
If you make this homemade sour cream, please come back and leave a comment below to tell me how much you loved it, and don’t forget to rate the recipe! Your feedback means the world to me. Happy cooking, and keep exploring more delicious recipes right here on our website!

