Hey beauty besties! Are you dreaming of hair that’s so smooth and shiny, it practically glides through your fingers? We all know that battling dry, frizzy hair can be a real struggle, especially when you’re looking for an affordable and easy solution. Well, get ready because today, we’re sharing a magical DIY blend that uses two common household ingredients to transform your locks: Vaseline and coconut oil! Trust us, your hair is about to thank you.
Why This Duo is Your Hair’s New Best Friend
Before we dive into the ‘how-to,’ let’s talk about why this simple combination of Vaseline and coconut oil is so powerful for achieving silky smooth hair. Both ingredients bring unique benefits to the table, working together to give your hair a serious glow-up!
The Wonders of Vaseline for Hair
- Seals in Moisture: Vaseline (petroleum jelly) is an occlusive, meaning it creates a protective barrier on the hair shaft. This barrier helps to lock in existing moisture, preventing dryness and keeping your hair hydrated.
- Reduces Frizz: By sealing the hair cuticle, Vaseline helps to smooth down unruly strands, significantly reducing frizz and flyaways.
- Adds Shine: The emollient properties of Vaseline can give your hair a lovely, healthy sheen, making it look more vibrant and alive.
- Protects Ends: It can act as a shield for split ends, helping to prevent further damage and breakage.
The Magic of Coconut Oil for Hair
- Deep Penetration: Coconut oil is famous for its ability to deeply penetrate the hair shaft, rather than just sitting on the surface. This means it can nourish your hair from within.
- Strengthens Hair: Rich in fatty acids, coconut oil helps to reduce protein loss in hair, making it stronger and less prone to breakage.
- Conditions Naturally: It’s a fantastic natural conditioner, leaving your hair feeling soft, manageable, and incredibly smooth.
- Adds Luster: Just like Vaseline, coconut oil contributes to a beautiful, natural shine, enhancing your hair’s overall appearance.
How to Make Your Silky Hair Mask
Ready to whip up this hair-transforming treatment? It’s super easy, and you probably already have these ingredients in your home!
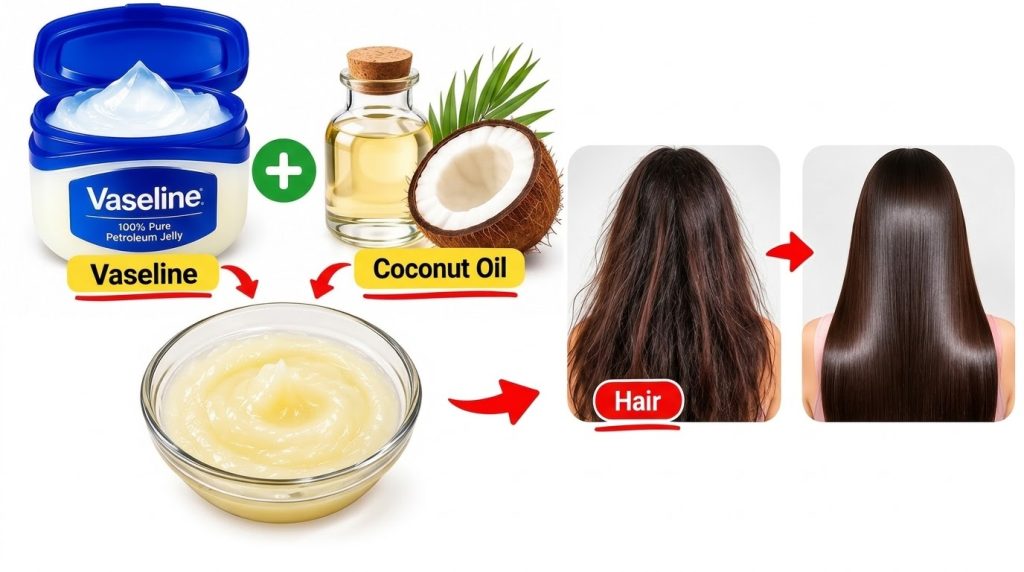
Ingredients You’ll Need:
- 1-2 tablespoons of Vaseline (adjust based on hair length and thickness)
- 1-2 tablespoons of pure coconut oil (preferably virgin or unrefined)
Note: If your hair is very fine or prone to oiliness, start with smaller amounts and adjust as needed.
Step-by-Step Instructions:
- Melt the Coconut Oil: If your coconut oil is solid, gently warm it in a microwave-safe bowl for a few seconds or place the jar in a bowl of warm water until it melts into a liquid.
- Combine Ingredients: In a clean bowl, mix the melted coconut oil with the Vaseline. Stir well until you get a smooth, consistent mixture. It might look a bit thick and glossy, which is perfect!
- Cool Slightly (Optional): If the mixture is too warm, let it cool down a bit so it’s comfortable to apply to your scalp and hair.
How to Apply for Best Results
Applying this mask correctly is key to getting those gorgeous, silky results without making your hair greasy.
- Start with Dry or Slightly Damp Hair: This mask works best on dry or slightly damp hair. Avoid applying it to soaking wet hair, as it can dilute the mask’s effectiveness.
- Section Your Hair: Divide your hair into manageable sections. This ensures even application and makes the process much easier.
- Apply Evenly: Take a small amount of the mixture and gently rub it between your palms to warm it up. Apply it from the mid-lengths of your hair down to the ends. Focus especially on dry, damaged, or frizzy areas. If you have a dry scalp, you can also gently massage a small amount into your scalp, but avoid excessive application to prevent oiliness.
- Massage In: Gently massage the mixture into your hair, ensuring every strand is coated.
- Wrap It Up: Once your hair is thoroughly coated, tie it up in a bun or use a hair clip. For extra heat (which helps the ingredients penetrate deeper), you can cover your hair with a shower cap or warm towel.
- Let It Sit: Leave the mask on for at least 30 minutes. For an intensive treatment, you can even leave it on for a few hours or overnight. Just be sure to protect your pillow with a towel if you’re sleeping with it!
Tips for Maximizing Your Mask Benefits
- Don’t Overdo It: While amazing, too much Vaseline can be hard to wash out. Start with the recommended amounts and add more only if needed.
- Warm Before Use: Warming the Vaseline and coconut oil slightly before mixing makes for a smoother, easier application.
- Use a Wide-Tooth Comb: After applying, gently comb through your hair with a wide-tooth comb to ensure even distribution and detangle any knots.
- Rinse Thoroughly: This is the most crucial step! Use lukewarm water and a gentle shampoo. You might need to shampoo twice to completely remove the mask, especially if you have fine hair. Follow up with a light conditioner if desired.
Frequency and Aftercare
You can use this DIY hair mask once or twice a week, depending on your hair’s needs. Pay attention to how your hair feels and looks to find your perfect routine. After rinsing, you’ll immediately notice your hair feels softer, looks shinier, and is much more manageable. Style as usual and enjoy your new, luscious locks!
Ready for Your Best Hair Day?
Say goodbye to dry, frizzy hair and hello to the silky, smooth strands you’ve always wanted! This simple Vaseline and coconut oil mask is an affordable, natural, and incredibly effective way to give your hair the love it deserves. Give it a try and prepare to be amazed by the results!
Have you tried this mask before, or do you have other natural hair secrets? Share your thoughts and experiences in the comments below! We love hearing from our Beauty Tips Daily family. Happy pampering!