Most people ignore this simple trick to ensure their favorite geraniums return year after year, often buying new plants when they don’t have to. As the chill of autumn approaches, many gardeners reluctantly watch their beautiful geraniums succumb to the frost. But what if you could not only save those cherished varieties but multiply them for free, ready for a stunning display next spring? You absolutely can, and it’s simpler than you might think.
Propagating geraniums from cuttings is a time-honored gardening secret that transforms a single plant into many, preserving its unique beauty and saving you money. Forget expensive nursery trips next season; with a few basic steps, you’ll have a thriving collection of your favorite geraniums, all from your existing stock.
What is Geranium Propagation?
Geranium propagation, in this context, refers to taking cuttings from a mature, healthy geranium plant and encouraging these cuttings to grow roots. Once rooted, these new plantlets can be grown indoors over winter and then planted out in your garden the following spring. It’s a method of asexual reproduction, meaning the new plants will be genetically identical to the parent plant, ensuring you keep your favorite colors and forms.
This technique is particularly valuable for tender perennial geraniums (often Pelargoniums) that are not hardy in colder climates. Instead of treating them as annuals, you can keep them going indefinitely. This process allows you to save those special varieties that might be sentimental or hard to find again.
What You’ll Need
The beauty of this method lies in its simplicity and minimal requirements. Most items are likely already in your garden shed or easily acquired.
- Healthy Geranium Plant: Choose a vigorous, disease-free parent plant.
- Sharp Pruning Snips or Knife: Essential for clean cuts, which prevent damage and disease.
- Small Pots or Trays: Individual 3-4 inch pots are ideal for rooting.
- Sterile Potting Mix: A light, well-draining mix designed for seedlings or cuttings. Avoid heavy garden soil.
- Rooting Hormone (Optional but Recommended): A powder or gel that encourages root development.
- Pencil or Dibber: For making holes in the potting mix.
Step-by-Step Method: Taking and Rooting Cuttings
Timing is crucial. Take your cuttings about 6-8 weeks before the first expected hard frost in your area. This gives the cuttings enough time to root before they need to come indoors for winter.
1. Choose Your Stems Wisely
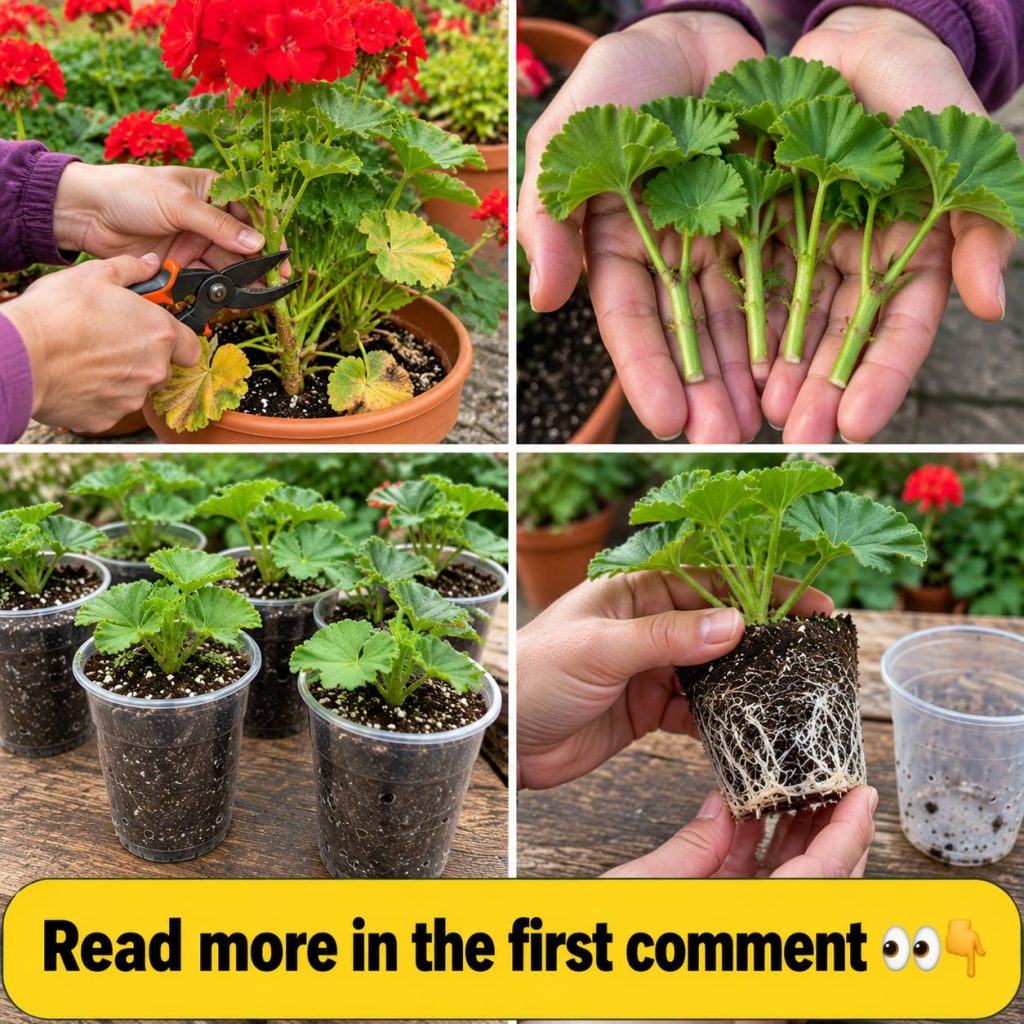
Look for healthy, non-flowering stems that are 4-6 inches long. They should be firm, not woody, but not overly soft and new either. Avoid stems with flowers or buds, as the plant’s energy will go into blooming instead of rooting.
2. Make the Cut
Using your sharp, clean snips or knife, cut just below a leaf node (the point where a leaf attaches to the stem). This area contains cells that are highly receptive to rooting. A clean cut minimizes stress to the plant.
3. Prepare the Cutting
Remove all but the top two or three leaves from the cutting. Any leaves below the soil line will rot and can introduce disease. If the remaining leaves are very large, you can cut them in half horizontally to reduce moisture loss. This step is often overlooked but can significantly impact success.
4. Apply Rooting Hormone (Optional)
Dip the cut end of the stem into rooting hormone powder or gel, shaking off any excess. This step isn’t strictly necessary, as geraniums root quite readily, but it can speed up the process and increase success rates.
5. Plant the Cuttings
Fill your small pots with the sterile potting mix and moisten it lightly. Use a pencil or dibber to create a hole in the center of the potting mix, slightly larger than your cutting. Insert the prepared cutting into the hole, ensuring the bottom leaf node is buried. Gently firm the soil around the stem to ensure good contact.
6. Initial Care and Placement
Place the potted cuttings in a warm location with bright, indirect light. Avoid direct sunlight initially, which can be too intense. Keep the soil consistently moist but not waterlogged. You can create a mini-greenhouse effect by placing a clear plastic bag over the pots, supported by stakes, but ensure there’s some ventilation to prevent fungal issues.
Did You Know? Rooting in Water
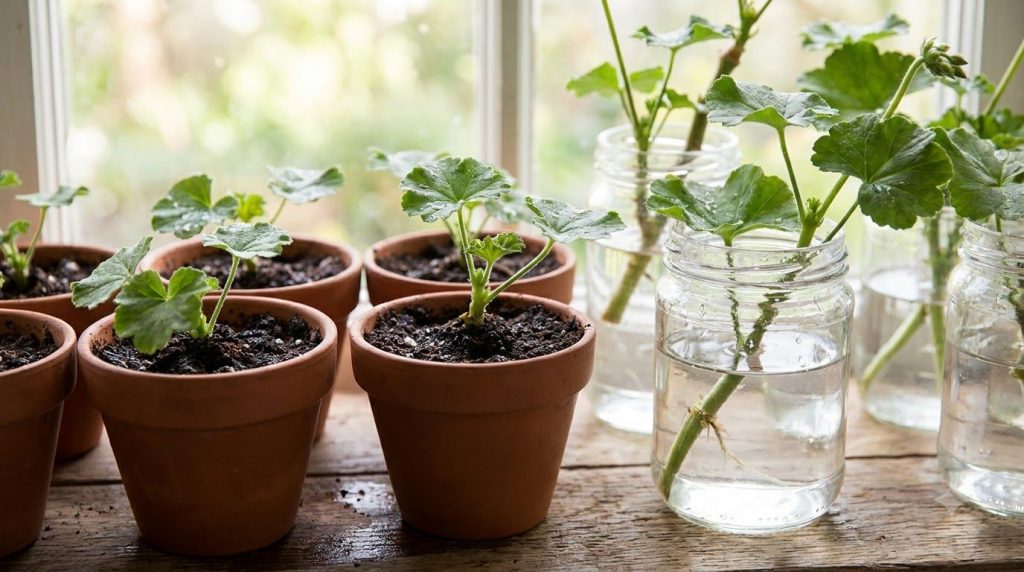
While rooting in soil is often recommended for stronger initial growth, geranium cuttings can also root successfully in water. Simply place the prepared cuttings in a jar of clean water, ensuring only the stem is submerged, not the leaves. Change the water every few days to prevent stagnation. Once roots are about an inch long, transfer them carefully to potting mix. This method allows you to visually track root development, which can be satisfying!
You may also like: Your DIY Guide to Starting Seeds Indoors
How to Care for Your Young Geraniums Over Winter
Once rooted (usually within 3-6 weeks), your young geraniums need proper care to thrive indoors until spring. Look for new leaf growth as a sign of successful rooting. Give the plants good light, preferably near a south-facing window or under grow lights, for 12-16 hours a day. Keep the temperature moderate, around 60-70°F (15-21°C).
Water sparingly during winter, allowing the top inch of soil to dry out between waterings. Overwatering is a common mistake that can lead to root rot. Avoid fertilizing until new growth resumes vigorously in early spring. These young plants will enter a semi-dormant state, conserving energy until conditions improve.
How Often to Propagate
If you live in a region with cold winters, propagating your geraniums annually before the first hard frost is the ideal practice. This ensures a continuous supply of healthy plants. You can also take cuttings at other times of the year if you want to increase your stock, but the autumn timing is perfect for overwintering.
Common Mistakes to Avoid
Even experienced gardeners can make simple errors that hinder propagation success. Here are the most common pitfalls:
- Using Dull Tools: Ragged cuts crush plant tissue and invite disease. Always use sharp, sterilized snips.
- Overwatering: Wet, soggy soil suffocates roots and encourages fungal rot. Good drainage and careful watering are critical.
- Too Long Cuttings: Very long cuttings struggle to support themselves and root effectively. Stick to the 4-6 inch recommendation.
- Planting Leaves Too Deep: Any leaves below the soil line will decompose and rot, potentially killing the cutting.
- Ignoring Parent Plant Health: Weak or diseased parent plants yield weak cuttings. Choose only the healthiest specimens.
- Skipping Sterilization: Reusing old potting mix or unsterilized pots can introduce pathogens that kill tender cuttings.
Related remedy: Learn How to Brew Your Own Compost Tea
Comparison: Water vs. Soil Rooting for Geranium Cuttings
| Feature | Water Rooting | Soil Rooting |
|---|---|---|
| Visibility of Roots | High (easy to see development) | Low (roots are hidden) |
| Transition Shock | Can experience shock when moved to soil | Minimal shock, direct growth |
| Root Quality | Often brittle, water-adapted roots | Stronger, soil-adapted fibrous roots |
| Disease Risk | Lower (easy to change water) | Higher (fungal issues if soil is too wet) |
| Speed | Can appear faster, but transition adds time | Consistent, steady development |
| Success Rate | Good, but soil transition can be tricky | Generally higher long-term success |
Cautions: Handling Geraniums
While geraniums are generally safe to handle, some people may experience mild skin irritation from the plant’s sap. It’s always a good idea to wear gardening gloves, especially if you have sensitive skin. Geraniums are not intended for human consumption; keep them out of reach of pets and children who might try to chew on them.
Quick Summary
- Best Preparation: Take 4-6 inch cuttings from healthy, non-flowering stems.
- Best Use-Case: Preserve favorite varieties and multiply plants for free, especially before winter.
- Storage: Overwinter rooted cuttings indoors in bright, indirect light with moderate temperatures and careful watering.
- When to Use: Annually, about 6-8 weeks before the first hard frost.
- What to Avoid: Dull tools, overwatering, diseased parent plants, and placing cuttings with leaves below the soil line.
FAQ
Can I use old or woody geranium stems for cuttings?
It’s best to use green, semi-hardwood stems. Old, woody stems are much slower to root and have a lower success rate. Very soft, new growth can also be too tender and prone to rotting.
How long does it take for geranium cuttings to root?
Geranium cuttings typically take between 3 to 6 weeks to develop sufficient roots. You’ll often see new leaf growth as an indicator of successful rooting.
When should I plant my propagated geraniums outside?
Wait until all danger of frost has passed in your area, and nighttime temperatures are consistently above 50°F (10°C). Gradually acclimatize them to outdoor conditions over a week or two before planting.
Can I reuse potting mix for propagation?
It is strongly recommended to use fresh, sterile potting mix for cuttings. Reused soil can harbor pathogens that can quickly infect and kill tender cuttings.
What if the leaves on my cuttings turn yellow?
Yellowing leaves can indicate overwatering, insufficient light, or sometimes simply the cutting adjusting to its new environment. Check your watering schedule and ensure adequate light. Remove any yellowing leaves promptly.
Do I need to fertilize young geranium cuttings?
No, not initially. The cuttings contain enough stored energy to root. Once they have rooted and show vigorous new growth (usually in spring), you can begin with a dilute, balanced liquid fertilizer.
Can I propagate geraniums from seeds?
Yes, but seed propagation can be less reliable for preserving specific characteristics, as many popular geraniums are hybrids and won’t grow true from seed. Cuttings guarantee an exact replica of the parent plant.
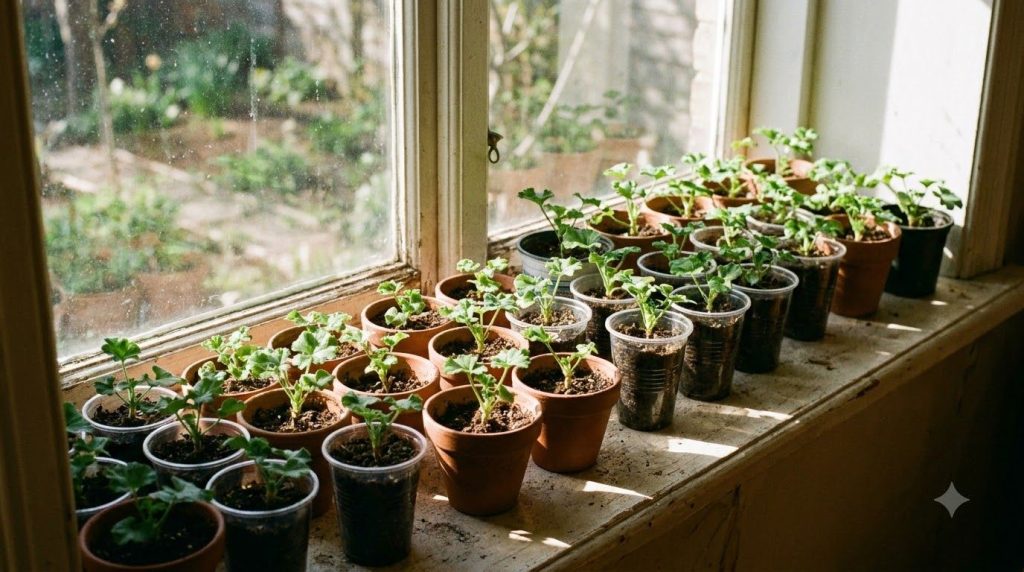
Mastering geranium propagation is a rewarding skill that transforms how you approach your garden each year. It’s a simple, free method to preserve cherished plants and ensure a continuous display of vibrant color. By following these practical steps and avoiding common mistakes, you’ll soon have a flourishing collection of geraniums that bring joy season after season. Don’t let your beautiful blooms fade with the frost; instead, multiply their beauty for years to come.
Continue with: The Best Herbs to Grow Indoors for Year-Round Freshness