Are you looking for a fun, eco-friendly project to brighten up your garden and give a little something back to nature? Look no further! This charming DIY Rainbow Bottle Cap Bird Feeder is the perfect weekend craft. It’s an easy way to give new life to everyday recycled items while providing a lovely, vibrant spot for your feathered friends to visit.
We absolutely adore how colorful and unique this feeder is, transforming simple bottle caps into a beautiful piece of garden art. Not only does it add a splash of rainbow to your outdoor space, but it also provides a much-needed snack station for local birds, making your garden a haven for wildlife.
Why Create a Recycled Bird Feeder?
Gardening is all about connecting with nature, and what better way to do that than by inviting more wildlife into your backyard? Bird feeders are fantastic for attracting a variety of bird species, allowing you to observe their beauty and listen to their cheerful songs. This particular DIY project takes it a step further by embracing the principles of upcycling and sustainability.
- Eco-Friendly: Reduce waste by repurposing plastic bottle caps that might otherwise end up in landfills.
- Cost-Effective: Most materials you’ll need are likely items you already have around the house or can easily collect.
- Unique Garden Decor: Stand out from traditional feeders with a vibrant, one-of-a-kind design that reflects your creativity.
- Supports Local Wildlife: Provide a vital food source for birds, especially during colder months or when natural food sources are scarce.
Gather Your Materials
Before you begin, make sure you have all your supplies ready. This project is surprisingly simple and doesn’t require any specialized tools!
What You’ll Need:
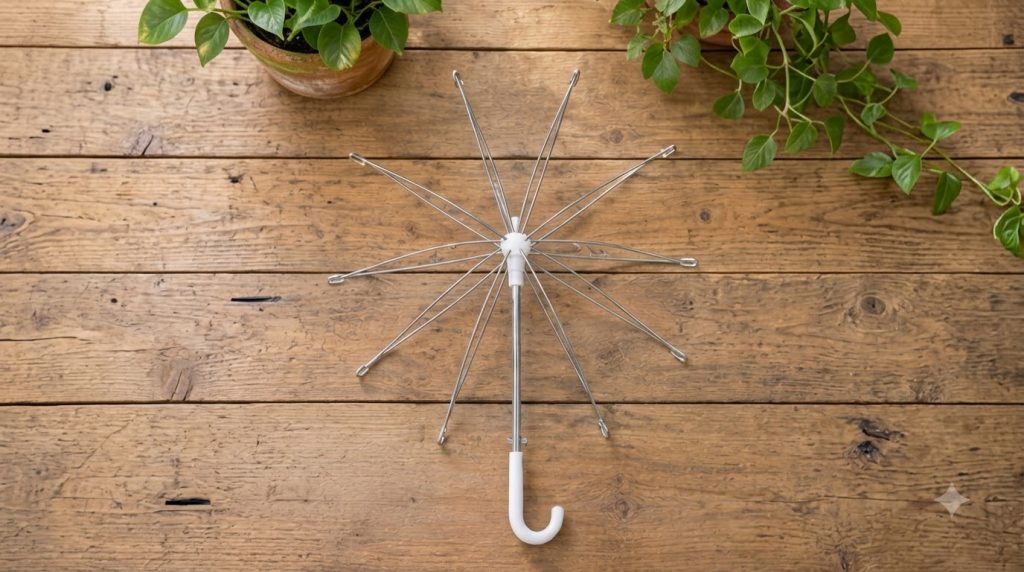
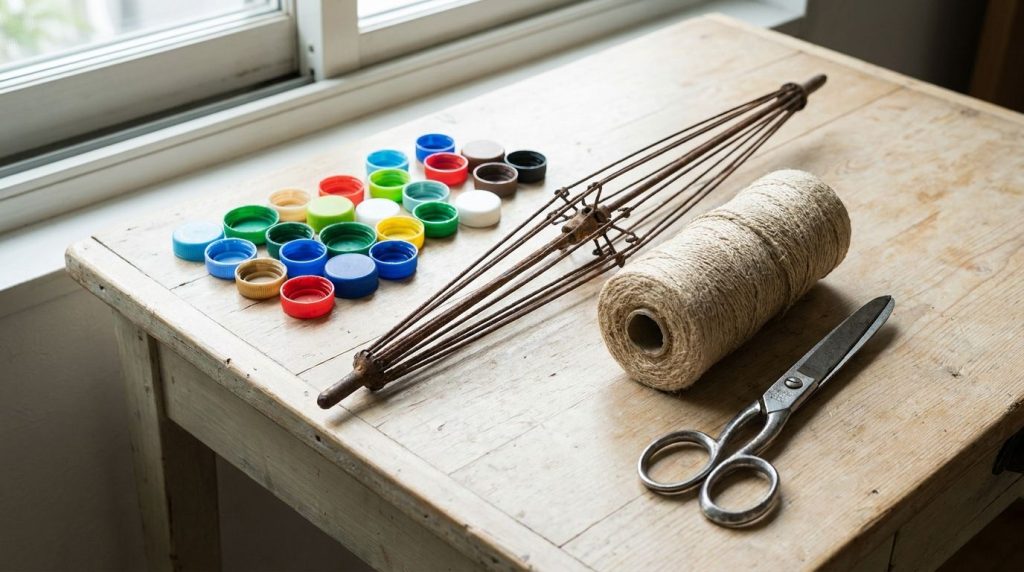
- An old or broken umbrella frame (the metal skeleton is key!)
- A collection of colorful plastic bottle caps (the more, the merrier, for a rainbow effect!)
- Strong string, fishing line, or thin wire
- Scissors or wire cutters (depending on your chosen attaching material)
- A drill with a small bit (optional, for making holes in caps if they don’t have them)
- Birdseed
Step-by-Step Guide to Your Rainbow Bird Feeder
Step 1: Prepare Your Umbrella Frame
First, dismantle your old umbrella. You’ll need the metal frame that gives it shape. Carefully remove all fabric, leaving just the spokes and the central pole. Clean the frame thoroughly to ensure no fabric scraps or dirt remain. You might want to gently sand down any sharp edges, though most umbrella frames are fairly smooth.
Step 2: Collect and Prepare Bottle Caps
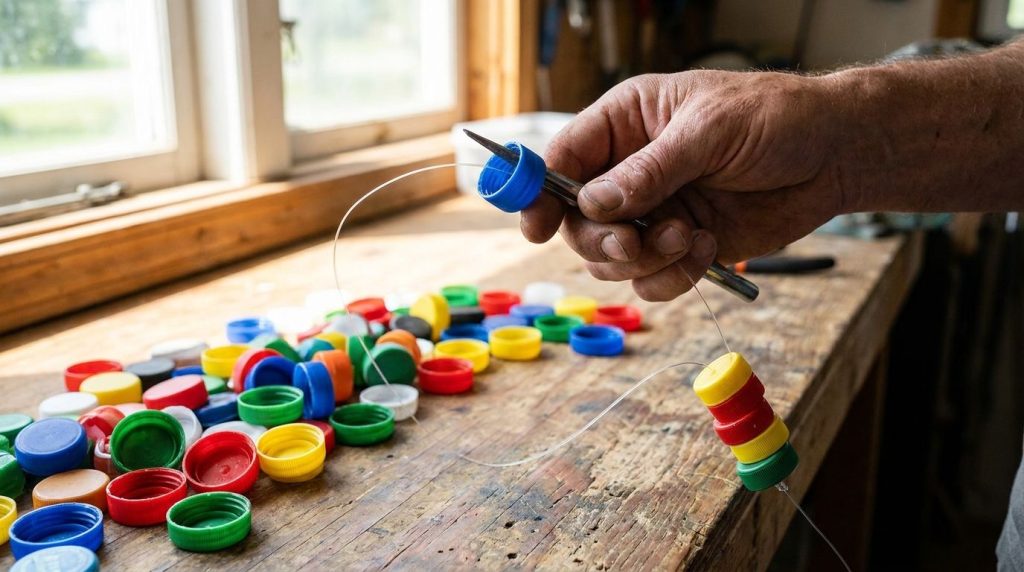
This is where the ‘rainbow’ comes in! Start collecting plastic bottle caps of various colors, shapes, and sizes. Rinse them well and let them dry completely. If your caps don’t have existing holes (some juice or milk caps do), you’ll need to create small holes near the edge of each cap using a drill or a hot nail (with extreme caution!). These holes will be used to string the caps together.
Step 3: String Your Rainbow
Begin stringing your bottle caps onto pieces of string, fishing line, or wire. The goal is to create colorful strands that will hang from the umbrella spokes. You can create different patterns or simply mix colors randomly for a vibrant look. Make sure each strand is long enough to drape nicely but not so long that it touches the ground when hung from the feeder. Secure the caps firmly on the string so they don’t slide off.
Step 4: Attach Strands to the Frame
Tie or attach your colorful bottle cap strands to the individual spokes of the umbrella frame. Space them evenly around the frame to create a full, attractive dome of color. You can also add some shorter strands directly to the central pole if desired. Ensure all knots are tight and secure, as birds might perch on them.
Step 5: Add a Seed Tray (Optional but Recommended)
To hold the birdseed, you can either create a base from a larger, sturdier plastic lid (like from a yogurt container or coffee can) or use a small, shallow tray. Secure this tray to the bottom center of the umbrella frame. This will act as the main reservoir for your birdseed, keeping it somewhat sheltered by the umbrella’s ‘canopy’ of bottle caps.
Step 6: Hang Your Feeder and Fill with Seed
Find a suitable spot in your garden to hang your new bird feeder. A sturdy tree branch or a shepherd’s hook works perfectly. Make sure it’s in a location where you can easily observe your feathered visitors! Once hung, fill the base with your favorite birdseed mix.
Tips for a Thriving Bird Feeder
- Placement is Key: Hang your feeder in a quiet spot away from potential predators (like cats) but close enough for you to enjoy the view.
- Regular Cleaning: To prevent the spread of diseases, clean your bird feeder regularly with a mild soap and water solution, rinsing thoroughly.
- Variety of Seeds: Offer different types of birdseed to attract a wider range of birds.
- Water Source: Consider adding a fresh water source nearby, like a bird bath, to make your garden even more inviting.
Creating this DIY Rainbow Bottle Cap Bird Feeder is not just a craft project; it’s an invitation for nature to thrive in your own backyard. It’s rewarding to see something you created from repurposed materials bring so much joy and life to your outdoor space. We hope you and your garden guests enjoy this colorful addition!
What recycled materials have you used in your garden projects? Share your ideas and photos with us!