Most people see a common houseplant sitting on a windowsill, a pretty green accent. But what if that familiar plant held surprising secrets for natural healing and everyday wellness that you’ve been overlooking? The truth is, one of the most unassuming green companions in our homes is actually a powerhouse of practical remedies, often underestimated for its true value. It’s time to unlock its full potential for your daily remedy needs.
What is Aloe Vera?
This isn’t just a decorative succulent; we’re talking about Aloe Vera, a plant renowned for its thick, fleshy leaves packed with a clear, jelly-like gel. For centuries, various cultures have tapped into this plant’s internal treasure, applying it to soothe skin, calm irritations, and support natural healing. Yet, in many modern homes, it remains just a pretty face. Discover how to transform this humble houseplant into a valuable part of your natural wellness routine.
Ingredients for Fresh Aloe Gel
The primary ingredient for most DIY Aloe Vera remedies is the plant itself. You’ll need:
- A mature Aloe Vera plant (at least 2-3 years old for maximum potency)
- A sharp knife or clean pruning shears
- A clean bowl
- A spoon or small spatula
- (Optional) A clean, airtight container for storage
Approximate Measurements
For a single application or small batch:
- 1 large, mature Aloe Vera leaf (approx. 6-10 inches long) will yield about 2-4 tablespoons of gel.
- Adjust based on the size of your leaf and the amount of gel needed.
Formula / Recipe: Basic Aloe Vera Gel Extraction
This simple formula is the foundation for almost any topical aloe remedy. The goal is to separate the pure, clear gel from the outer leaf and the yellowish aloin layer.
Step-by-Step Method to Extract Aloe Gel
- Select and Cut a Leaf: Choose a thick, mature leaf from the outer part of the plant, near the base. Using a sharp knife or shears, cut it close to the stem.
- Drain the Aloin: Stand the cut leaf upright in a glass or bowl for 10-15 minutes. A yellowish, bitter sap (aloin) will drain out. This step is crucial, as aloin can be irritating to the skin.
- Wash the Leaf: Rinse the leaf thoroughly under cool water to remove any residual aloin.
- Trim the Edges: Lay the leaf flat and carefully trim off the serrated edges using your knife.
- Fillet the Leaf: Gently slice off the green skin from one side of the leaf, exposing the clear gel.
- Scoop the Gel: Using a spoon or spatula, carefully scoop out the clear, translucent gel into a clean bowl. Avoid scraping too deep, as you want to minimize any green skin fragments.
- Process (Optional): For a smoother consistency, you can lightly blend the scooped gel with a fork or a handheld blender for a few seconds. Do not over-blend, or it will become too watery.
- Store: Transfer the fresh gel into a clean, airtight container.
How to Use Fresh Aloe Vera Gel
Once you have fresh Aloe Vera gel, its applications are incredibly versatile:
- Sunburn Relief: Apply a generous layer directly to sun-kissed or mildly burned skin. The cooling sensation and natural compounds help soothe and hydrate.
- Minor Cuts and Scrapes: Dab a small amount onto cleaned minor cuts or abrasions to support healing and reduce irritation.
- Skin Irritations: For general redness, itching, or dry patches, apply a thin layer to the affected area.
- Moisturizer: Use a small amount as a lightweight, natural facial or body moisturizer, especially for oily or acne-prone skin.
- Hair Mask: Mix with a little coconut oil and apply to the scalp and hair for a nourishing treatment.
How Often to Use
For acute issues like sunburn or minor irritations, you can apply fresh Aloe Vera gel 2-3 times a day until symptoms subside. As a general moisturizer or preventative measure, daily use is often well-tolerated. Pay attention to your skin’s reaction; if any irritation occurs, reduce frequency or discontinue use.
Quick Tip: Patch Test First!
Always do a patch test on a small area of skin before applying liberally, especially if you have sensitive skin. Apply a tiny amount to your inner arm and wait 24 hours to check for any adverse reactions.
How to Buy / How to Choose Ingredients
The best way to ensure you have fresh, pure Aloe Vera gel is to grow your own plant.
- Choosing a Plant: Look for a healthy, robust Aloe Vera plant at your local nursery or garden center. Ensure the leaves are plump, firm, and free of brown spots or damage.
- Organic is Best: If possible, choose an organically grown plant to avoid pesticides that could transfer to your remedy.
- Harvesting: Only harvest leaves from mature plants (at least 2-3 years old) as younger plants may not have developed the full potency of their gel. Avoid over-harvesting, leaving plenty of leaves for the plant to thrive.
Storage Solutions for Aloe Gel
Fresh Aloe Vera gel is perishable, so proper storage is essential to maintain its efficacy.
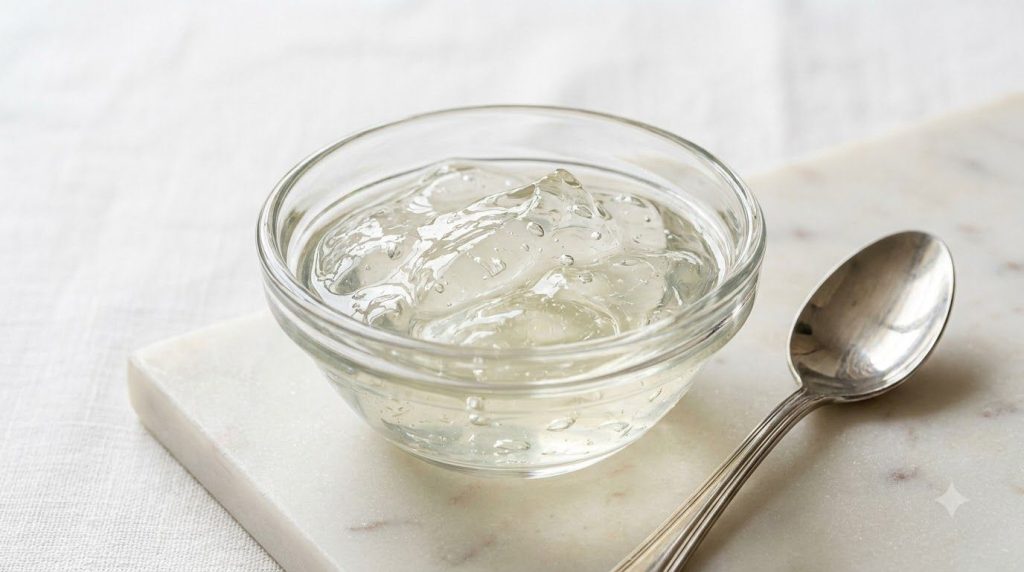
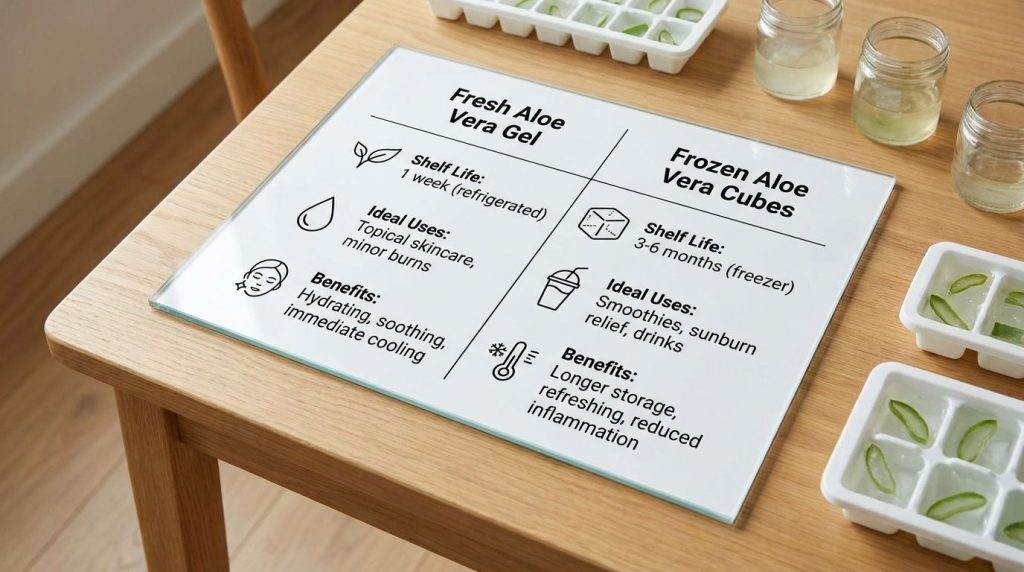
- Refrigeration: Store fresh gel in an airtight container in the refrigerator for up to 5-7 days.
- Freezing: For longer storage, you can freeze individual portions of gel in ice cube trays. Once frozen, transfer the cubes to a freezer-safe bag. Frozen aloe cubes can last up to 6 months. Thaw before use or apply directly as a cooling compress.
Practical Tips for Best Results
- Cleanliness is Key: Always use clean tools and containers to prevent contamination, which can shorten the gel’s shelf life.
- Patience with Aloin: Don’t skip the aloin draining step; it makes a significant difference in skin tolerance and prevents irritation.
- Mix and Match: For enhanced benefits, you can mix fresh aloe gel with other natural ingredients like a few drops of tea tree oil for acne, or a little vitamin E oil for extra moisturization.
Common Mistakes to Avoid
One small preparation mistake can ruin the whole batch or cause skin irritation. Here are the common pitfalls:
- Skipping the Aloin Drain: The yellowish aloin sap is a natural latex that can cause skin irritation, itching, or even allergic reactions in some individuals. Always stand the leaf upright to drain it fully.
- Using Too Much Green Skin: When filleting the leaf, try to remove as much of the green outer skin as possible. Small pieces of skin can also contain aloin and reduce the purity of your gel.
- Harvesting from Young Plants: Immature Aloe Vera plants may not have developed the full concentration of beneficial compounds in their gel. Wait until your plant is robust and mature.
- Improper Storage: Leaving fresh gel at room temperature allows bacteria to grow quickly, rendering it unusable and potentially harmful. Always refrigerate or freeze.
- Over-Processing: Blending the gel too much can break down its natural structure, making it watery and less effective. A light mash or quick blend is usually sufficient.
Cautions / Who Should Avoid It
While generally safe for topical use, some individuals may experience:
- Allergic Reactions: Redness, itching, or rash. Perform a patch test first. Discontinue use if irritation occurs.
- Internal Use: This article focuses solely on topical application. Internal consumption of Aloe Vera can have laxative effects and is not recommended without professional guidance, especially for pregnant women, nursing mothers, children, or those with certain medical conditions or on medications.
- Open Wounds: For deep cuts, severe burns, or infections, consult a medical professional before applying any home remedies.
Quick Summary
The common Aloe Vera plant is a versatile natural remedy. Harvest mature leaves, drain the irritating aloin, and scoop the clear gel. Use it topically to soothe sunburn, minor irritations, and as a natural moisturizer. Store fresh gel in the refrigerator for up to 7 days or freeze for longer. Avoid aloin, use clean tools, and always patch test before widespread use.
FAQ
- Can I use fresh or dried Aloe Vera? For topical skin remedies, fresh gel directly from the plant is almost always preferred for its potency and hydration. Dried aloe powder is typically for internal use and requires careful preparation.
- How long does fresh Aloe Vera gel last? When stored in an airtight container in the refrigerator, fresh gel typically lasts 5-7 days.
- Can I refrigerate it? Yes, refrigeration is the best way to store fresh gel for short periods.
- How often should I use it on my skin? For acute issues, 2-3 times daily. For general moisturizing, once daily. Adjust based on your skin’s needs and reaction.
- What part of the plant is best to use? The clear gel from the inner part of the mature, thick leaves is best for remedies. Avoid the green skin and the yellowish aloin layer.
- Can I freeze Aloe Vera gel? Absolutely! Freezing in ice cube trays is an excellent way to preserve it for up to 6 months.
- Is it okay to use Aloe Vera daily? For most people, topical daily use is fine, but always perform a patch test first and monitor for any irritation.
Conclusion
Next time you glance at an Aloe Vera plant, remember it’s far more than just a pretty decorative accent. It’s a natural pharmacy in a pot, offering simple, effective, and accessible remedies for common skin woes. By understanding how to properly harvest and use its potent gel, you can unlock a world of natural wellness from your very own home. Embrace the power of this everyday green companion and make it a staple in your natural remedy toolkit.
You may also like: DIY Lavender Oil for Relaxation.
Read more: Natural Remedies for Dry Skin.