Bake the Easiest Fluffy Dinner Buns at Home (Foolproof Recipe!)
Who knew making delicious, soft, and golden buns could be this easy? If you’ve ever dreamt of pulling warm, homemade dinner rolls straight from your oven, filling your kitchen with that irresistible aroma, today is your day. These dinner buns are incredibly fluffy inside, with a perfectly golden crust, and they are surprisingly simple to make, even for beginner bakers!
Forget about complicated bread-making techniques! This foolproof recipe breaks down every step, ensuring you achieve perfect results every time. You’ll be amazed at how quickly you can master these delightful rolls, which are ideal for complementing any meal – from a cozy weeknight dinner to a festive holiday spread. Plus, making bread at home means you control the ingredients, opting for wholesome choices and avoiding unnecessary additives often found in store-bought versions.
Not only are these buns a comforting addition to any plate, but they also offer the simple joy and satisfaction that comes from baking from scratch. They’re a fantastic source of energy and can be a wholesome part of a balanced diet when enjoyed in moderation. Perfect for families, meal preppers, or anyone looking to add a touch of homemade goodness to their table, this recipe will teach you everything you need to know to bake fluffy, delicious dinner buns with confidence.
Recipe Summary
- Prep Time: 25 minutes
- Cook Time: 15-20 minutes
- Total Time: 1 hour 45 minutes (includes rising time)
- Servings: 12 buns
- Difficulty Level: Easy-Medium
- Course: Side Dish, Bread
- Cuisine: American, Comfort Food
- Diet Type: Vegetarian (can be dairy-free/vegan with substitutions)
Why You’ll Love This Recipe
- Incredibly Fluffy & Tender: Achieve that perfect soft, airy texture every time.
- Simple & Straightforward: Easy-to-follow steps make bread baking approachable for beginners.
- Warm & Comforting: Nothing beats the aroma and taste of freshly baked bread.
- Customizable: Easily adapt with your favorite herbs or whole grains.
- Impressive Results: Delight your family and friends with these beautiful golden buns.
- Budget-Friendly: Made with common, affordable pantry staples.
- Wholesome Homemade Goodness: Control your ingredients for a healthier alternative to store-bought.
Ingredients
- 1 cup warm milk (105-115°F / 40-46°C; dairy or non-dairy milk like almond or soy)
- 2 ¼ teaspoons active dry yeast (one standard packet)
- 2 tablespoons granulated sugar (or honey/maple syrup for a healthier option)
- 1 teaspoon salt
- ¼ cup unsalted butter (melted and cooled slightly; or plant-based butter for dairy-free)
- 1 large egg (room temperature, lightly beaten; or a flax egg for vegan)
- 3 cups all-purpose flour (plus extra for dusting; or a mix of whole wheat and all-purpose for added fiber)
- Optional: 1 tablespoon melted butter for brushing tops (dairy or plant-based)
Equipment Needed
- Large mixing bowl
- Measuring cups and spoons
- Whisk or fork
- Stand mixer with dough hook (optional, can also knead by hand)
- Kitchen towel or plastic wrap
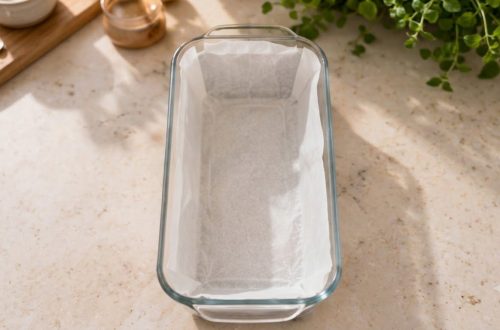
- 9×13 inch baking pan (or similar size)
- Small microwave-safe bowl (for melting butter)
- Pastry brush (optional, for egg wash or butter topping)
Step-by-Step Instructions
- Activate the Yeast: In a large mixing bowl, combine the warm milk and sugar. Sprinkle the active dry yeast over the top. Gently whisk and let it sit for 5-10 minutes until foamy. This indicates the yeast is active and ready to work.
- Combine Wet Ingredients: Once the yeast is foamy, add the melted and slightly cooled butter, salt, and lightly beaten egg to the yeast mixture. Whisk everything together until well combined.
- Add Flour: Gradually add the flour, one cup at a time, mixing with a wooden spoon or a stand mixer on low speed. Once the dough starts to come together, it will be shaggy.
- Knead the Dough: If using a stand mixer, attach the dough hook and knead on medium-low speed for 5-7 minutes until the dough is smooth, elastic, and pulls away from the sides of the bowl. If kneading by hand, turn the dough out onto a lightly floured surface and knead for 8-10 minutes until it becomes smooth and elastic. It should spring back slightly when poked.
- First Rise: Lightly grease a clean large bowl with a little oil. Place the dough in the bowl, turning it once to coat. Cover the bowl with a clean kitchen towel or plastic wrap and let it rise in a warm place for 1 to 1.5 hours, or until doubled in size. This can be in a slightly warm oven (turned off), near a sunny window, or just in a warm spot in your kitchen.
- Shape the Buns: Once doubled, gently punch down the dough to release the air. Turn it out onto a lightly floured surface. Divide the dough into 12 equal pieces. Roll each piece into a smooth ball.
- Second Rise: Arrange the dough balls in a lightly greased 9×13 inch baking pan, leaving a small space between each bun. Cover the pan again with a clean kitchen towel or plastic wrap and let the buns rise for another 30-45 minutes, or until they look puffy and nearly doubled in size.
- Preheat Oven & Bake: While the buns are on their second rise, preheat your oven to 375°F (190°C). Once the buns have risen, bake for 15-20 minutes, or until golden brown on top. The internal temperature should be around 200-210°F (93-99°C).
- Serve Warm: For extra shine and softness, you can brush the tops of the hot buns with melted butter immediately after taking them out of the oven. Let them cool slightly in the pan for a few minutes before serving warm. Enjoy your delicious homemade fluffy dinner buns!
Nutrition Highlights
These homemade fluffy dinner buns are a wonderful source of carbohydrates, providing essential energy for your body. They offer a satisfying texture and can be a great way to incorporate fiber if you opt for whole wheat flour or add seeds. By making them at home, you avoid processed ingredients and can control the amount of sugar and fat, making them a more wholesome choice than many store-bought alternatives. They contain protein from the milk and egg, contributing to a well-rounded meal.
Ingredient Benefits
- Milk: Adds richness, tenderness, and helps create a soft crumb in the bread. It also provides calcium and protein.
- Yeast: The magical ingredient that makes the buns rise and creates their light, airy texture.
- Sugar: Feeds the yeast, helping it activate, and adds a subtle sweetness and helps with browning of the crust.
- Salt: Enhances the flavor of the bread and controls the yeast activity, ensuring a balanced rise.
- Butter: Contributes to the tender texture and rich flavor of the buns, making them incredibly delicious.
- Egg: Adds richness, helps with browning, and contributes to the structure and tenderness of the dough.
- All-Purpose Flour: Provides the structure for the buns, allowing them to hold their shape while remaining soft.
Expert Tips
- Check Yeast Activity: Always ensure your yeast is active by letting it foam in warm milk and sugar. If it doesn’t foam, your yeast might be old, or your milk isn’t the right temperature, and you should start over.
- Warm Environment for Rising: A warm, draft-free spot is crucial for yeast dough to rise properly. A slightly warm (but turned off) oven or a sunny spot works wonders.
- Don’t Over-Knead or Under-Knead: Proper kneading is key for texture. The dough should be smooth and elastic. If using a stand mixer, follow the timing. If kneading by hand, feel for the elasticity.
- Measure Flour Correctly: Too much flour can make your buns dry and dense. Scoop flour into your measuring cup with a spoon and then level it off with a knife, rather than scooping directly from the bag.
- Evenly Sized Buns: For consistent baking, try to make your dough balls as uniform in size as possible. A kitchen scale can help with this.
- Brush for Golden Tops: Brushing the tops with a little melted butter or an egg wash (1 egg beaten with 1 tbsp water) before baking will give them a beautiful golden sheen.
- Cool Before Storing: Allow the buns to cool completely before storing to prevent them from becoming soggy.
Recipe Variations
- Whole Wheat Dinner Buns: Substitute 1 cup of all-purpose flour with whole wheat flour for added fiber and a nuttier flavor. You might need a little extra liquid as whole wheat flour absorbs more.
- Herb & Garlic Buns: Add 1-2 teaspoons of dried herbs (like Italian seasoning, rosemary, or thyme) and 1 teaspoon of garlic powder to the flour mixture for savory buns.
- Vegan/Dairy-Free Buns: Use non-dairy milk (like almond or soy milk), plant-based butter, and a flax egg (1 tbsp ground flaxseed + 3 tbsp water, let sit for 5 minutes) instead of a regular egg.
- Sweet Dinner Rolls: Increase sugar to ¼ cup and add ½ teaspoon of cinnamon for a subtly sweet roll perfect with butter and jam.
- Seed Topping: Before baking, sprinkle the tops of the risen buns with sesame seeds, poppy seeds, or everything bagel seasoning.
Storage Instructions
- Refrigerator Storage: Leftover dinner buns can be stored in an airtight container or a large zip-top bag at room temperature for up to 2-3 days. For slightly longer freshness, refrigerate for up to 5 days, though they may dry out a bit.
- Freezer Storage: For longer storage, allow the baked and cooled buns to freeze in a single layer on a baking sheet for about an hour until firm. Then, transfer them to a freezer-safe bag or airtight container. They will keep well for up to 2-3 months.
- Reheating: To reheat, thaw frozen buns at room temperature, then warm them in a preheated oven at 350°F (175°C) for 5-10 minutes, or microwave briefly until warm and soft.
- Best Storage Containers: Use airtight containers, large freezer bags, or bread bags to keep them fresh and prevent them from drying out.
Frequently Asked Questions
Can I make these dinner buns ahead of time?
Yes, absolutely! You can prepare the dough up to the first rise, then punch it down, shape the buns, and refrigerate them overnight. Let them come to room temperature for about 30-60 minutes and complete their second rise before baking as usual.
Can I freeze the dough before baking?
You can freeze the shaped dough balls before the second rise. Place them on a baking sheet and freeze until solid, then transfer to a freezer-safe bag. When ready to bake, thaw them overnight in the refrigerator, then let them rise at room temperature until puffy before baking.
What kind of flour works best for these buns?
All-purpose flour is recommended for the fluffiest results. However, you can substitute up to half of the all-purpose flour with whole wheat flour for a healthier, more fibrous bun, keeping in mind the texture will be slightly denser.
Why didn’t my dough rise?
The most common reasons are inactive yeast (check the expiration date!), milk that was too hot (which kills the yeast) or too cold (which won’t activate it), or a cold environment for rising. Ensure your warm milk is between 105-115°F (40-46°C).
Can children help make this recipe?
Yes! This recipe is wonderful for involving children. They can help with measuring ingredients, mixing (especially if using a stand mixer), and shaping the dough balls, which is a fun and tactile experience.
Can I use honey instead of sugar?
Yes, you can substitute the granulated sugar with an equal amount of honey or maple syrup. Keep in mind that liquid sweeteners might slightly affect the dough consistency, but it generally works well.
How do I know when the buns are fully baked?
The buns should be golden brown on top and sound hollow when tapped on the bottom. For precision, an instant-read thermometer inserted into the center of a bun should read between 200-210°F (93-99°C).
Conclusion
There’s truly nothing quite like the smell and taste of freshly baked bread, and these easy fluffy dinner buns deliver on all fronts! They’re the perfect canvas for your favorite spreads, a delicious accompaniment to any meal, and a fantastic way to bring the warmth of homemade goodness into your kitchen. Whether you’re a seasoned baker or just starting your journey, this recipe is designed to be a success, leaving you with tender, golden buns that will impress everyone. So grab your ingredients, preheat your oven, and get ready to enjoy the simple pleasure of baking your own incredible dinner rolls. Happy baking!