Have you ever noticed your toilet flushing weakly, or perhaps heard it running constantly, seemingly for no reason? These common issues don’t just affect performance; they can also lead to wasted water and higher utility bills. An efficient flush keeps things running smoothly and quietly, and often, the fix is simpler than you think.
This DIY guide will walk you through optimizing your toilet’s water level, a quick adjustment that can dramatically improve flush power, conserve water, and restore peace to your bathroom. It’s a practical step towards better home efficiency, without needing to call a plumber!
What You’ll Need
- Your hands
- A flathead or Phillips screwdriver (if your fill valve uses a screw for adjustment)
- A permanent marker (optional, for noting the original water level)
Why This DIY Can Be Useful
Your toilet’s water level in the tank directly influences its flushing power and water consumption. If the water level is too low, the flush might be weak and ineffective, requiring multiple flushes. If it’s too high, water can unnecessarily spill into the overflow tube, leading to a constantly running toilet and wasted water.
Adjusting the water level ensures that the right amount of water is used for each flush, maximizing efficiency. This can help save water, reduce your water bill, and prevent those annoying phantom flushes or constant running noises, contributing to a more sustainable and peaceful home.
How to Make It (Adjust Your Toilet Water Level)
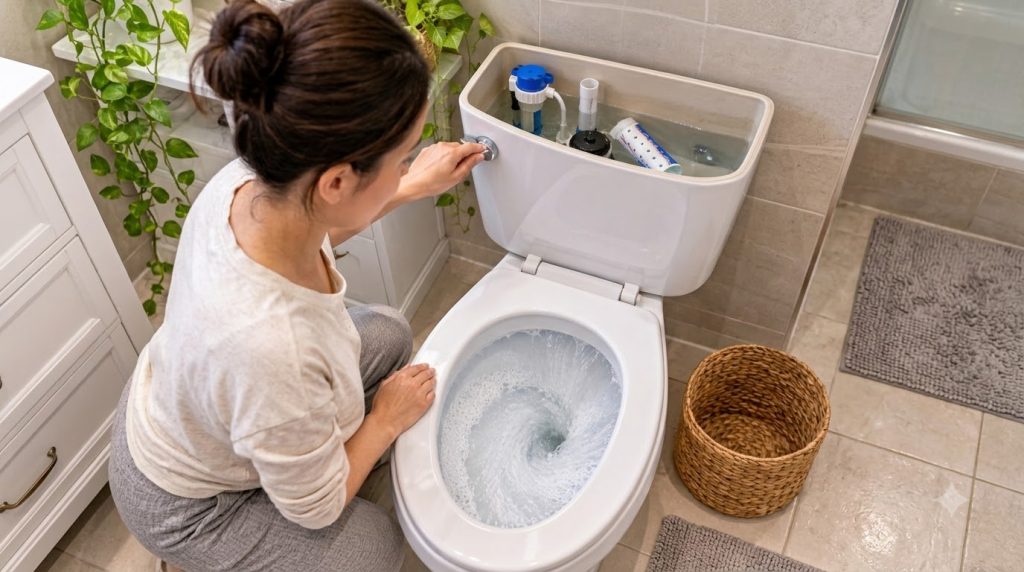
- Remove the Tank Lid: Carefully lift the lid off your toilet tank and set it aside in a safe place.
- Identify the Fill Valve and Float Mechanism: Inside the tank, you’ll see a vertical pipe (the fill valve) and usually a floating component. This float rises with the water level and tells the fill valve when to stop filling. There are typically two main types of floats: an old-style ballcock float on an arm, or a newer cup-style float that slides up and down the fill valve shaft.
- Locate the Adjustment Point:
- For a ballcock float: Look for a screw on the top of the fill valve or a metal rod connecting to the float arm. Turning the screw or bending the rod will adjust the float’s height.
- For a cup-style float: There will be an adjustment clip or screw on the side of the fill valve shaft. Squeeze the clip or turn the screw to allow the float cup to move up or down.
- Adjust the Water Level:
- To lower the water level: For a ballcock, turn the screw counter-clockwise or gently bend the float arm down. For a cup-style, push the float cup down the shaft.
- To raise the water level: For a ballcock, turn the screw clockwise or gently bend the float arm up. For a cup-style, pull the float cup up the shaft.
Aim for the water level to be about 1 inch below the top of the overflow tube (the central standpipe in the tank), or at the waterline marked inside the tank by the manufacturer.
- Test and Re-Adjust: Flush the toilet to see the new fill level. If it’s still not right, repeat the adjustment process until you achieve the desired water level.
- Replace the Tank Lid: Once satisfied, carefully place the tank lid back on.
How to Use It
Once adjusted, your toilet is ready for regular use. Each flush should now be more efficient, using the optimal amount of water to clear the bowl effectively. You’ll notice a stronger flush and, hopefully, less wasted water. If you previously had issues with a constantly running toilet due to an overflowing tank, this adjustment should resolve it.
What to Expect
You can expect a noticeable improvement in your toilet’s flushing performance. Flushes should be more powerful and complete, often requiring only a single flush. Furthermore, by preventing unnecessary water overflow, you’ll see a reduction in water waste, which can lead to savings on your water bill. Your bathroom might also become quieter if the constant running noise was a previous issue.
Helpful Tips
- Mark Your Original Level: Before making any adjustments, use a permanent marker to draw a line on the inside of the tank at the current water level. This way, you can easily revert to the original setting if needed.
- Check for Leaks: Even with the correct water level, your toilet could still be running due to a leak. To check for a silent leak, add a few drops of food coloring to the tank water. Do not flush. Wait 15-30 minutes. If color appears in the toilet bowl, you have a leak, likely from a faulty flapper.
- Clean Rim Jets: For an even better flush, occasionally clean the small holes under your toilet’s rim (the rim jets). Mineral buildup can restrict water flow, weakening the flush. Use a small wire or a stiff brush to clear them.
- Don’t Over-Adjust: Small adjustments can make a big difference. Make incremental changes and test after each adjustment.
Important Notes / Safety
- Always be gentle when adjusting toilet components to avoid damage. Plastic parts can be brittle.
- If you’re ever unsure about a component or hear unusual noises after an adjustment, it’s best to turn off the water supply to the toilet (using the shut-off valve at the wall behind the toilet) and consult a professional plumber.
- Do not force any parts into position, as this could break them and cause a larger leak or malfunction.