Hello, Beauty Besties!
Are you dreaming of that radiant, clear skin but finding your current routine a little… lacking? Or maybe you’re looking for effective, affordable ways to pamper your skin right at home? Well, you’ve come to the right place! Today, we’re diving into a beautiful blend of science-backed skincare and age-old natural remedies to create a DIY healing ointment that your skin will absolutely adore.
Imagine combining the powerful skin-barrier-repairing qualities of CeraVe Healing Ointment with the incredible brightening and anti-inflammatory benefits of turmeric. Sounds like a dream, right? And we’re adding a little extra magic with Vitamin E oil! This homemade concoction is designed to soothe, heal, and bring out your skin’s natural glow, addressing everything from dry patches to dullness and even dark spots.
Let’s get ready to nourish your skin with nature’s best and unlock a healthier, more vibrant complexion!
Why CeraVe Healing Ointment? Your Skin’s Best Friend
Before we add our natural stars, let’s talk about CeraVe Healing Ointment. If you haven’t already discovered its wonders, it’s time! This ointment is a skincare superstar for a reason. It’s packed with ceramides, which are essential lipids found naturally in your skin that help restore and maintain your skin’s protective barrier. This means it locks in moisture, prevents dryness, and helps protect your skin from environmental irritants.
- Intense Hydration: Perfect for dry, chapped, or irritated skin.
- Barrier Repair: Helps strengthen your skin’s natural defense.
- Non-Comedogenic: It won’t clog your pores, making it suitable for most skin types.
- Gentle Formula: Free of fragrance and parabens, minimizing irritation.
The Golden Glow: The Power of Turmeric for Your Skin
Now, let’s welcome turmeric – the golden spice that’s been a staple in beauty rituals for centuries! Beyond its culinary uses, turmeric is a powerhouse for skin health, thanks to its active compound, curcumin.
- Anti-Inflammatory Hero: Soothes irritated skin, reduces redness, and calms conditions like acne and eczema.
- Brightening Booster: Helps to reduce the appearance of dark spots, hyperpigmentation, and gives your skin a lovely, natural glow.
- Antioxidant Rich: Fights off free radicals, protecting your skin from environmental damage and premature aging.
- Acne Fighter: Its antiseptic and antibacterial properties can help keep breakouts at bay.
The Magic Touch: Vitamin E Oil for Enhanced Healing
To further boost our healing ointment, we’re adding a few drops of Vitamin E oil. This beloved vitamin is renowned for its skin-loving properties:
- Deep Moisturization: Provides intense hydration, making your skin feel soft and supple.
- Antioxidant Support: Just like turmeric, Vitamin E is a powerful antioxidant that helps protect skin cells from damage.
- Scar Reduction: Often used to help minimize the appearance of scars and promote skin healing.
Your DIY CeraVe & Turmeric Healing Ointment Recipe
Ready to whip up your own batch of skin-loving goodness? Here’s how!
What You’ll Need:
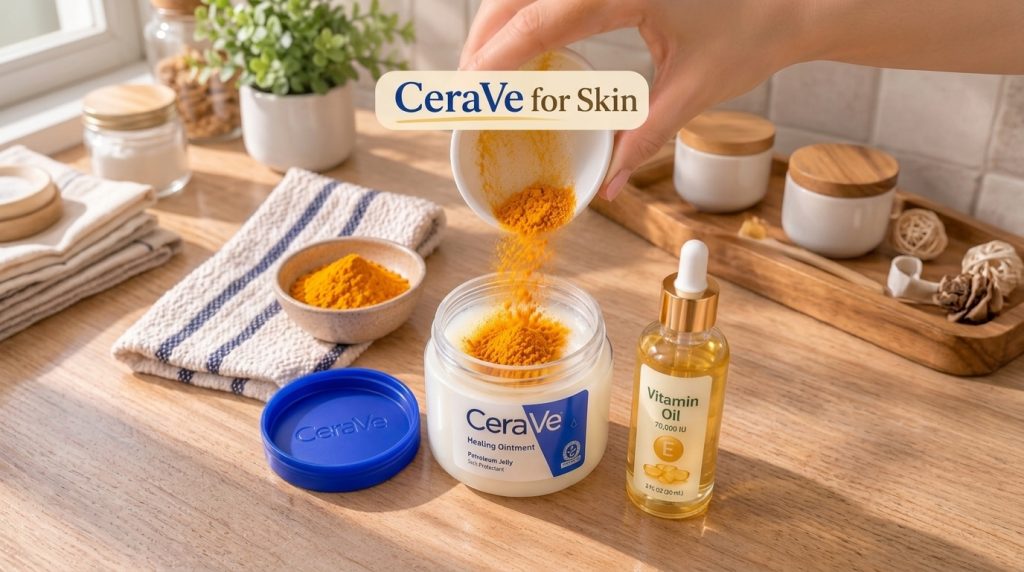
- 2 tablespoons of CeraVe Healing Ointment
- ½ teaspoon of organic turmeric powder (make sure it’s pure, food-grade)
- 3-5 drops of pure Vitamin E oil
- A small, clean, airtight container (like a small glass jar)
- A small, clean mixing spoon or spatula
Step-by-Step Instructions:
- Prepare Your Space: Make sure your hands, mixing tools, and container are thoroughly clean and dry to prevent contamination.
- Scoop the Ointment: Carefully scoop 2 tablespoons of CeraVe Healing Ointment into your clean container.
- Add Turmeric: Add ½ teaspoon of turmeric powder to the CeraVe ointment.
- Add Vitamin E: Drip 3-5 drops of Vitamin E oil into the mixture.
- Mix Thoroughly: Using your spoon or spatula, mix all the ingredients together very well until the turmeric is evenly distributed and you have a smooth, consistent golden-yellow ointment. This might take a few minutes!
- Store It: Once mixed, secure the lid on your container.
How to Use Your Healing Ointment
Now that you have your homemade golden balm, here’s how to incorporate it into your routine for maximum benefits:
- Cleanse First: Always apply to clean, dry skin.
- Nighttime Treat: For best results, use it as an overnight treatment. Apply a thin layer to any areas needing extra love – dry patches, dark spots, or areas prone to irritation.
- Targeted Application: You can use it as a spot treatment for breakouts or hyperpigmentation, or as a general nourishing balm for your face, hands, elbows, or anywhere your skin feels rough or dull.
- Gentle Massage: Gently massage the ointment into your skin until absorbed. Be mindful that turmeric can temporarily stain if you use too much, so a thin layer is key!
Important Tips for DIY Skincare
- Patch Test Always: Before applying to your entire face or a large area, do a patch test on a small, inconspicuous part of your skin (like behind your ear or on your inner arm) to check for any allergic reactions or sensitivities.
- Storage: Store your DIY ointment in a cool, dry place away from direct sunlight. It should last as long as the CeraVe ointment’s expiry date, but it’s best to use it within 1-2 months for optimal freshness.
- Consistency is Key: Like any skincare routine, regular use will yield the best results. Stick with it and observe how your skin transforms!
- Staining: Turmeric can stain fabric, so be careful when applying and consider using an old pillowcase if using overnight on your face.
Embrace Your Natural Glow!
There you have it, beauties! A simple, powerful DIY healing ointment that harnesses the best of both worlds: effective pharmaceutical ingredients and nature’s finest. This CeraVe and turmeric blend is your secret weapon for glowing, healthy, and happy skin. Give it a try and watch your complexion transform!
Do you have any favorite DIY skincare hacks? Share them in the comments below! We’d love to hear your thoughts and experiences.