Sweeten Your Day with These 6 Truffle Recipes!
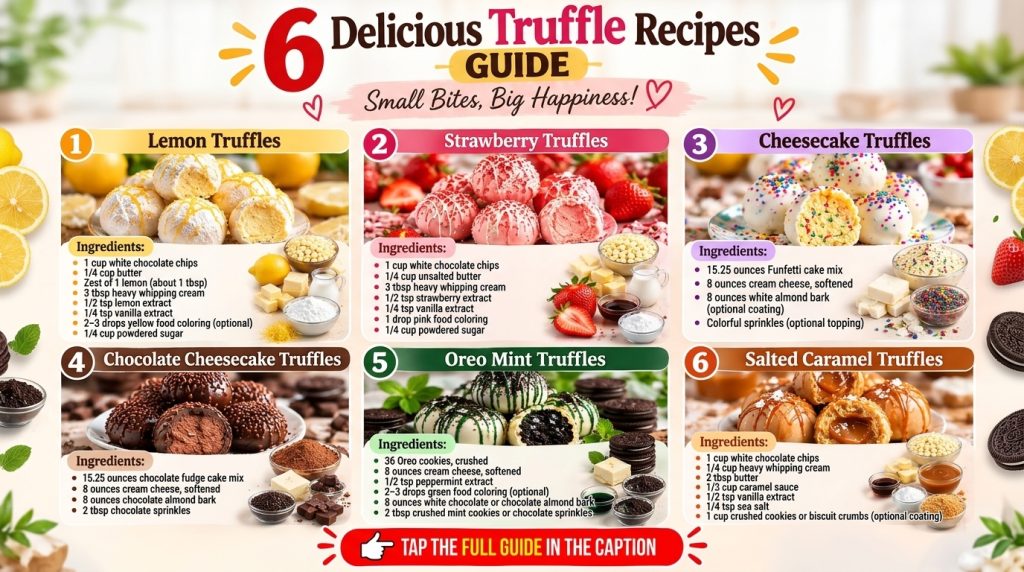
Truffles are tiny bites of heaven, and with these 6 truffle recipes, you’re in for a serious treat! Whether you’re planning a party, looking for a thoughtful homemade gift, or simply craving a sweet indulgence, these versatile confections are always a delightful choice. From bright and zesty lemon to rich, decadent chocolate cheesecake, and playful Oreo mint, there’s a flavor here to satisfy every palate.
These bite-sized wonders are known for their rich texture, intense flavor, and elegant appearance, making them feel incredibly special without requiring advanced culinary skills. Each of these homemade truffles is designed to be easy to make, yet impressive enough to wow your friends and family. Get ready to dive into the world of delicious possibilities and discover your new favorite sweet treat!
Why You’ll Love These 6 Truffle Recipes
- Incredibly Easy to Make: Many of these recipes are no-bake, requiring minimal cooking and simple steps.
- Customizable Flavors: You get six distinct flavor profiles, offering something for everyone.
- Perfect for Parties: Truffles are ideal bite-sized desserts for entertaining, potlucks, or holiday gatherings.
- Great for Gifting: Homemade truffles make thoughtful and delicious presents for friends and loved ones.
- Kid-Friendly Fun: Rolling and decorating truffles can be a fun activity for all ages.
- Make-Ahead Friendly: Most truffles can be prepared in advance, saving you time on the day of your event.
Ingredients
For the Basic Truffle Base (Applies to most flavors)
- 8 oz (226g) cream cheese, softened
- 1/2 cup (113g) unsalted butter, softened
- 1 tsp (5ml) vanilla extract
- 2 cups (240g) powdered sugar (confectioners’ sugar), sifted, plus more for dusting
- 12 oz (340g) vanilla wafers, graham crackers, or Oreo cookies, finely crushed
Flavor-Specific Additions and Coatings
Lemon Truffles
- Additions: 1 tbsp (15ml) fresh lemon juice, 2 tsp lemon zest
- Coating: 8 oz (226g) white chocolate, chopped; extra lemon zest for garnish
Strawberry Truffles
- Additions: 1/4 cup (25g) freeze-dried strawberries, finely crushed; 1-2 drops red or pink food coloring (optional)
- Coating: 8 oz (226g) white chocolate, chopped; pink sprinkles or more crushed freeze-dried strawberries for garnish
Cheesecake Truffles
- Additions: 1/2 cup (50g) graham cracker crumbs (from base ingredients)
- Coating: 8 oz (226g) white chocolate, chopped; extra graham cracker crumbs for garnish
Chocolate Cheesecake Truffles
- Additions: 1/4 cup (22g) unsweetened cocoa powder; 12 oz (340g) chocolate graham crackers or Oreo cookies, finely crushed (instead of vanilla wafers)
- Coating: 8 oz (226g) dark chocolate, chopped; chocolate sprinkles or cocoa powder for garnish
Oreo Mint Truffles
- Additions: 12 oz (340g) Oreo cookies, finely crushed (instead of vanilla wafers); 1/2 tsp mint extract; 1-2 drops green food coloring (optional)
- Coating: 8 oz (226g) dark or semi-sweet chocolate, chopped; green sprinkles or crushed mint Oreos for garnish
Salted Caramel Truffles
- Additions: 1/4 cup (60ml) caramel sauce (plus more for drizzle)
- Coating: 8 oz (226g) milk or dark chocolate, chopped; flaky sea salt and caramel drizzle for garnish
Ingredient Notes
- Cream Cheese: Ensure it’s fully softened to room temperature for a smooth, lump-free mixture.
- Butter: Like cream cheese, softened butter is key for proper blending.
- Powdered Sugar: Sifting helps prevent lumps and ensures a silky smooth truffle base.
- Crushed Cookies/Crackers: Fine crumbs are best for a consistent texture. A food processor works wonders for this.
- Chocolate for Coating: Good quality chocolate chips or baking bars will melt more smoothly. White chocolate can be trickier; melt it gently.
- Freeze-Dried Strawberries: These provide intense strawberry flavor without adding excess moisture, which can make truffles soft.
Equipment You’ll Need
- Large mixing bowl
- Electric mixer (handheld or stand mixer)
- Food processor (optional, for crushing cookies)
- Rubber spatula
- Baking sheets
- Parchment paper or silicone baking mats
- Small cookie scoop or spoon
- Microwave-safe bowls or a double boiler (for melting chocolate)
- Fork or dipping tools (for coating truffles)
How to Make 6 Truffle Recipes
The general process for making these truffles is quite similar, focusing on creating a rich, flavorful base, chilling, rolling, and then coating. Here’s a step-by-step guide for making your assorted truffle masterpieces:
-
Prepare the Base Mixture:
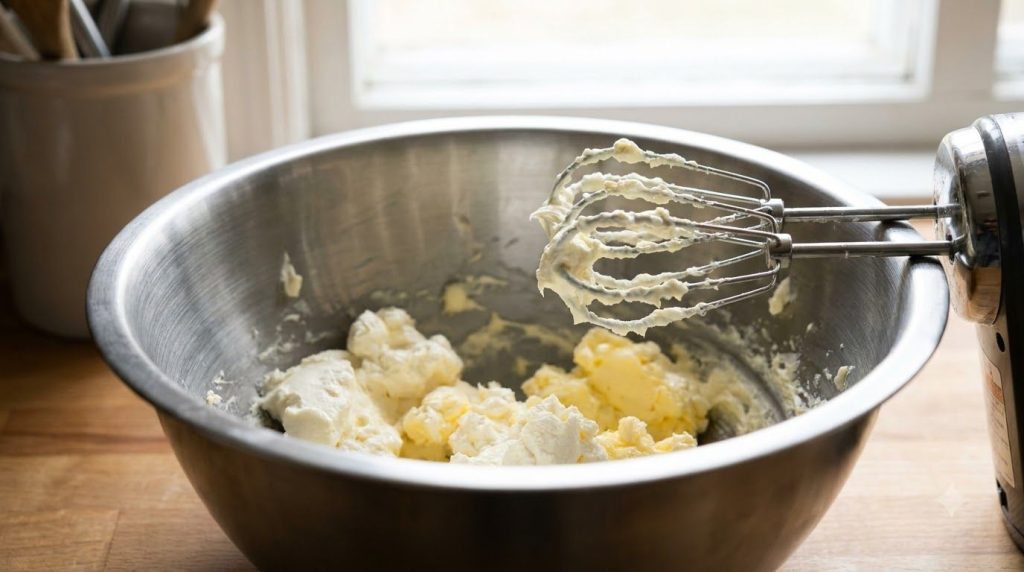
- In a large mixing bowl, beat the softened cream cheese and softened butter with an electric mixer until smooth and creamy, about 2-3 minutes.
- Add the vanilla extract and sifted powdered sugar. Beat on low speed until combined, then increase to medium and beat until light and fluffy.
-
Incorporate Flavor Additions:
- Divide the cream cheese mixture into separate bowls, one for each flavor you plan to make.
- For each flavor, add the specific additions (e.g., lemon juice and zest, crushed freeze-dried strawberries, cocoa powder, mint extract, caramel sauce) and the corresponding crushed cookies/crackers as listed in the “Flavor-Specific Additions” section above.
- Mix gently with a spatula or on low speed until just combined. Be careful not to overmix.
-
Chill the Truffle Mixture:
- Cover each bowl of truffle mixture with plastic wrap and refrigerate for at least 2-4 hours, or until firm enough to roll. This step is crucial for truffles that hold their shape.
-
Roll the Truffles:
- Line baking sheets with parchment paper or silicone baking mats.
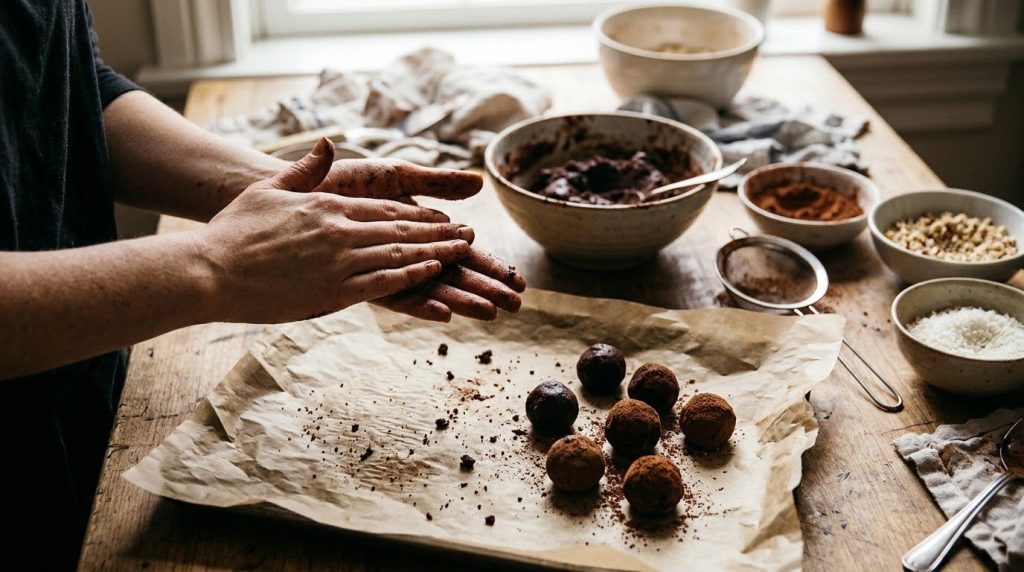
- Using a small cookie scoop or a spoon, portion out the chilled truffle mixture. Roll each portion between your palms into smooth, bite-sized balls, about 1 inch (2.5 cm) in diameter.
- Place the rolled truffles on the prepared baking sheets. Return them to the refrigerator for another 15-30 minutes to firm up slightly before coating.
-
Melt the Chocolate Coating:
- In separate microwave-safe bowls (or using a double boiler), melt the chocolate for each truffle flavor according to package directions. Stir until completely smooth. If adding food coloring (for strawberry or Oreo mint), mix it in now.
-
Coat and Decorate:
- Using a fork or a dipping tool, dip one chilled truffle at a time into the melted chocolate. Tap gently against the side of the bowl to remove excess chocolate.
- Carefully place the coated truffle back onto the parchment-lined baking sheet. Immediately decorate with any specified garnishes (e.g., lemon zest, sprinkles, sea salt, extra graham cracker crumbs) before the chocolate sets.
- Repeat with the remaining truffles and coatings.
-
Final Chill and Serve:
- Once all truffles are coated and decorated, return the baking sheets to the refrigerator for at least 30 minutes, or until the chocolate coating is completely set.
- Serve chilled and enjoy your homemade assortment of delicious truffles!
Pro Tips for the Best Results
- Proper Chilling is Key: Don’t rush the chilling steps! Firm truffle mixture is easier to roll and coat, preventing a messy outcome.
- Uniform Sizes: Use a small cookie scoop to ensure all your truffles are roughly the same size for even coating and a professional look.
- Work in Batches: Keep the truffles you’re not actively coating in the refrigerator so they stay firm.
- Melt Chocolate Gently: Overheated chocolate can seize or become thick. Melt slowly in 30-second intervals in the microwave, stirring well after each, or use a double boiler.
- Thin Your Chocolate (If Needed): If your melted chocolate is too thick for dipping, you can add a tiny bit (1/2 tsp at a time) of coconut oil or vegetable shortening to thin it out.
- Use Dipping Tools: A candy dipping tool or even a regular fork can make coating much easier and less messy.
- Decorate Immediately: Sprinkles, zest, or crumbs won’t stick if the chocolate has already set. Have your garnishes ready!
Common Mistakes to Avoid
- Not Softening Ingredients: Hard cream cheese and butter will lead to a lumpy, uneven truffle base.
- Not Chilling Enough: Trying to roll or coat warm truffle mixture is a recipe for a sticky, frustrating mess.
- Overmixing the Base: Once you add the dry ingredients, mix just until combined to maintain a good texture.
- Overheating Chocolate: This can make the chocolate seize, creating a thick, unusable coating. Melt slowly and gently.
- Too Much Liquid Additions: Be cautious with liquid flavorings (like extracts or juices) as they can make the mixture too soft. Stick to the recommended amounts.
Variations & Substitutions
- Different Coatings: Beyond chocolate, consider coating truffles in powdered sugar, cocoa powder, finely chopped nuts, or shredded coconut.
- Cake Pop Truffles: Instead of crushed cookies, use crumbled leftover cake for a different texture.
- Nut Butter Swirl: Add a tablespoon of peanut butter, almond butter, or Biscoff spread to your base mixture for a nutty twist.
- Coffee Lovers: Mix in a teaspoon of instant espresso powder to the chocolate truffle base for a mocha flavor.
- Spice It Up: A pinch of cinnamon, nutmeg, or even a tiny amount of cayenne pepper can add an unexpected depth of flavor to chocolate truffles.
- Gluten-Free: Simply use gluten-free vanilla wafers, graham crackers, or sandwich cookies.
Serving Suggestions
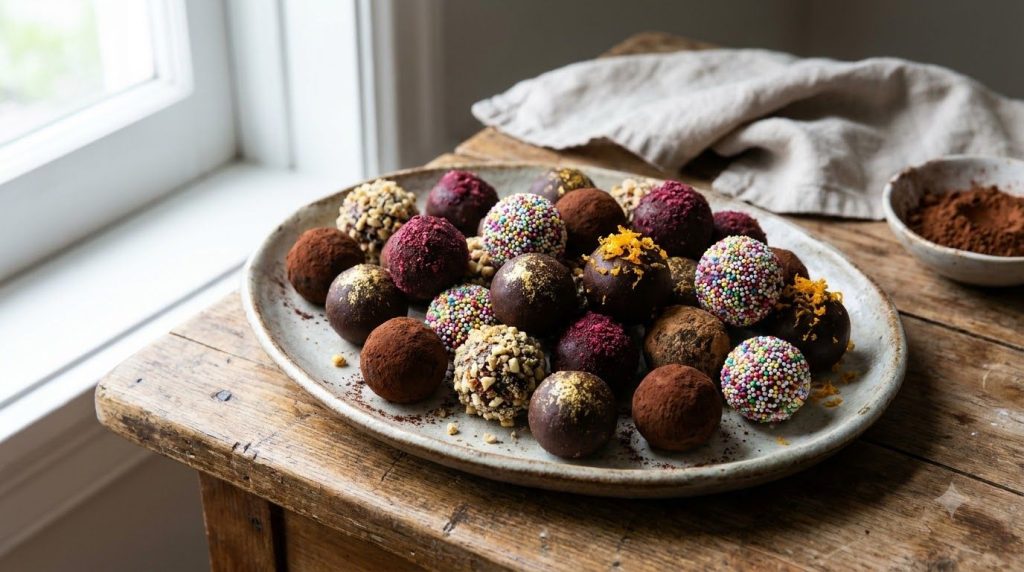
These assorted truffles are perfect for any occasion! Arrange them on a beautiful dessert platter for parties or holiday gatherings. They pair wonderfully with a hot cup of coffee, espresso, or a glass of dessert wine. For a thoughtful gift, package a selection of different flavors in small boxes or cellophane bags tied with a ribbon. They are also a fantastic addition to a dessert buffet, allowing guests to choose their favorite sweet bite.
Storage & Reheating
- Refrigerator Storage: Store homemade truffles in an airtight container in the refrigerator for up to 1 week. Separate layers with parchment paper to prevent sticking.
- Freezer Suitability: Truffles freeze beautifully! Place coated truffles in a single layer on a parchment-lined baking sheet and freeze until solid. Once frozen, transfer them to a freezer-safe airtight container or freezer bag, again separating layers with parchment paper. They can be stored in the freezer for up to 1 month.
- Reheating Method: Thaw frozen truffles in the refrigerator overnight or at room temperature for about 30 minutes before serving. No reheating is necessary. Enjoy them chilled or at room temperature for a slightly softer texture.
FAQ
Can I make these truffles ahead of time?
Absolutely! Truffles are excellent make-ahead desserts. You can prepare them up to a week in advance and store them in the refrigerator, or freeze them for up to a month.
Why did my truffle mixture turn out too soft?
This usually happens if your cream cheese and butter weren’t properly chilled before mixing, or if you added too much liquid. Ensure ingredients are cold before starting and chill the mixture thoroughly. If it’s still too soft, you can try adding a bit more finely crushed cookies or powdered sugar, but do so gradually.
Can I use different types of chocolate for the coating?
Yes, you can use dark, milk, semi-sweet, or white chocolate for coating. Just be mindful that white chocolate can be a bit more temperamental when melting.
How do I prevent the chocolate coating from cracking?
Ensure your truffles are thoroughly chilled but not frozen solid before dipping. Also, make sure your melted chocolate isn’t too hot, as extreme temperature differences can cause cracking.
Can I add alcohol to these truffles?
Yes, for an adult twist, you can replace a small amount (1-2 tablespoons) of the vanilla extract with a liqueur like Kahlua, Bailey’s, rum, or Grand Marnier, depending on the truffle flavor.
What can I do if my chocolate seizes while melting?
If your chocolate becomes thick and clumpy, it means it has seized, usually due to overheating or contact with a tiny bit of water. Sometimes you can rescue it by stirring in a teaspoon of vegetable oil or shortening at a time until it loosens up, but it might not be as smooth as intended.
Recipe Card
6 Irresistible Assorted Truffle Recipes
These easy-to-make truffles offer a delightful array of flavors, perfect for sharing or savoring yourself. With a creamy base and endless possibilities for customization, you’ll love making these bite-sized sweet treats!
- Prep Time: 45 minutes
- Cook Time: 5 minutes
- Chilling Time: 2-4 hours (plus 30 minutes for rolling/setting)
- Total Time: 3-5 hours
- Servings: Approximately 20-24 truffles per flavor variation (120-144 total)
- Course: Dessert
- Cuisine: American
- Cooking Method: No-Bake, Chilling
Ingredients:
Basic Truffle Base:
- 8 oz (226g) cream cheese, softened
- 1/2 cup (113g) unsalted butter, softened
- 1 tsp (5ml) vanilla extract
- 2 cups (240g) powdered sugar, sifted
- 12 oz (340g) finely crushed cookies/crackers (vanilla wafers, graham crackers, or Oreos, depending on flavor)
Flavor-Specific Additions & Coatings:
- Lemon: 1 tbsp lemon juice, 2 tsp lemon zest; 8 oz white chocolate; extra zest.
- Strawberry: 1/4 cup crushed freeze-dried strawberries; 8 oz white chocolate; pink sprinkles.
- Cheesecake: 1/2 cup graham cracker crumbs; 8 oz white chocolate; extra crumbs.
- Chocolate Cheesecake: 1/4 cup cocoa powder; 12 oz chocolate graham crackers; 8 oz dark chocolate; chocolate sprinkles.
- Oreo Mint: 12 oz Oreo cookies, 1/2 tsp mint extract; 8 oz dark/semi-sweet chocolate; green sprinkles.
- Salted Caramel: 1/4 cup caramel sauce; 8 oz milk/dark chocolate; flaky sea salt, caramel drizzle.
Instructions:
- Make the Base: In a large bowl, beat softened cream cheese and butter until creamy. Add vanilla and powdered sugar; beat until fluffy.
- Flavor Each Batch: Divide the base. For each flavor, mix in its specific additions and crushed cookies/crackers. Mix until just combined.
- Chill: Cover and refrigerate each mixture for 2-4 hours, or until firm.
- Roll: Line baking sheets. Scoop and roll chilled mixture into 1-inch balls. Place on sheets and chill for another 15-30 minutes.
- Melt Chocolate: Gently melt chocolate coatings separately.
- Coat & Decorate: Dip truffles into melted chocolate, removing excess. Immediately garnish with corresponding toppings.
- Set: Return truffles to the refrigerator for 30 minutes or until chocolate is fully set.
- Serve: Enjoy chilled!
Notes:
Ensure all ingredients, especially cream cheese and butter, are at room temperature for a smooth base. Chill mixtures thoroughly before rolling and coating to prevent stickiness. Use good quality chocolate for the best coating results.
Storage:
Store in an airtight container in the refrigerator for up to 1 week. Can be frozen for up to 1 month.
Nutrition:
Nutrition information is an estimate and may vary significantly depending on the ingredients and brands used. Each truffle (approx. 20-24 per flavor) may contain between 100-150 calories, 8-12g fat, 10-15g carbohydrates, and 1-2g protein.